
You can automate tweets using X's native scheduler (free, desktop only), third-party tools like PostPlanify or Buffer ($6/channel and up), RSS-to-tweet services, or automation platforms like Zapier. The best method depends on your posting frequency, budget, and whether you need features like AI captions, thread scheduling, or multi-platform posting.
Automating tweets saves 5-10 hours per week by eliminating manual posting, helping you maintain consistent presence, and allowing you to post during optimal times even when you're offline.
This complete guide covers:
- 5 ways to automate tweets (free and paid options)
- Best tweet automation tools compared (features, pricing, pros/cons)
- Step-by-step tutorials for each method
- Automation best practices to avoid looking robotic
- Common mistakes that hurt engagement
Quick comparison:
| Method | Cost | Best For | Automation Level |
|---|---|---|---|
| X Native Scheduler | Free | 1-2 tweets/day, one account | Basic (manual scheduling) |
| PostPlanify | $79/mo yearly / $99/mo monthly and up | Daily posters, multi-platform | High (AI + bulk scheduling) |
| Buffer/Hootsuite | $6-249/mo | Teams, analytics needs | Medium-High |
| RSS-to-Tweet | Free-$11/mo | Blog auto-sharing | Fully automated |
| Zapier/IFTTT | Free-$20+/mo | Complex workflows | Custom automation |
Let's start with the simplest free option, then explore advanced automation methods.
Why Automate Tweets? (5 Key Benefits)
Tweet automation isn't about being lazy—it's about being strategic. Here's what changes when you automate your Twitter posting:
1. Post During Peak Times (Even When Sleeping)
The best engagement windows on X are:
- Wednesday 9 AM EST (peak of the week)
- Tuesday 8-10 AM EST
- Weekday lunch hours (12-1 PM)
Problem: Your best time might be 6 AM EST, but you're not awake.
Solution: Automate tweets to publish during high-traffic windows regardless of your schedule.
Result: 2-3x more impressions than random posting times.
2. Maintain Consistency Without Burnout
X's algorithm rewards accounts that post 3-5 times daily. Manually posting that often is exhausting.
Data: Accounts posting 3+ times daily see 40% higher follower growth (Buffer, 2024).
Automation solution: Batch-create 15-20 tweets on Sunday, queue them, stay consistent all week.
All your social media in one simple dashboard
Schedule posts, track analytics, and reply to comments/DMs — without switching tabs.

Engagement
+18%
Views
52.8k
3. Save 5-10 Hours Per Week
Time breakdown without automation:
- Finding content ideas: 30 min/day
- Creating graphics: 20 min/day
- Writing captions: 15 min/day
- Manually posting: 5 min/day
- Total: 70 min/day = 8+ hours/week
With automation:
- Batch creation: 2 hours/week
- Scheduling: 30 min/week
- Total: 2.5 hours/week
Savings: 5.5 hours/week = 286 hours/year
4. Test and Optimize Posting Times
When you automate, you can easily A/B test:
- Monday 9 AM vs. Monday 6 PM
- Video posts vs. image posts
- Different hashtag strategies
Manual posting: Too inconsistent to gather reliable data
Automated posting: Clean experiments with measurable results
5. Focus on Engagement, Not Publishing
The irony: Spending all day posting means zero time for:
- Replying to comments
- Joining conversations
- Building relationships
- Creating strategy
Automation frees you to do the high-value work that actually grows your account.
When NOT to Automate
Don't automate:
- ❌ Breaking news commentary (needs real-time context)
- ❌ Customer service responses (needs human touch)
- ❌ Trending topic participation (timing is everything)
- ❌ Crisis management (requires immediate judgment)
DO automate:
- ✅ Educational content
- ✅ Blog post promotions
- ✅ Product updates
- ✅ Evergreen tips
- ✅ Scheduled announcements
Best practice: 70% automated evergreen content + 30% real-time engagement.
Now let's explore the 5 methods to actually automate your tweets.
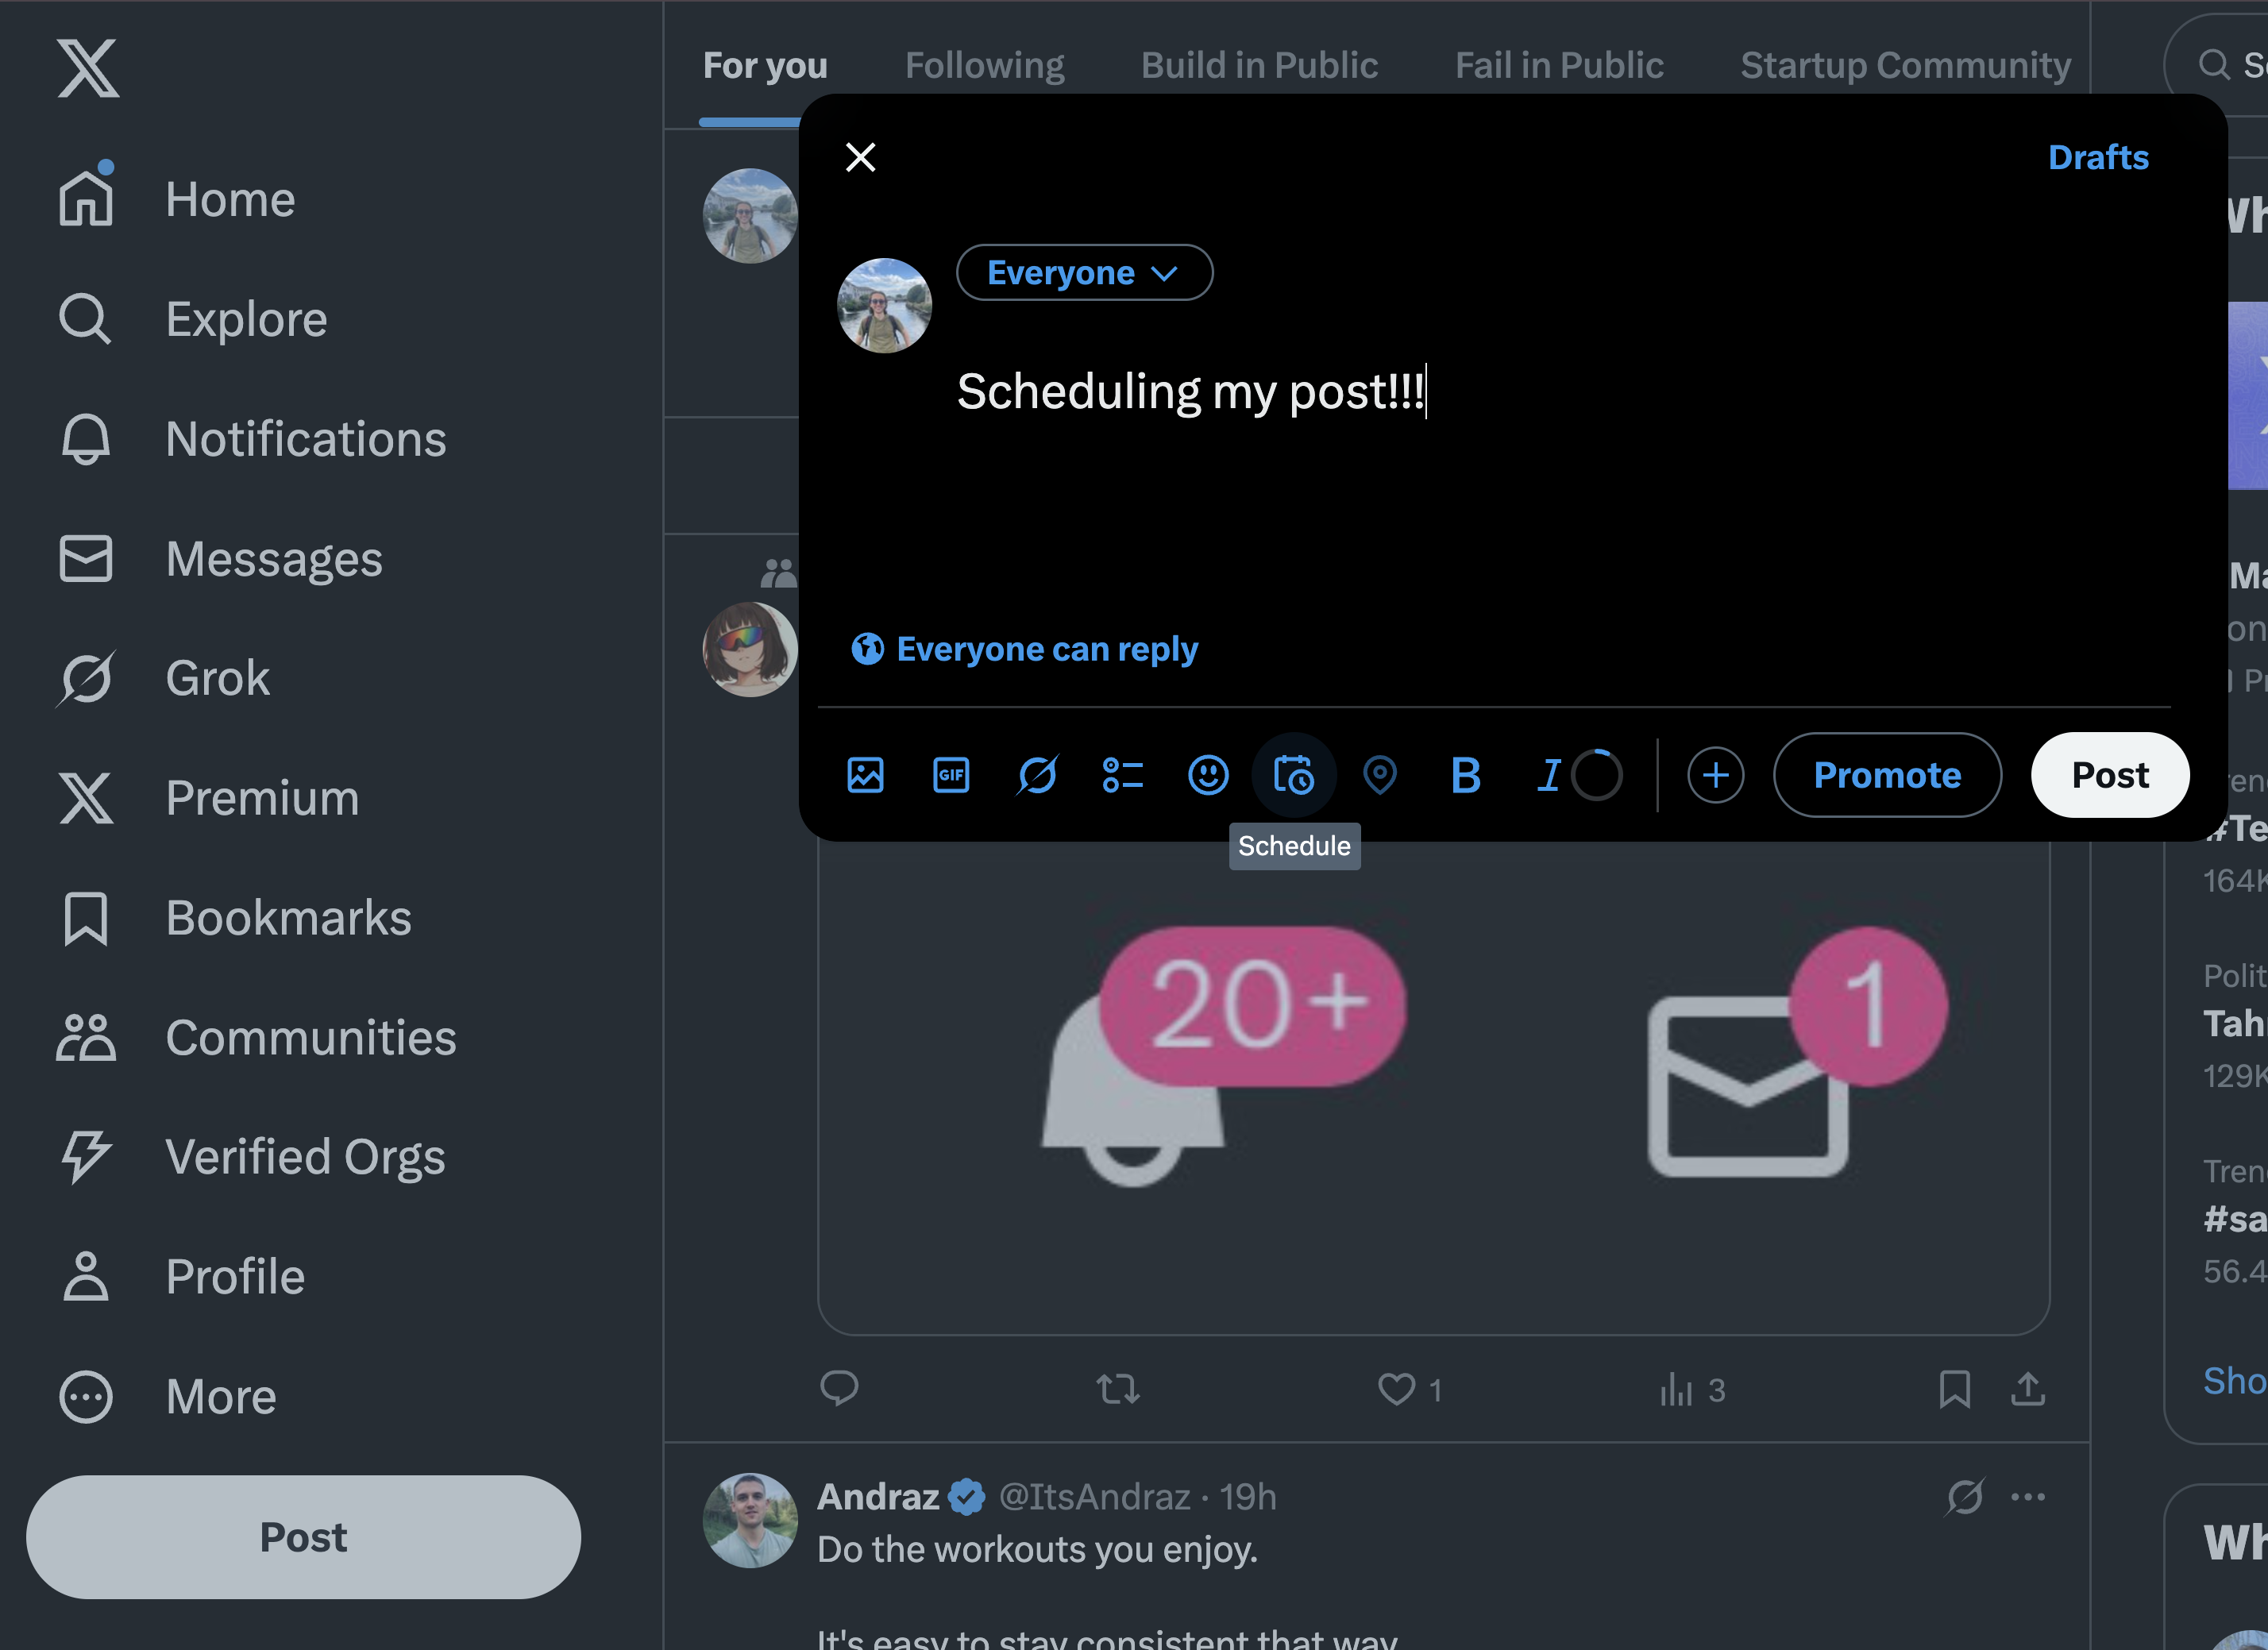
Method 1: X's Native Tweet Scheduler (Free)
Best for: Casual users posting 1-2 times daily, single account, $0 budget
X has a built-in scheduler that's completely free but limited to basic scheduling.
How to Use X's Native Scheduler
Requirements:
- Desktop browser (no mobile support)
- Any X account (free or Premium)
Step-by-step:
- Open X.com on desktop
- Click "What's happening?" to open composer
- Write your tweet (up to 280 characters)
- Add media (optional): Up to 4 images, 1 GIF, or 1 video
- Click calendar icon at bottom of composer
- Select date/time (up to 18 months ahead)
- Click "Schedule"
To manage scheduled tweets:
- Click calendar icon again → "Scheduled" tab
- Edit or delete before they publish
Native Scheduler: Pros & Cons
✅ Pros:
- Completely free
- No learning curve
- Reliable (native platform)
- No API limits or connection issues
❌ Cons:
- Desktop only (no mobile scheduling)
- One tweet at a time (no bulk uploads)
- No thread scheduling
- No AI caption help
- No analytics beyond basic X stats
- Can't cross-post to other platforms
- No first comment automation
When to Use Native Scheduler
Perfect if you:
- Post 1-2 times per day
- Manage one X account only
- Have zero budget for tools
- Don't need advanced features
Outgrow it when you need:
- Mobile scheduling
- Bulk uploads
- Thread automation
- Multi-account management
- Cross-platform posting
Bottom line: Great starting point, but most active users need more power.
👉 Complete X native scheduler guide
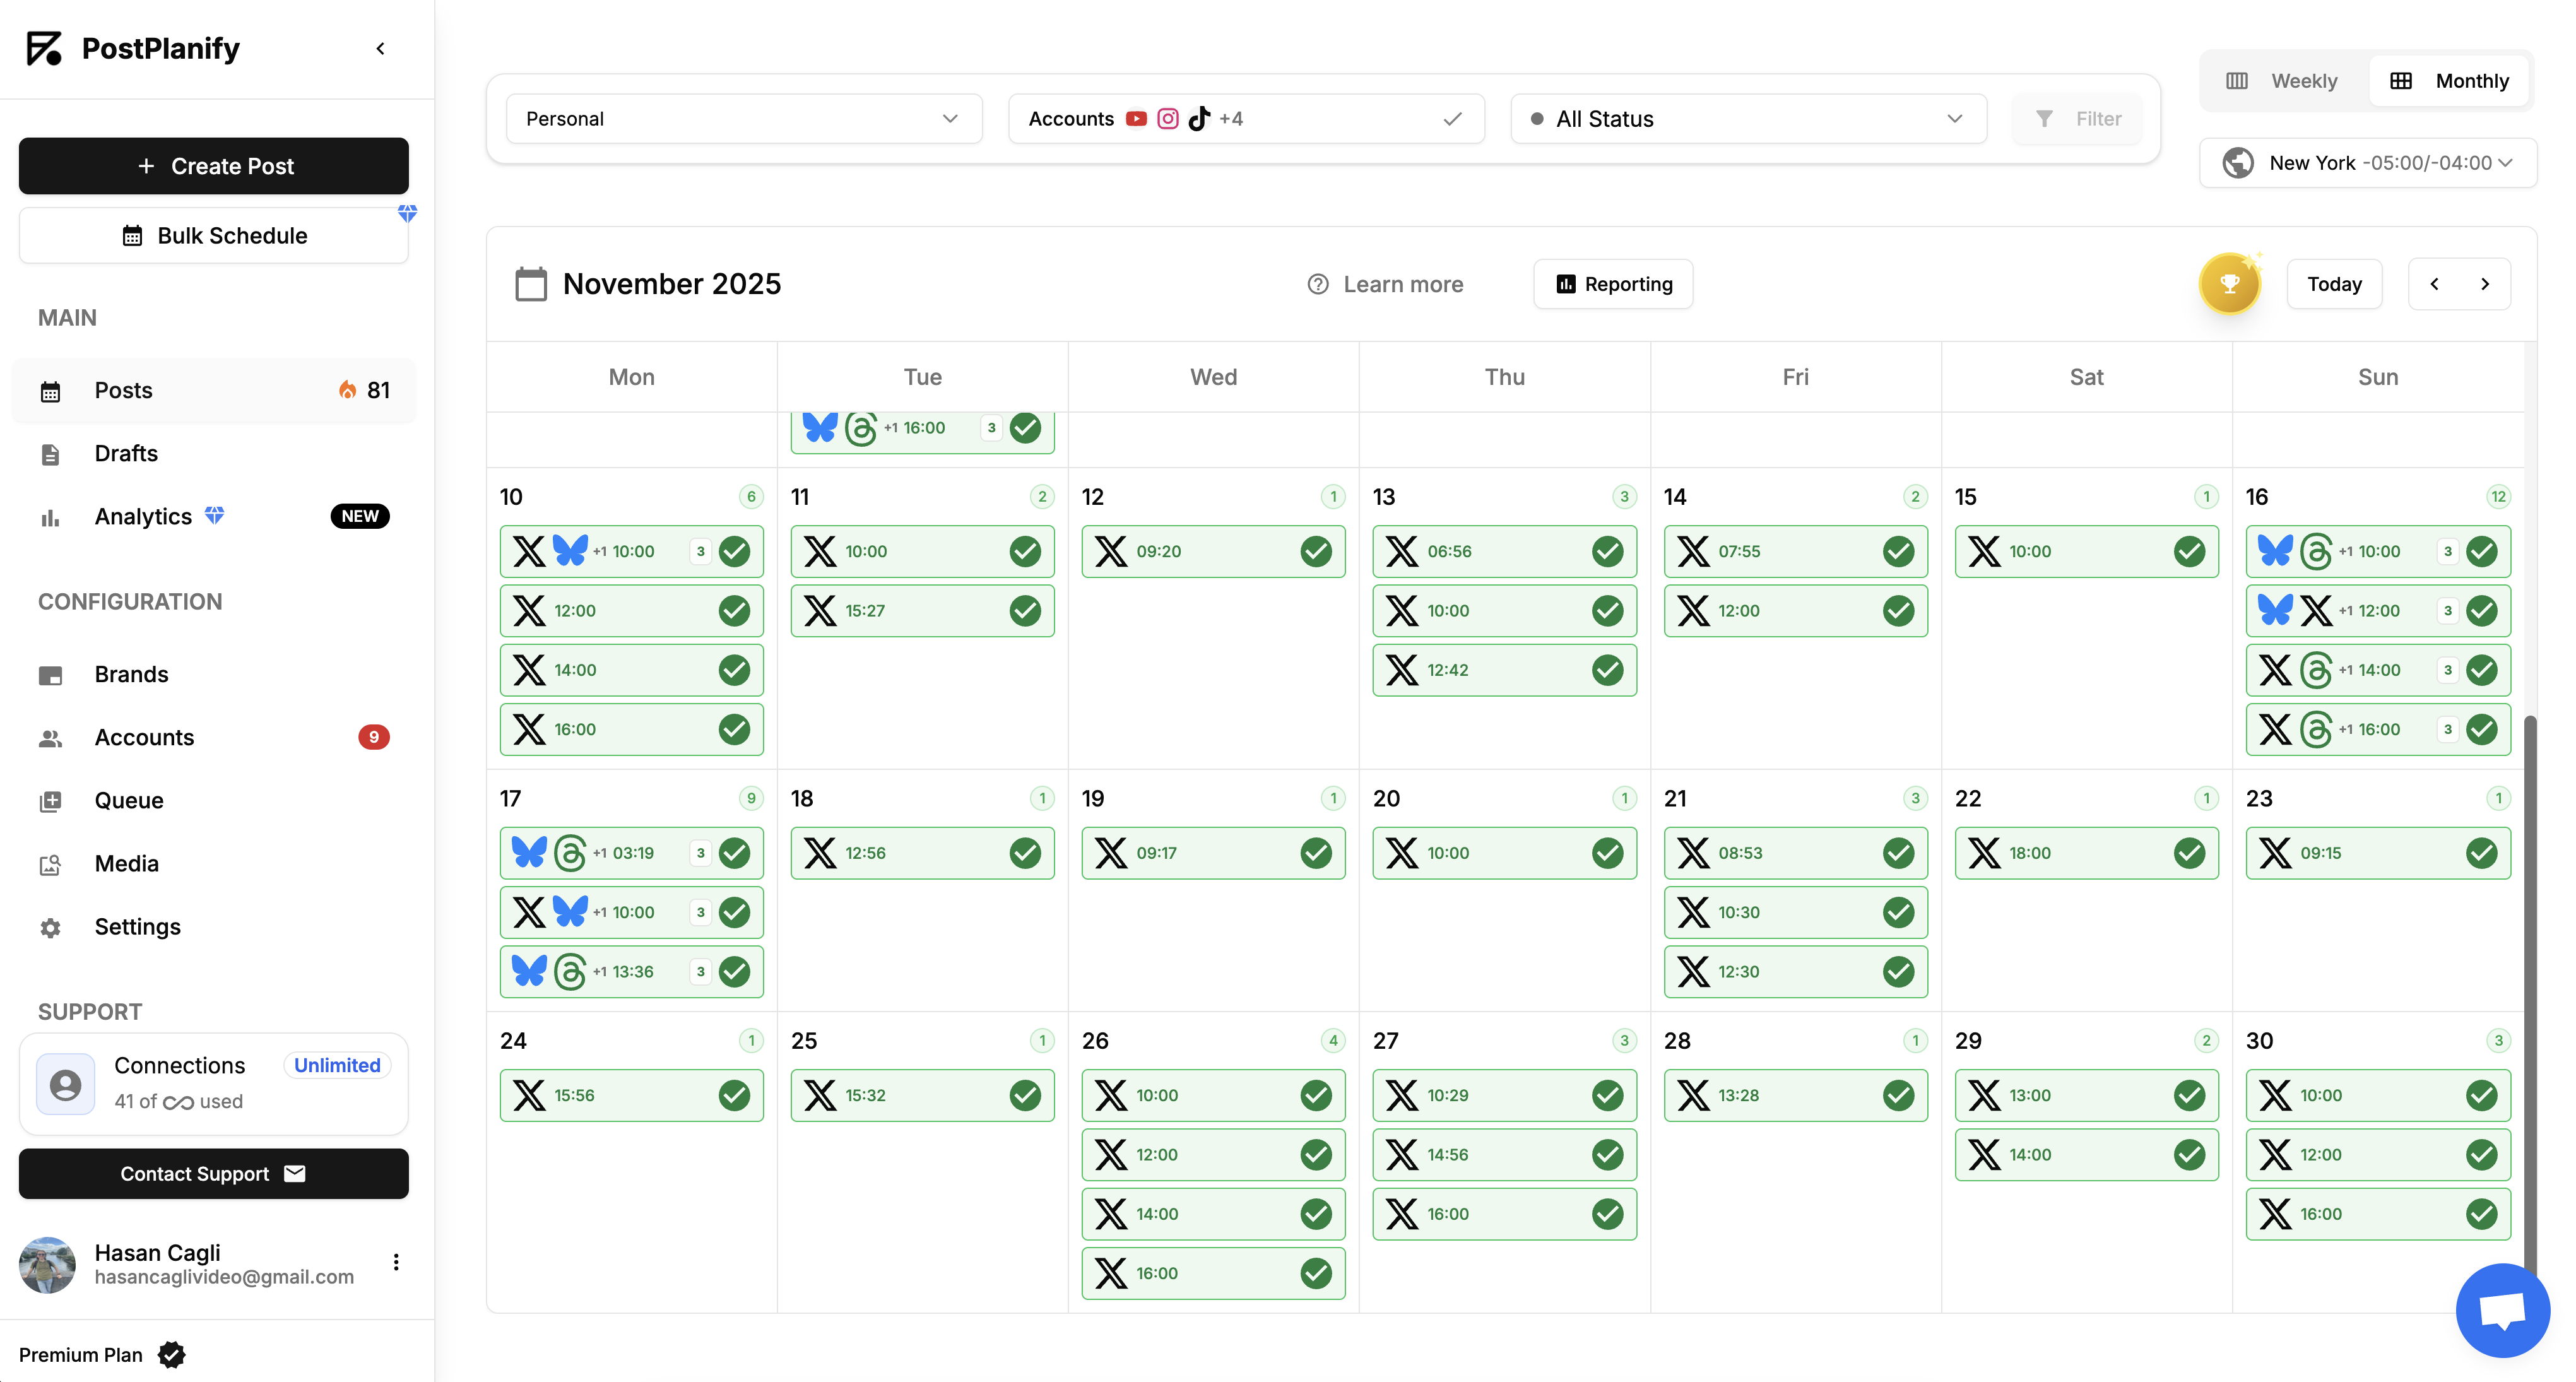
Method 2: PostPlanify (Full-Featured Tweet Automation)
Best for: Daily posters, agencies, multi-platform managers, AI caption users
Price: From Growth at $99/mo, or $79/mo billed yearly, to Scale at $299/mo, or $239/mo billed yearly; Enterprise is custom Trial: 7 days free, with a 14-day money-back guarantee
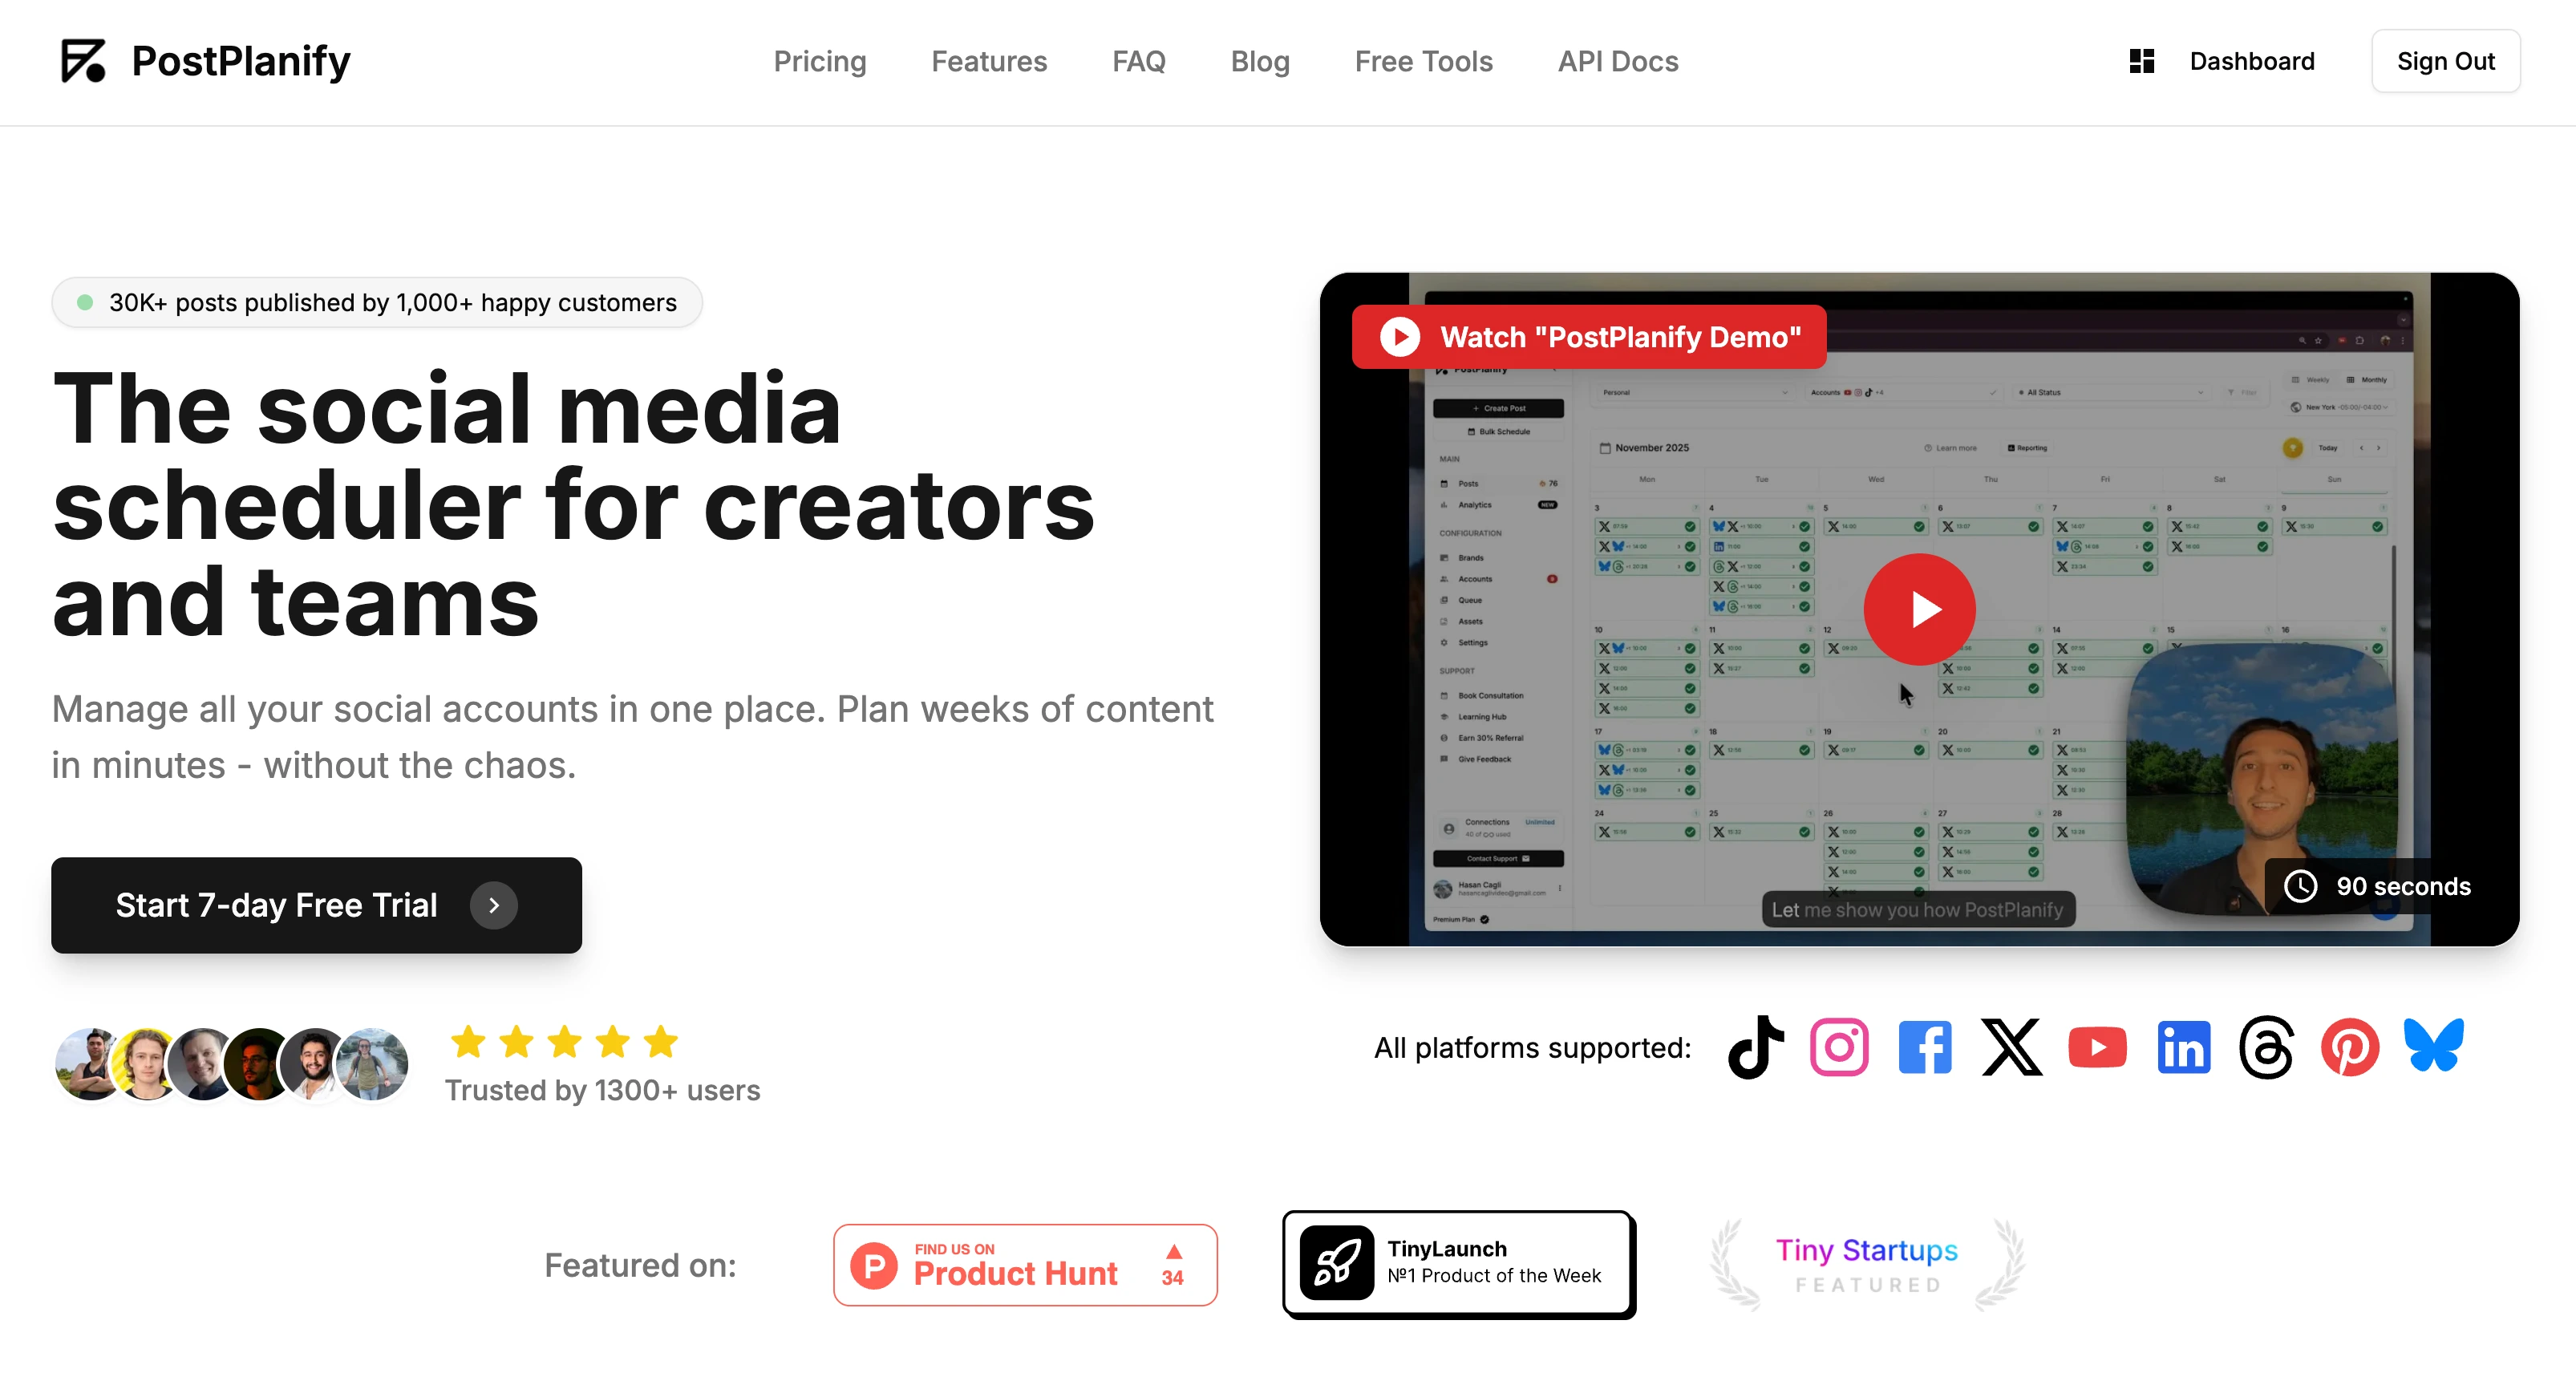
PostPlanify is a complete social media management platform built for creators and small teams who need automation across multiple platforms.
Key Features for Tweet Automation
What sets PostPlanify apart:
-
Analytics Across All Platforms
- Track followers, engagement, and per-post performance across 10 platforms
- Best time to post heatmap based on your actual audience data
- Top performing posts identification
-
- Reply to comments and messages from one dashboard
- AI-generated reply suggestions
- Labels, filters, and team assignment
-
- Analyzes your uploaded images and videos to write relevant captions
- Platform-specific tone adaptation
- 7 text refinement tools and 6 tones
-
Thread & First Comment Scheduling
- Schedule multi-tweet threads with proper spacing
- Add first comment automatically (keeps main tweet clean)
- Twitter Communities posting for higher engagement
-
- Generate PDF reports with your branding
- Period-over-period comparisons
- Shareable links for clients
-
- 3 users on Growth, 6 on Premium, and 12 on Scale
- Premium+ multi-approver workflows with role-based permissions
- Shared content calendar
-
Cross-Platform Publishing
- Post to X, Instagram, TikTok, LinkedIn, Facebook, YouTube, Threads, Pinterest, Bluesky
- Adapt captions per platform automatically
- Bulk scheduling up to 20 posts at once
How to Automate Tweets with PostPlanify
Step 1: Connect X Account
- Sign up at postplanify.com
- Create a brand profile
- Go to Social Accounts → Connect X
- Authorize PostPlanify
Step 2: Create Tweet Content
- Click "Create Post"
- Select X as platform
- Add media:
- Upload from computer, OR
- Import from Canva, OR
- Use Google Drive integration
- Write caption:
- Manual entry, OR
- Click "Generate AI Caption"
- Edit as needed
Step 3: Schedule & Automate
- Click "Schedule" button
- Choose date/time OR add to queue
- Optional: Add first comment
- Optional: Select Twitter Community
- Confirm
Post goes live automatically at scheduled time.
PostPlanify Pricing
| Plan | Price | Accounts | Features |
|---|---|---|---|
| Growth | $99/mo, or $79/mo billed yearly | 15 social accounts | 5 workspaces, 3 users, analytics, social inbox |
| Premium | $199/mo, or $159/mo billed yearly | 30 social accounts | 15 workspaces, 6 users, approval workflows, reports |
| Scale | $299/mo, or $239/mo billed yearly | 100 social accounts | 50 workspaces, 12 users, white-label PDF reports |
| Enterprise | Custom | Custom | Custom limits and support |
| Trial | Free | 7 days | 14-day money-back guarantee after purchase |
Pros & Cons
✅ Pros:
- Analytics across all 10 platforms with best time to post suggestions
- Social inbox for managing comments from one dashboard
- AI assistant analyzes your media and writes platform-specific captions
- Team collaboration (3 users on Growth, 6 on Premium, 12 on Scale) with approval workflows on Premium+
- White-label PDF reports for clients on Scale+
- Cross-platform scheduling (10 platforms)
- Thread + first comment automation
- Multi-account scheduling across Growth, Premium, Scale, and Enterprise plans
❌ Cons:
- Not free (after trial)
- Newer platform (less brand recognition than legacy tools)
When to Choose PostPlanify
Perfect if you:
- Post 3+ times daily across platforms
- Want AI caption help
- Need thread scheduling
- Manage 2-10 brand accounts
- Cross-post to Instagram/TikTok/LinkedIn
- Value simple interface over complex features
Skip if you:
- Only need basic X scheduling (use native)
- Require enterprise reporting
- Have $0 budget (try free trial, then decide)
All your social media in one simple dashboard
Schedule posts, track analytics, and reply to comments/DMs — without switching tabs.
Engagement
+18%
Views
52.8k
Method 3: Buffer & Hootsuite
Best for: Teams, enterprise, heavy analytics users
Buffer
Price: $6/mo per channel (Essentials) to $120/mo (Team)
Key features:
- Queue system (set times, posts fill slots automatically)
- "Optimal timing tool" suggests best post times
- Basic analytics included
- Browser extension for easy sharing
- Clean, simple interface
Pros:
- Trusted brand (10+ years)
- Reliable auto-posting
- Good free plan (3 channels, 10 posts each)
Cons:
- Price adds up per channel ($6 each)
- No AI captions
- No Canva integration
- Analytics less detailed than competitors
Best for: Solo creators wanting proven, simple tool
Hootsuite
Price: $249/user/mo (Standard) to $499/user/mo (Advanced)
Key features:
- Manage up to 50 social accounts
- Advanced analytics and reporting
- Team collaboration with approval workflows
- Bulk scheduling (CSV upload)
- Social listening tools
Pros:
- Enterprise-grade features
- Robust analytics
- Team management built-in
- Integrates with 35+ platforms
Cons:
- Expensive for solo users
- Steep learning curve
- Interface feels dated
- Overkill if you just need tweet automation
Best for: Marketing teams 5+ people, agencies, enterprises
Buffer vs Hootsuite vs PostPlanify
| Feature | Buffer | Hootsuite | PostPlanify |
|---|---|---|---|
| Price | $6/channel | $249/user/mo | $79/mo yearly / $99/mo monthly |
| AI Captions | ❌ | ❌ | ✅ |
| Thread Scheduling | ✅ | ✅ | ✅ |
| Social Inbox | ❌ | ✅ | ✅ |
| Free Plan | ✅ (Limited) | ❌ | 7-day trial |
| Team Features | Basic | Advanced | ✅ 3 / 6 / 12 users; approvals on Premium+ |
| Analytics | Good | Excellent | ✅ All platforms |
| Ease of Use | ⭐⭐⭐⭐⭐ | ⭐⭐⭐ | ⭐⭐⭐⭐⭐ |
Quick decision:
- Just starting: Buffer Free or X native
- Daily posting, multi-platform: PostPlanify
- Large team, enterprise: Hootsuite
Method 4: RSS-to-Tweet Automation (Fully Automated)
Best for: Bloggers, news sites, content creators who want to auto-share new posts
How it works: Automatically tweet every time you publish a new blog post, YouTube video, or podcast episode.
Popular RSS-to-Tweet Tools
1. Zapier (Most flexible)
Setup:
- Create Zap: RSS Feed → X/Twitter
- Enter your blog's RSS feed URL
- Customize tweet template:
New post: {{Title}} {{Link}} #YourHashtag
- Turn on Zap
Price: Free for 100 tasks/mo, then $20/mo
Pros: Highly customizable, integrates with 5,000+ apps
Cons: Requires some technical setup
2. dlvr.it (Purpose-built for RSS)
Setup:
- Sign up at dlvr.it
- Add your RSS feed
- Connect X account
- Customize post template
- Set posting frequency
Price: Free (3 feeds) or $11/mo (unlimited)
Pros: Simple, focused on RSS-to-social
Cons: Less flexible than Zapier
3. IFTTT (If This Then That)
Setup:
- Create applet: RSS → Twitter
- Enter feed URL
- Customize tweet format
- Activate
Price: Free for 2 applets, $3/mo for unlimited
Pros: Dead simple, cheap
Cons: Limited customization
RSS-to-Tweet Best Practices
✅ DO:
- Customize the template (don't just auto-post title)
- Include relevant hashtags
- Add a hook: "New post:" or "Just published:"
- Vary the format occasionally
❌ DON'T:
- Post the exact same template every time (looks robotic)
- Spam - limit to 1-2 auto-tweets per post
- Forget to engage after auto-posting
Example good template:
Just published: {{Title}}

{{Excerpt}}

Read more: {{Link}}

#ContentMarketing #Blogging
Pros & Cons of RSS Automation
✅ Pros:
- Truly hands-off (no manual work)
- Never forget to promote new content
- Consistent cross-promotion
❌ Cons:
- Can look robotic if not customized
- Less engagement than manual, tailored tweets
- Relies on RSS feed working correctly
Best for: Supplementing manual tweets, not replacing them entirely
Method 5: Advanced Automation with Zapier & IFTTT
Best for: Power users, custom workflows, complex automation needs
Important update (2025-2026): Make.com officially killed its X/Twitter integration on May 30, 2025. All existing scenarios with X now return errors. If you were using Make.com for X automation, migrate to Zapier or IFTTT. Zapier restored its X integration in February 2026, but it now requires your own X Developer App credentials (Client ID + Secret).
Examples of advanced automation:
1. Auto-Tweet New YouTube Videos
Workflow: New YouTube upload → Auto-tweet with thumbnail
Tools needed: Zapier + YouTube + X
Setup:
- Trigger: New YouTube video in channel
- Action: Post to X with video title, link, custom caption
2. Repost Top-Performing Tweets
Workflow: High-engagement tweet → Auto-repost 30 days later
Tools needed: Zapier + X API
Setup:
- Monitor tweets with 100+ likes
- Add to queue
- Repost with "In case you missed it:" prefix
3. Tweet LinkedIn Posts Automatically
Workflow: Publish on LinkedIn → Auto-adapt for X
Tools needed: Zapier + LinkedIn + X + AI (OpenAI API)
Setup:
- Trigger: New LinkedIn post
- Use AI to adapt copy for X (shorter, casual)
- Auto-post to X
4. Auto-Reply to Mentions
Workflow: Someone mentions your keyword → Auto-reply with helpful resource
Tools needed: Zapier + X API
Setup:
- Monitor mentions of "social media scheduler"
- Auto-reply: "Check out this guide: [link]"
- (Use sparingly to avoid spam)
Advanced Automation: Pros & Cons
✅ Pros:
- Limitless customization
- Connect any app to X
- Save hours on repetitive tasks
❌ Cons:
- Requires technical knowledge
- Can look spammy if done wrong
- Monthly cost ($20-100/mo)
- Can violate X's automation rules if aggressive
Warning: X has strict automation rules. Don't:
- Auto-follow/unfollow aggressively
- Auto-DM everyone
- Post identical content repeatedly
- Auto-like excessively
Safe automation:
- Scheduled original content
- RSS-to-tweet your own blog
- Cross-posting your own content
- Analytics-triggered actions (with moderation)
Which Tweet Automation Method Should You Choose?
Decision Tree
START HERE:
Do you post 1-2 times per day with one account?
- YES → Use X Native Scheduler (free)
- NO → Continue
Do you only want to auto-share blog posts?
- YES → Use RSS-to-Tweet (dlvr.it or Zapier)
- NO → Continue
Do you manage a team of 5+ people?
- YES → Use Hootsuite ($249/user/mo, enterprise features)
- NO → Continue
Do you want AI caption help + cross-platform posting?
- YES → Use PostPlanify (from $99/mo, or $79/mo billed yearly, with a 7-day trial)
- NO → Continue
Do you want the simplest, most trusted tool?
- YES → Use Buffer ($6/mo per channel)
Comparison by Use Case
Scenario 1: Solo Creator, Daily Posts
Best choice: PostPlanify
Why: AI captions save time, cross-posting maximizes reach, and Growth includes 15 connected social accounts
Scenario 2: Blogger, Auto-Promote New Posts
Best choice: dlvr.it + X Native Scheduler
Why: RSS automation handles blog promo, native scheduler for manual tweets
Scenario 3: Agency, 10+ Client Accounts
Best choice: Hootsuite or PostPlanify Scale Why: Hootsuite = robust team features; PostPlanify Scale = 100 accounts, 50 workspaces, 12 users, and white-label PDF reports at a lower entry point than many enterprise suites
Scenario 4: Occasional Poster, Zero Budget
Best choice: X Native Scheduler
Why: Free, reliable, sufficient for low volume
Scenario 5: Power User, Custom Workflows
Best choice: Zapier + PostPlanify
Why: Zapier handles complex automation, PostPlanify for scheduled content
Quick Comparison Table
| Need | Free Option | Best Paid Option |
|---|---|---|
| Basic scheduling | X Native | PostPlanify Growth ($79 yearly / $99 monthly) |
| AI captions | N/A | PostPlanify Growth ($79 yearly / $99 monthly) |
| Thread automation | N/A | PostPlanify/Hootsuite |
| RSS auto-posting | IFTTT | dlvr.it ($11) |
| Team management | N/A | Hootsuite ($249/user) |
| Cross-platform | N/A | PostPlanify Growth ($79 yearly / $99 monthly) |
| Enterprise features | N/A | Hootsuite ($249+/user) |
👉 Try PostPlanify free for 7 days
Tweet Automation Best Practices (Don't Sound Like a Bot)
Automation is powerful, but done wrong it makes you look robotic. Follow these rules:
1. The 70/30 Rule
70% automated, 30% real-time
Automate:
- Educational tips
- Blog promotions
- Product updates
- Evergreen content
- Scheduled announcements
Post manually:
- Breaking news reactions
- Trending topic participation
- Replies to mentions
- Engagement with others' content
- Time-sensitive offers
Why: Automation handles consistency, manual posting handles humanity.
2. Vary Your Posting Times
Bad: Every post at 9 AM daily
Good: Rotate between 9 AM, 12 PM, 6 PM
Why: Reaches different segments of your audience, looks less robotic
How: Most schedulers let you set "best time" or queue slots that vary
3. Don't Auto-Post Identical Content
Bad:
Check out our new blog post: [link]
Check out our new blog post: [link]
Check out our new blog post: [link]
Good:
Tweet 1: "Just published: How to X"
Tweet 2: "Quick read: 5 ways to Y"
Tweet 3: "New guide: Everything about Z"
Why: X's algorithm penalizes repetitive content, users ignore identical posts
4. Always Include a Human Touch
For each automated tweet, ask:
- Does this sound like I wrote it, or like a bot?
- Would I engage with this if someone else posted it?
- Is there a unique angle or personality?
Bad auto-tweet:
New blog post published. Click here to read. #blogging
Good auto-tweet:
Spent 3 hours figuring this out so you don't have to.

New guide: [Topic]

The #3 tip blew my mind 🤯

[Link]
5. Monitor and Adjust Based on Data
Every 2 weeks, review:
- Which automated tweets got engagement?
- Which got ignored?
- What times performed best?
- Any patterns in successful posts?
Then adjust:
- Drop low-performing content formats
- Double down on what works
- Test new posting times
- Refresh evergreen content
Tools: X Analytics, PostPlanify analytics, Buffer insights
6. Set Up Engagement Alerts
Don't auto-post and disappear.
Set up notifications for:
- Replies to your tweets
- Mentions of your handle
- DMs
- High-engagement posts (50+ likes)
Then respond within 1-2 hours if possible.
Why: Engagement signals boost reach. Automated posting + manual engagement = best results.
7. Audit Your Automation Monthly
Every month:
- Review scheduled content for relevance
- Remove outdated info (old prices, expired offers)
- Refresh stats and data
- Update screenshots
- Check all links work
Common issues:
- Seasonal content posting year-round
- Links to deleted pages
- Outdated product info
- Stale memes/references
8. Use First Comments Strategically
Instead of cramming everything into one tweet:
Main tweet: Hook + value proposition (clean, simple)
First comment: Links, CTAs, extended hashtags
Example:
Main tweet:
3 years of trial and error condensed into one guide.

Here's how I grew from 0 to 50K followers on X 🧵

(Free template inside)
First comment:
Grab the free content calendar template: [link]

Follow @yourusername for more growth tips

#TwitterGrowth #SocialMediaMarketing #ContentStrategy
Why this works:
- Main tweet stays clean and engaging
- Algorithm favors simple tweets over link-heavy ones
- First comment still gets seen by engaged readers
- Can edit first comment without editing main tweet
9. Don't Automate Customer Service
Never auto-respond to:
- Support requests
- Complaints
- Questions
- Crisis situations
Always handle manually:
- Customer issues
- Negative feedback
- Specific questions
- PR situations
Why: People can tell when it's automated, and it damages trust.
10. Test Before Automating at Scale
Before scheduling 50 tweets:
- Test 5-10 first
- Check formatting on mobile
- Verify links work
- Confirm images aren't cropped weirdly
- Make sure timezone is correct
Common mistakes caught in testing:
- Wrong timezone (post goes out at 3 AM instead of 3 PM)
- Broken links
- Images too large/wrong aspect ratio
- Character count issues
- Hashtags not working (banned or misspelled)
One test week >>> one month of bad auto-posts
All your social media in one simple dashboard
Schedule posts, track analytics, and reply to comments/DMs — without switching tabs.
Engagement
+18%
Views
52.8k
7 Tweet Automation Mistakes That Kill Engagement
Mistake 1: Over-Automating
Problem: 100% automated feed, zero manual engagement
Result: Looks robotic, algorithm penalizes, followers drop
Fix: 70% automated + 30% manual interaction
Mistake 2: Ignoring Time Zones
Problem: Scheduling at "9 AM" but you're in PST, audience is in EST
Result: Posts go out at 6 AM EST (dead zone)
Fix: Always check scheduler timezone settings, adjust for audience location
Mistake 3: Set-It-and-Forget-It
Problem: Schedule 100 tweets, never check back
Result: Outdated info, broken links, missed opportunities to engage
Fix: Review queue weekly, monitor engagement, reply to comments
Mistake 4: Identical Posts Everywhere
Problem: Same exact tweet to X, LinkedIn, Instagram
Result: LinkedIn post looks too casual, Instagram caption too short, X thread broken
Fix: Adapt content per platform:
- X: Casual, 280 chars, 2-3 hashtags
- LinkedIn: Professional, longer-form, industry hashtags
- Instagram: Visual-first, emoji-heavy, 10-15 hashtags
Mistake 5: No Personality
Problem: Automated tweets read like press releases
Result: Zero engagement, algorithm buries them
Fix: Add personality:
- Use "I" and "you"
- Share opinions
- Tell stories
- Ask questions
- Use emojis sparingly
Bad: "New blog post about social media marketing published."
Good: "Spent all weekend testing this. The results surprised me 👇"
Mistake 6: Scheduling Without Preview
Problem: Hit schedule without checking mobile preview
Result: Image cropped badly, text cut off, link preview broken
Fix: Always preview before scheduling
- Check mobile view
- Verify image aspect ratio
- Test link preview
- Confirm character count
Mistake 7: Breaking X's Automation Rules
Problem: Aggressive auto-follow, auto-DM, auto-like
Result: Account suspension, shadowban, loss of trust. Not sure if your account has been hit? Learn how to check if you're shadowbanned on Twitter.
Fix: Only automate content publishing, never automate:
- Mass following/unfollowing
- Auto-DMs to new followers
- Excessive auto-liking
- Repetitive posting (same tweet 10x)
X's Automation Rules: What's Allowed vs. What Gets You Suspended
Before you automate anything, know the rules. X has clear policies, and breaking them can mean account suspension.
Allowed (safe to automate)
- ✅ Scheduling your own original tweets via authorized third-party tools
- ✅ Posting from apps using the official API within rate limits
- ✅ Auto-sharing your own content (blog, RSS, podcast) to your account
- ✅ Bot accounts, provided they are clearly labeled as bots in their bio
- ✅ Using AI (ChatGPT, Claude, etc.) to write tweet content
- ✅ Thread scheduling and queue-based posting
- ✅ Cross-posting your own content from other platforms
Prohibited (will get you suspended)
- ❌ Automated follow/unfollow activity
- ❌ Automated liking, retweeting, or bookmarking (engagement farming)
- ❌ Automated or unsolicited DMs (including "thanks for following" auto-DMs)
- ❌ Posting identical content across multiple accounts
- ❌ Automated posting about trending topics to manipulate trends
- ❌ Scraping without API authorization
- ❌ Running accounts with zero human interaction (pure bot without disclosure)
- ❌ Coordinated inauthentic behavior across accounts
Gray areas (proceed with caution)
- ⚠️ Auto-retweeting your OWN older content — some tools offer "evergreen recycling," but identical reposts can trigger duplicate detection. Vary wording instead.
- ⚠️ High-volume AI-generated posting — AI content is allowed, but spam-like volume is not
- ⚠️ X's new "Made with AI" label (March 2026) — X now flags AI-generated content. While not required for scheduled posts, disclosure pressure is increasing for fully automated accounts.
Bottom line: Automate content publishing. Never automate engagement (likes, follows, DMs, retweets).
X API Pricing Tiers (2026)
If you're building custom automation or evaluating third-party tools, understanding X's API pricing helps you make informed decisions.
| Tier | Monthly Cost | Post Limits | Key Capabilities |
|---|---|---|---|
| Free | $0 | ~17 posts/day (50 requests/24hr per user) | Write-only, severely limited read access, 1 app |
| Basic | $200/mo | 3,000 posts/month per user | Read + write, 7-day search history, 2 apps |
| Pro | $5,000/mo | 1M tweets/month (app-level) | Full archive search, higher rate limits, full API |
| Enterprise | ~$42,000+/mo | Custom | Dedicated account team, complete data streams |
| Pay-Per-Use (NEW) | Usage-based | Varies | Launched Feb 2026 in closed beta, AWS-style billing |
What this means for you:
- Most third-party schedulers (PostPlanify, Buffer, Hootsuite) handle API costs for you — you pay their subscription, not X's API fees
- If you're building a custom bot, the Free tier is enough for low-volume posting (~17 tweets/day)
- The Basic tier ($200/mo) is needed for reading tweets, search, or higher-volume posting
- The Basic tier price doubled from $100 to $200 during 2025
Integration platform status (March 2026)
| Platform | X Integration Status |
|---|---|
| IFTTT | ✅ Active and working |
| Zapier | ✅ Restored Feb 2026 (requires your own X Developer App credentials) |
| Make.com | ❌ Dead — Decommissioned May 30, 2025. All X scenarios fail. |
| Buffer | ✅ Active |
| Hootsuite | ✅ Active |
| dlvr.it | ✅ Active |
How X's Algorithm Treats Automated Posts in 2026
Understanding how X's algorithm distributes content helps you automate smarter. Here are the key factors:
Engagement signal weights
Not all interactions are equal. X's algorithm values these signals differently:
| Signal | Weight (vs. Likes) | What It Means |
|---|---|---|
| Retweets/Reposts | 20x | Most valuable — each retweet massively boosts distribution |
| Replies | 13.5x | Conversation starters get amplified |
| Bookmarks | 10x | "Save for later" = strong quality signal |
| Likes | 1x | Baseline engagement signal |
The 30-minute engagement window
Engagement in the first 30 minutes after posting determines algorithmic distribution. This makes posting-time optimization critical — schedule tweets to go live when your audience is most active.
X Premium visibility boost
Premium subscribers receive a 4x visibility boost for in-network content and a 2x boost for out-of-network distribution. If automation is central to your X strategy, Premium ($8/mo) significantly amplifies your reach.
Link post suppression (critical for RSS automation)
As of 2025-2026, non-Premium accounts posting links receive near-zero median engagement. Even Premium accounts see reduced reach on link posts vs. native content.
What this means for automation:
- If your automation strategy is primarily sharing blog links (RSS-to-tweet), your reach will suffer significantly
- Prioritize native content (text, images, video) in your automation queue
- For link sharing: post the value/insight as native text, then add the link in a reply or first comment
Content type ranking (highest to lowest reach)
- Video — 10x more engagement than text-only
- Images — Strong engagement, algorithm-friendly
- Text-only — Good if the writing is engaging
- Link posts — Suppressed, especially for non-Premium accounts
Time decay
Posts lose 50% of their potential visibility every 6 hours. Unlike Instagram or TikTok where content can surface days later, X demands frequent posting. Space automated tweets 2-3 hours apart to catch different audience segments.
Troubleshooting: Common Automation Errors and Fixes
API error codes
| Error Code | Meaning | Fix |
|---|---|---|
| 429 | Rate limit exceeded | Wait for the 15-minute window to reset. Implement exponential backoff in custom tools. Check x-rate-limit-remaining header. |
| 32 | Could not authenticate | OAuth token expired. Revoke and reauthorize app in your scheduling tool. Regenerate API keys if building custom. |
| 186 | Tweet too long | Exceeds 280 chars (or 10,000 for Premium). Remember URLs count as 23 characters regardless of actual length. |
| 187 | Duplicate content | Identical tweet already posted. Vary wording — add timestamps, rephrase, or use different media. |
| 226 | Excessive automation | X flagged bot-like behavior. Slow posting frequency. Wait 15-30 min between posts. Mix in manual engagement. |
| 403 | Forbidden | App lacks required permissions. Check app permission level in Developer Portal — ensure read+write access. |
| 401 | Unauthorized | Invalid credentials. Verify API key, secret, access token, and token secret. |
Common non-API problems
| Problem | Cause | Fix |
|---|---|---|
| Scheduled posts not publishing | Expired OAuth tokens | Re-authenticate X account in your scheduling tool |
| Images/media not attaching | Separate media upload rate limits | Ensure images < 5 MB, videos < 512 MB |
| Thread automation breaking | One tweet in chain failed | Check each tweet individually; if one fails, subsequent tweets post as standalone |
| Timezone mismatch | Tool uses UTC vs your local time | Verify timezone settings in both the tool and your X account |
| Account locked after bulk scheduling | Sudden volume spike flagged | Ramp up posting volume gradually over 1-2 weeks |
| Make.com scenarios failing | X integration decommissioned May 2025 | Migrate to Zapier, IFTTT, or direct API solution |
Frequently Asked Questions: Tweet Automation
How do I automate tweets for free?
Use X's native scheduler (desktop only, up to 18 months ahead) or try free tiers of Buffer (10 posts/channel), Metricool (50 posts/month), or dlvr.it (3 RSS feeds).
Best free option: X native scheduler for basic needs
Best free trial: PostPlanify (7 days)
Can I automate tweets from my phone?
Native X scheduler: No, desktop only
Third-party tools with mobile apps:
- Buffer ✅ (iOS/Android)
- Hootsuite ✅ (iOS/Android)
Workaround: Use mobile browser in "Desktop Mode" to access X.com scheduler
Will automation hurt my engagement?
No, if done correctly. Studies show scheduled tweets perform equally or better when posted at optimal times.
What DOES hurt engagement:
- Identical repetitive posts
- 100% automation, 0% manual interaction
- Generic, robotic-sounding content
- Broken links or bad formatting
Best practice: Automate publishing, manually handle engagement (replies, likes, conversations)
How many tweets should I automate per day?
Optimal: 3-5 tweets per day
Breakdown:
- 2-3 automated (educational, promotional, evergreen)
- 1-2 manual (engagement, trending topics, replies)
Too few: 1-2/day = slow growth
Too many: 10+/day = spam (unless very high engagement)
Data: Accounts posting 3-5x daily see 40% higher follower growth (Buffer, 2024)
Can I schedule threads automatically?
Native X scheduler: No
Tools that schedule threads:
- PostPlanify ✅
- Hootsuite ✅
- Typefully ✅ (thread-specific)
- Hypefury ✅
How it works:
- Write all tweets in thread
- Set spacing between tweets (30 seconds typical)
- Schedule start time
- Tool auto-posts in sequence
How far in advance can I schedule tweets?
X native: Up to 18 months ahead
Third-party tools:
- Most allow unlimited advance scheduling
- Practical limit: 4-6 weeks (trending topics change)
Best practice: Don't schedule evergreen content more than 1-2 months ahead (need to audit for relevance)
Can I edit scheduled tweets?
X native: Yes
- Go to Scheduled → Edit before publish time
PostPlanify: Yes
- Edit from calendar, drag to new time, or delete
Buffer/Hootsuite: Yes
- Edit from queue before publish
After publishing: Can't edit (X doesn't allow editing live tweets except X Premium users)
What's the best time to auto-post tweets?
General best times (EST):
- Wednesday 9 AM (peak)
- Tuesday 8-10 AM
- Thursday 9-11 AM
- Weekday lunch (12-1 PM)
Find YOUR best time:
- Go to X Analytics
- Check top posts' publish times
- Test 2-3 time windows
- Double down on winners
Automation advantage: Can post at 6 AM without waking up early
Can I auto-post to Twitter Communities?
Native X scheduler: No
PostPlanify: Yes ✅
- Select Community when scheduling
- Posts go directly to Community feed
- Higher engagement than timeline
Why it matters: Communities see 2-3x higher engagement than regular timeline posts
How do I avoid looking like a bot?
8 ways to sound human:
- Use "I" and "you" (not "we" or "one")
- Share opinions, not just facts
- Ask questions
- Tell stories
- Vary sentence structure
- Use emojis (but not excessively)
- Respond to replies quickly
- Post manual content 30% of the time
Bot-like:
Article published: "How to Use Twitter"
Link: example.com
#Twitter #Marketing
Human:
Just spent 3 hours writing this guide so you don't have to.

Every mistake I made growing from 0 to 10K followers (and how to avoid them)

Free template inside 👇
[link]
Can I automate replies to mentions?
Technically yes (Zapier, Make.com), but don't.
Why:
- Looks spammy
- Damages trust
- Can violate X's automation rules
- Misses context (auto-replies often nonsensical)
Better approach:
- Set up mention alerts
- Reply manually within 1-2 hours
- Automate content, not conversations
What's the difference between scheduling and automation?
Scheduling: You manually queue specific posts for specific times
Automation: Tool automatically posts based on triggers (new blog post, RSS update, etc.)
Example:
- Scheduled: You write 10 tweets on Sunday, schedule for Mon-Fri
- Automated: Every time you publish a blog post, tool auto-tweets it
Best strategy: Combine both
- Schedule evergreen content
- Automate blog/video promotions
- Post manually for trending topics
Will automation work with X Premium?
Yes. All automation tools work with both free and X Premium accounts. In fact, Premium significantly boosts automation results:
X Premium benefits for automated posts:
- 4x visibility boost for in-network content, 2x for out-of-network
- Longer tweets (10,000 chars instead of 280)
- Edit tweets after posting
- Blue checkmark (credibility signal)
- Link posts actually get reach (non-Premium link posts get near-zero engagement)
- Higher visibility in replies
If automation is central to your X strategy, Premium ($8/mo) is worth considering for the visibility boost alone.
How do I track performance of automated tweets?
X Analytics (free):
- Impressions, engagements, link clicks
- Top tweets by engagement
- Follower growth
PostPlanify Analytics:
- Performance by post, time, content type
- Best time suggestions based on your data
- Engagement rates
Buffer/Hootsuite:
- Detailed analytics dashboards
- Custom reports
- A/B testing results
Best practice: Review weekly, adjust strategy monthly
Can I automate tweets to multiple accounts?
Native X scheduler: No (one account at a time)
PostPlanify: Yes
- Growth: 15 accounts
- Premium: 30 accounts
- Scale: 100 accounts
- Switch between accounts in dashboard
Hootsuite: Yes
- Professional: 10 accounts
- Team: 20 accounts
- Enterprise: 50+ accounts
Best for agencies: PostPlanify Scale, PostPlanify Enterprise (custom), or Hootsuite
Important: Don't post identical content across multiple accounts — X flags this as coordinated inauthentic behavior. Vary captions, media, or posting times per account.
Is it against X's rules to automate tweets?
No, as long as you follow X's automation guidelines. Scheduling original content via authorized tools (PostPlanify, Buffer, Hootsuite, etc.) is explicitly allowed. What's prohibited is automated engagement farming: auto-following, auto-liking, auto-retweeting, auto-DMs, and posting identical content across multiple accounts. See our X automation rules breakdown for the full list.
Can I auto-post from Instagram or Facebook to X?
Not directly through Meta's tools — Instagram and Facebook don't have built-in cross-posting to X. Use a multi-platform scheduler like PostPlanify to post the same content to X, Instagram, Facebook, and other platforms simultaneously with platform-specific caption adaptation. Zapier can also create workflows that trigger X posts when you publish to other platforms.
How do I auto-tweet when I publish a WordPress blog post?
Use a WordPress plugin like Uncanny Automator, XPoster, or Revive Social. These connect your WordPress site to X via API and automatically tweet when you hit Publish. You can customize the tweet template to include the post title, excerpt, featured image, and a link. Alternatively, set up an RSS-to-tweet workflow using dlvr.it or IFTTT with your WordPress RSS feed URL.
What happened to Make.com's X/Twitter integration?
Make.com permanently removed its X integration on May 30, 2025. All existing automation scenarios that included X now fail with errors. If you were using Make.com for X automation, migrate to Zapier (which restored its X integration in February 2026), IFTTT, or a direct API solution. Make.com recommends switching to Bluesky or using a dedicated scheduling tool like PostPlanify or Buffer.
How many tweets can I post per day via API?
On the Free API tier: ~17 tweets/day (50 requests per 24 hours per user). On the Basic tier ($200/mo): ~100 tweets/day (3,000/month per user). On Pro ($5,000/mo): up to 6,000 tweets/day. Most third-party scheduling tools handle API limits for you — you just schedule and they manage the API calls within limits.
Does X suppress link posts in the algorithm?
Yes, significantly. As of 2025-2026, non-Premium accounts posting links receive near-zero median engagement. Even Premium accounts see reduced reach on link posts vs. native content. If your automation strategy relies on sharing blog links (RSS-to-tweet), consider posting the key insight as native text with an image, then adding the link in a reply or first comment.
👉 Try PostPlanify free for 7 days
Start Automating Your Tweets Today
Tweet automation isn't about replacing human interaction—it's about freeing you up to be MORE human by handling the repetitive parts of posting.
Quick recap:
Best Tweet Automation Methods:
- X Native Scheduler - Free, basic, perfect for starting
- PostPlanify - from $99/mo, or $79/mo billed yearly, with AI captions, cross-platform scheduling, and threads
- Buffer/Hootsuite - $6-249/mo, industry standards, team features
- RSS-to-Tweet - Free-$11/mo, auto-share blog posts
- Zapier/IFTTT - Free-$20+/mo, custom advanced automation
Key Takeaways:
✅ Automate 70% of content, manually engage 30%
✅ Post 3-5 times daily for best growth
✅ Use AI captions to save time, but add personality
✅ Schedule during peak times (Wed 9 AM, Tue 8-10 AM EST)
✅ Monitor engagement, adjust strategy monthly
✅ Never automate customer service or replies
✅ Always preview before scheduling
Your Next Steps:
If you're just starting:
- Use X's native scheduler for free
- Schedule 3 posts this week
- Track which gets best engagement
If you post daily:
- Try PostPlanify's 7-day free trial
- Batch-create 15 tweets
- Schedule for the week
- Compare time saved vs. manual posting
If you run a team:
- Evaluate Hootsuite vs. PostPlanify Premium
- Set up approval workflows
- Define posting guidelines
- Train team on automation best practices
Recommended Tool by Use Case:
- Just starting out: X Native + Buffer Free
- Daily poster, wants AI + analytics: PostPlanify Growth ($99/mo, or $79/mo billed yearly)
- Blogger, auto-promote posts: dlvr.it + X Native
- Agency or multi-brand: PostPlanify Scale ($299/mo, or $239/mo billed yearly) or Enterprise (custom pricing)
- Enterprise, complex needs: Hootsuite ($249+/user/mo)
Ready to Save 5-10 Hours Per Week?
Stop manually posting every day. Start automating strategically.
PostPlanify offers:
- ✅ Analytics across all 10 platforms with best time to post
- ✅ Social inbox to manage comments from one dashboard
- ✅ AI assistant that analyzes your media and writes captions
- ✅ Team collaboration with 3 users on Growth, 6 on Premium, 12 on Scale, and approval workflows from Premium
- ✅ White-label PDF reports for clients on Scale
- ✅ Thread + first comment scheduling
- ✅ Cross-platform posting (X, Instagram, TikTok, LinkedIn, Facebook, YouTube, Threads, Pinterest, Bluesky)
- ✅ MCP server to schedule tweets from Claude, ChatGPT, Cursor, or any AI agent — see the best MCP servers for social media management
- ✅ 7-day free trial
👉 Try PostPlanify Free for 7 Days
Or continue with X's native scheduler—both work. The key is to start automating today.
More automation guides:
- How to Schedule Posts on X: Complete Guide
- Content Batching: Create a Month of Posts in One Day
- PostPlanify X Scheduler Features
- Am I Shadowbanned on Twitter? How to Check and Fix It
Your future self will thank you for starting today.
All your social media in one simple dashboard
Schedule posts, track analytics, and reply to comments/DMs — without switching tabs.
Engagement
+18%
Views
52.8k
About the Author

Hasan Cagli
Founder of PostPlanify, a content and social media scheduling platform. He focuses on building systems that help businesses, agencies, and teams plan, publish, and manage content and social media more efficiently across platforms.


