
Rolling out short-form video content consistently can feel like spinning plates, especially when Instagram Reels and TikTok each demand their own rhythm and optimizations to really take off. In this guide, you’ll learn how to schedule Instagram Reels and TikTok videos in a way that respects each platform’s unique algorithm, audience behavior, and native features, so you can save time, avoid random posting experiments, and amplify your reach without extra ad spend.
We’ll start by looking at how Instagram’s algorithm favors consistent posting slots for Reels - leveraging insights like Reel completion rate, hashtag relevance, and trending audio - then compare that to TikTok’s emphasis on “For You” page signals such as early engagement velocity, sound reuse, and posting frequency. Along the way, you’ll see exactly how to map your content calendar, choose the best posting windows based on native analytics, and use scheduling tools like PostPlanify to automate distribution while still customizing captions, cover images, and calls-to-action for each platform.
Whether you're a solopreneur squeezing content creation into evenings or a small marketing team trying to scale your video strategy, these platform-specific best practices will transform "schedule Instagram Reels" and "schedule TikTok videos" from vague aspirations into a clear, repeatable routine that grows your audience, maximizes engagement, and lets you focus more on creative storytelling than on juggling multiple apps. Let's dive into the differences and unlock a scheduling workflow that works for both Reels and TikTok videos.
1. Instagram Reels: Scheduling Guidelines
When you schedule Instagram Reels, you’re playing into an algorithm that rewards consistency, completion rate, and timely relevance - so first, take advantage of Instagram Insights to identify the days and hours when your Reels get the highest views and saves, then lock those slots into your content calendar and treat them like sacred publishing times rather than “whenever you remember.”
Start by exporting your Reel performance data for the last 30 days - look at completion rate (how many viewers watch to the end), reach (how many unique accounts saw your Reel), and engagement (likes, comments, shares) - and draw a clear picture of your top three posting windows. If you notice that Reels published on Tuesdays at 3 PM consistently get 25% more completions than Monday mornings, schedule future posts in that exact slot, and watch Instagram’s algorithm pick up on your regularity by prioritizing your Reels in follower and non-follower feeds.
Next, remember that Instagram loves signals like trending audio and sharp thumbnail images so when you batch your Reels in PostPlanify (or your favorite scheduler), always attach the trending sound file and upload a custom cover that clearly shows what viewers will learn or experience, because these small touches increase click-through rate and signal to Instagram that your content is high-quality.
When your Reels go live, take a moment to preview the caption in your scheduler. Make sure you:
- Place your main keyword (for example “coffee shop promotions” or “handcrafted jewelry tips”) at the very beginning so it’s obvious to readers and search engines.
- Write a natural hook about what they’ll learn (“Discover how to fill every seat during your morning rush” or “See how to showcase your latest earrings with style”).
- Publish your 3–5 most relevant hashtags - like #CoffeeHouseDeals, #SmallBizMarketing, #HandmadeJewelry - as the first comment so your caption stays clean but you still tap into hashtag search.
This little check helps your caption look polished for viewers and sends the right signals to each platform’s algorithm.
👉 How to Schedule Instagram Posts in 2026?
2. TikTok Videos: Scheduling Guidelines
When you schedule TikTok videos, your goal is to capture the “For You” page momentum by posting at the precise moments when your followers and the wider TikTok community are most likely to engage, so start by switching to a TikTok Pro or Business account and reviewing your analytics dashboard to see when your audience is active, which sounds and hashtags drove the highest early engagement velocity, and which posting slots led to the biggest spike in views within the first hour - then use that data to build a posting calendar that lets you reliably schedule TikTok videos at those optimum windows.
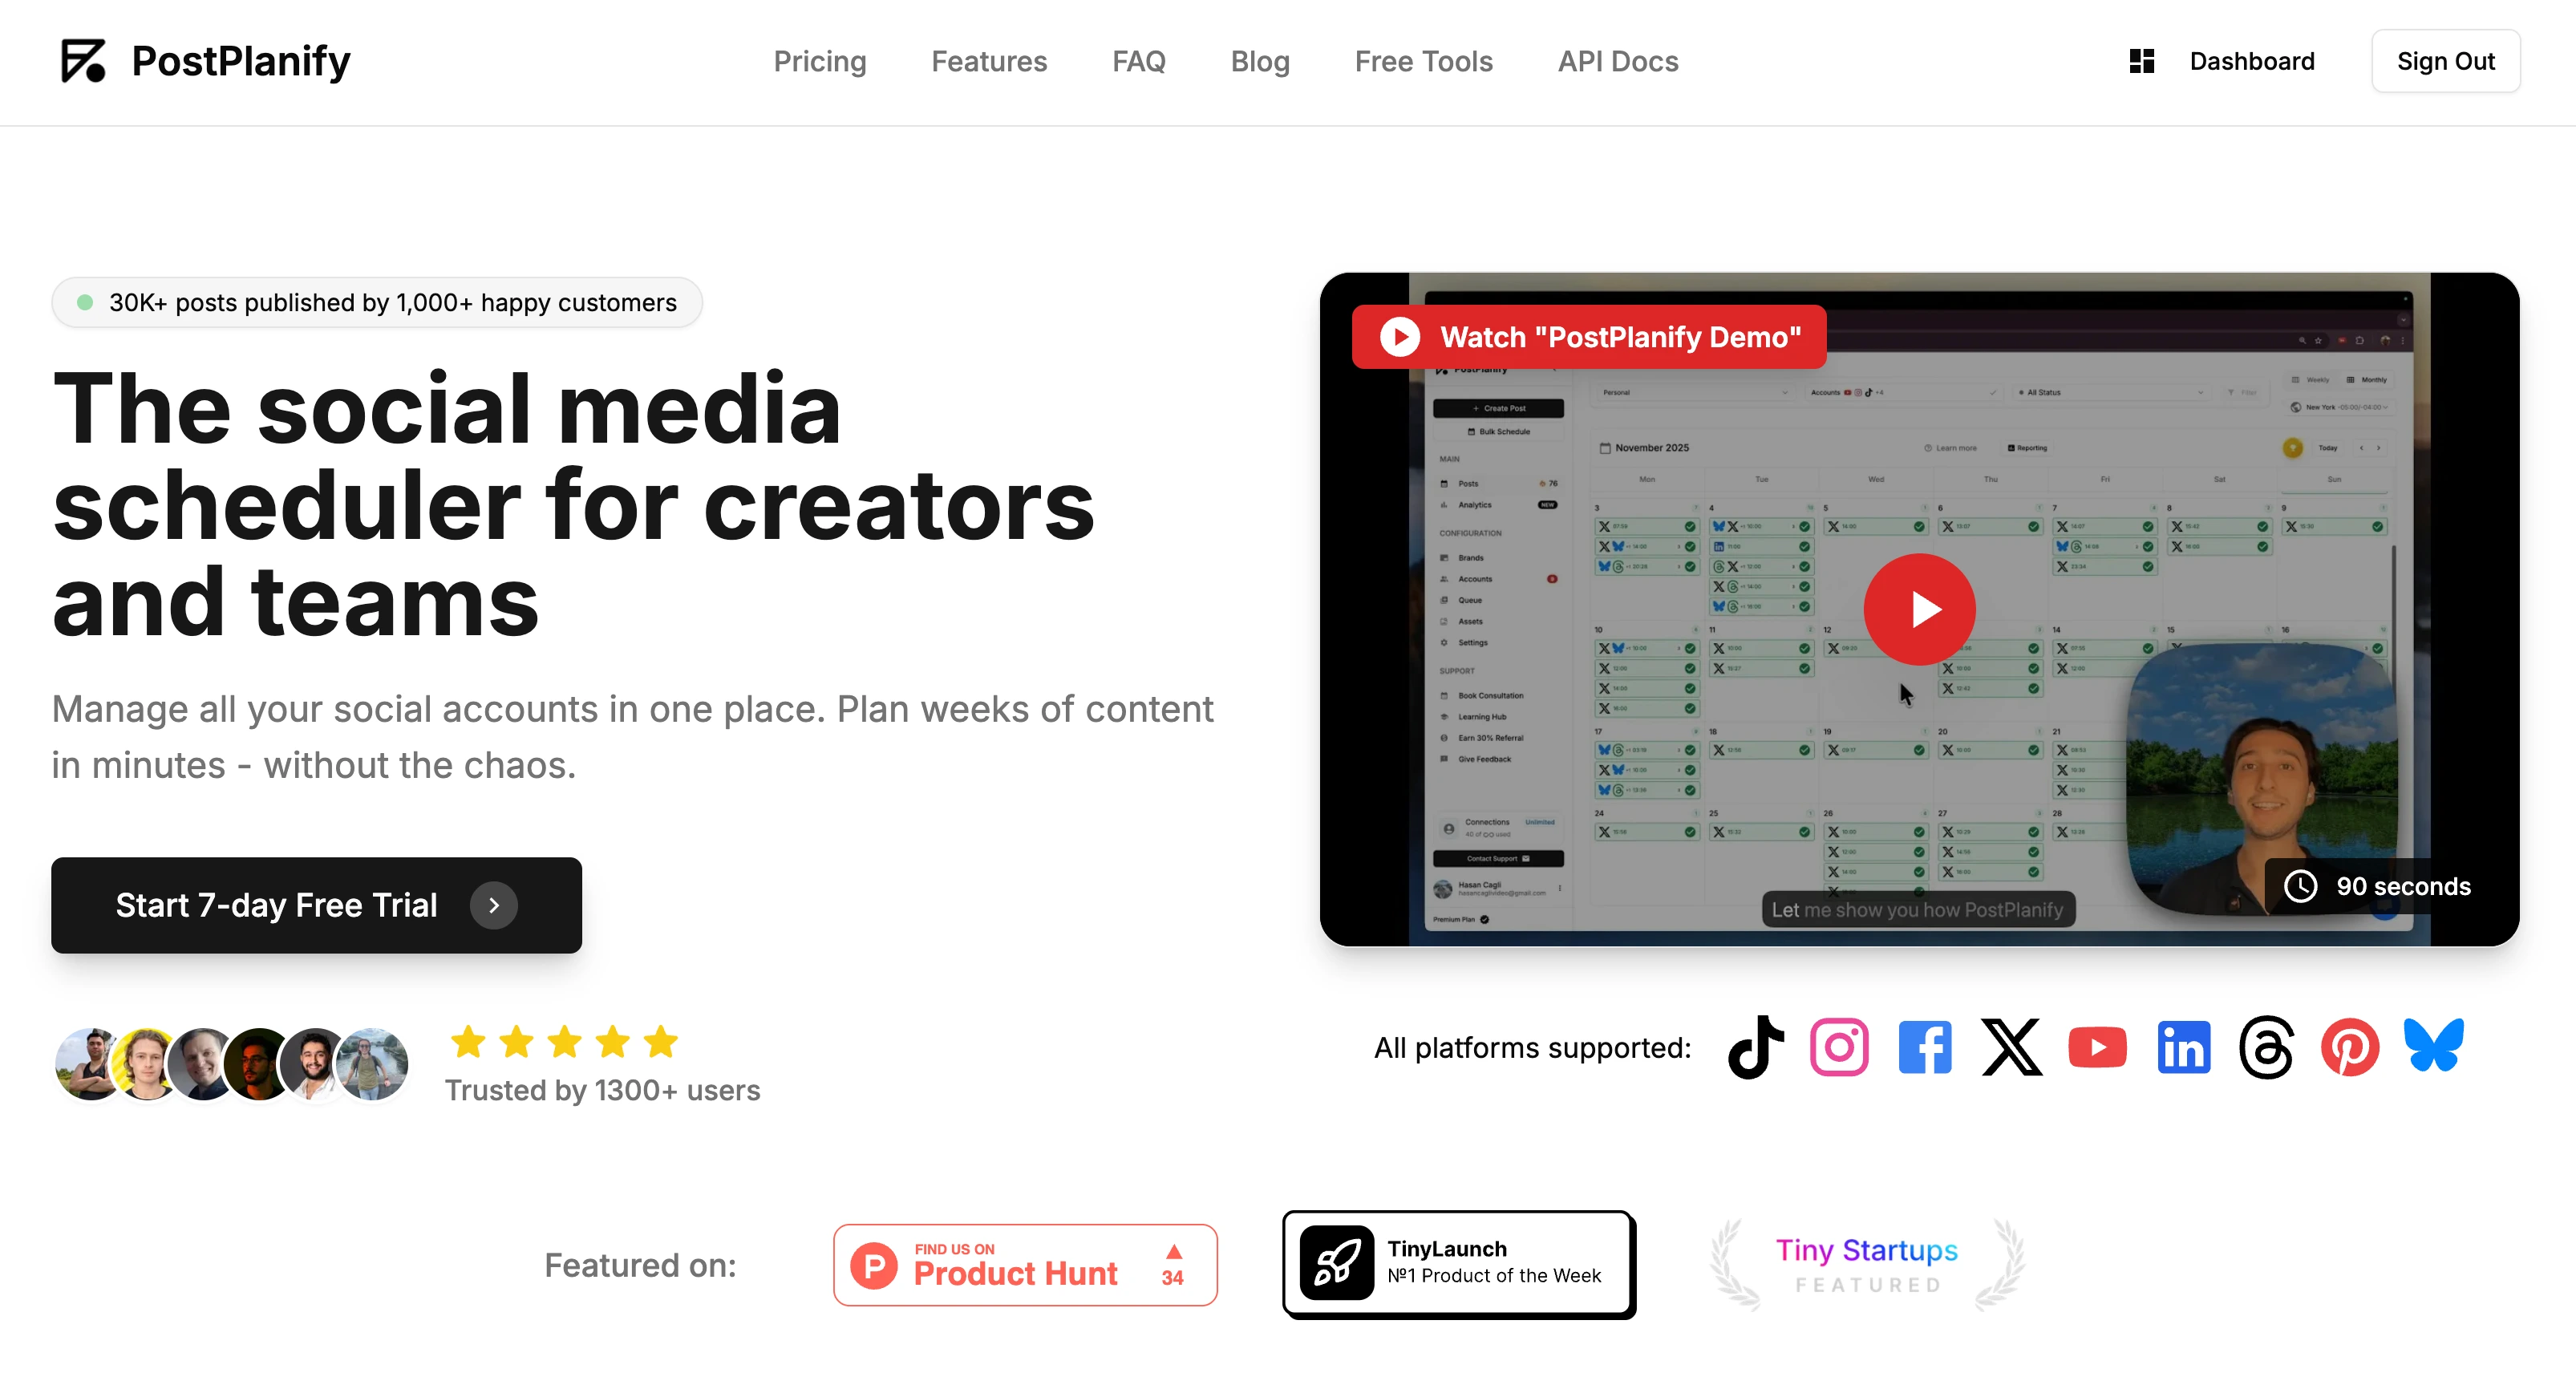
All your social media in one simple dashboard
Schedule posts, track analytics, and reply to comments/DMs — without switching tabs.

Engagement
+18%
Views
52.8k
Next, remember that TikTok’s algorithm rewards rapid interaction and sound reuse, so when you batch-create your videos in PostPlanify or another scheduler, always include a trending audio clip that’s relevant to your niche, add captions that hook viewers in the first three seconds, and choose a clear, compelling thumbnail frame so anyone scrolling will understand your video’s value immediately; this combination of data-driven timing plus creative optimization makes scheduling TikTok videos feel less like guesswork and more like a science.
Finally, don’t treat your schedule as set-and-forget - after queuing your videos, watch the performance of each post in real time, note any patterns in geographic engagement or hashtag performance, and adjust your future scheduling slots and hashtag sets accordingly; by iterating on your TikTok posting schedule week after week, you’ll refine your timing, stay ahead of trends, and ensure that every time you schedule TikTok videos, you’re giving them the best chance to go viral without spending extra ad budget.
👉 How to Schedule TikTok Posts in 2026? | Link Instagram to TikTok
3. Unified Scheduling Workflow with PostPlanify
👉 Learn more about PostPlanify Here!
When you’re ready to schedule Instagram Reels and schedule TikTok videos side by side, PostPlanify’s create-post flow lets you handle both in one streamlined session. Here’s how to make it work:
1. Upload Your Media
- In the “Create Post” screen, click Upload Media and select your vertical Reel or TikTok clip. Before uploading, make sure your content follows each platform's safe zone and dimension guidelines so text and key visuals are never hidden behind UI elements. You can run your TikTok videos through the TikTok safe zone checker to verify your layout before scheduling.
- If you have multiple angles or clips, upload them all at once to build a carousel draft (Instagram only) or keep them grouped for TikTok.
2. Select Accounts & Platforms
- Under Select Accounts, tick your Instagram profile (for Reels) and your TikTok profile.
- PostPlanify will show only those two options so you can see exactly where each video will go.
3. Generate & Customize Captions
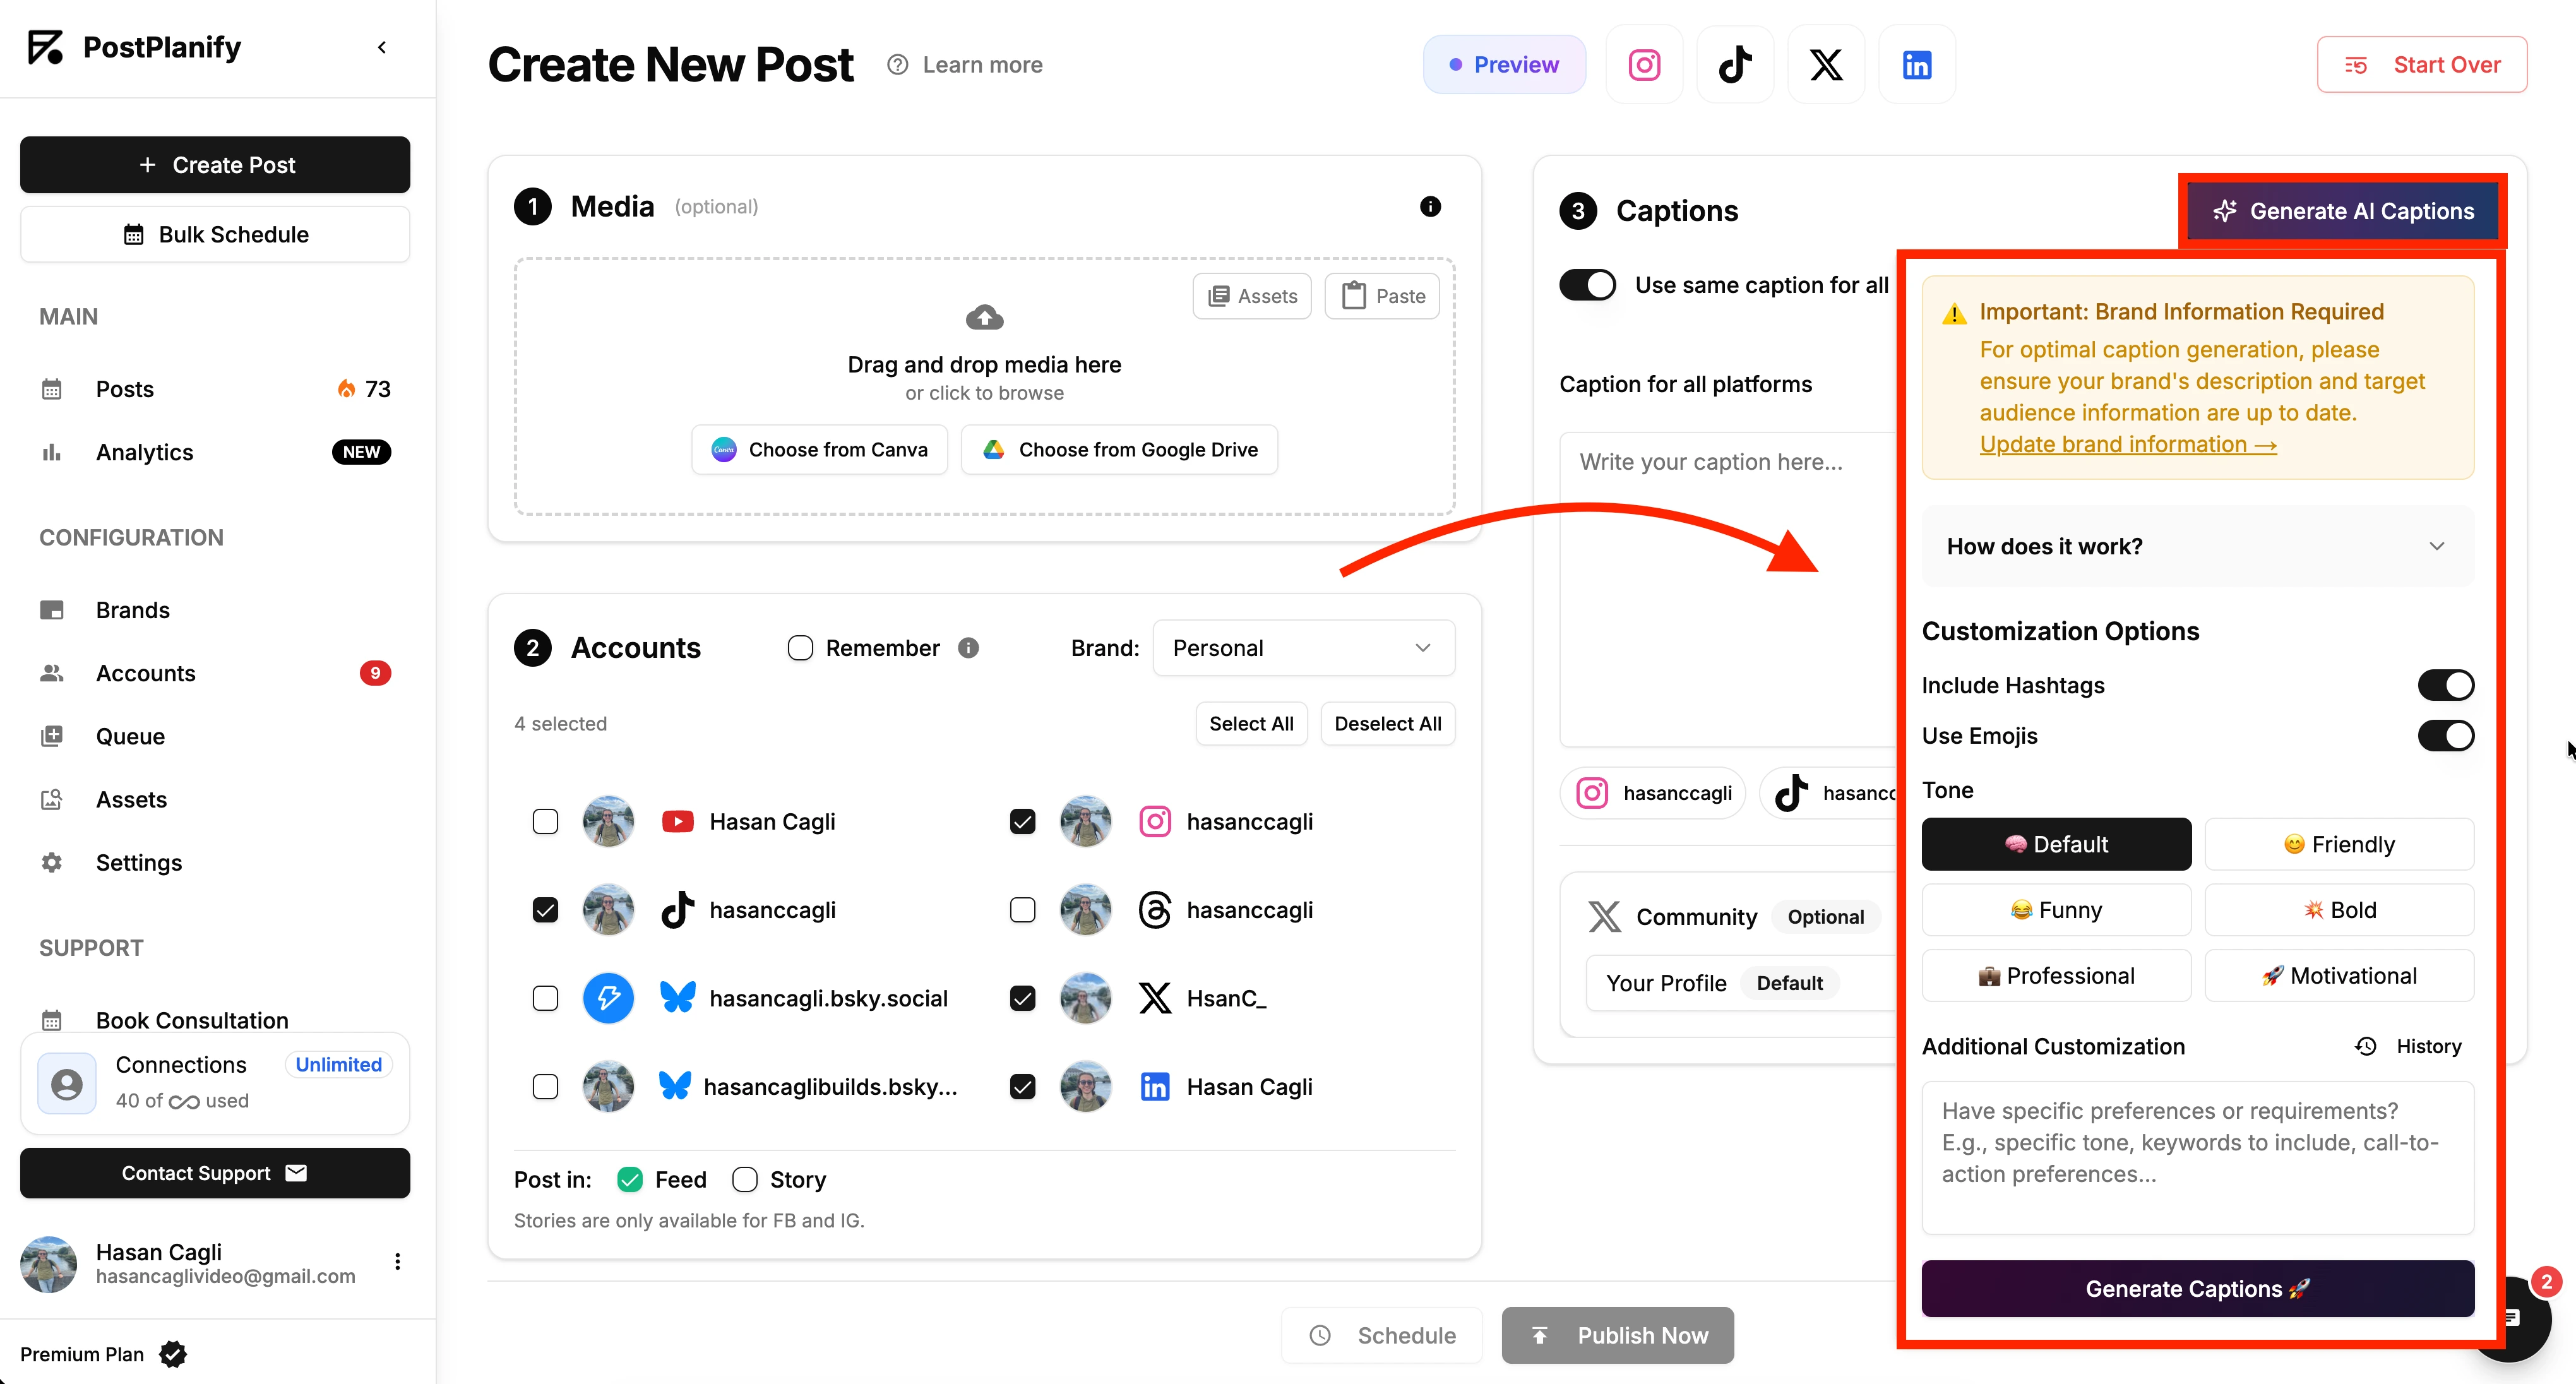
- Hit Generate AI Captions to get a first draft tailored to your brand voice and target audience.
- In the caption editor, tweak the text for each platform: keep Instagram captions punchy and emoji-friendly, and write TikTok captions that hook in the first two lines.
4. Set Cover & Thumbnail
- For Instagram Reels, upload a custom cover image or pick a frame so your grid stays on-brand.
- For TikTok, choose the video frame that best previews the content - PostPlanify shows a live thumbnail preview so you can be sure it looks right.
5. Schedule or Publish
- Click Schedule, pick your date and time manually (e.g., Tuesday at 3 PM for Reels, Thursday at 6 PM for TikTok), and confirm.
- Or hit Publish Now if you want both videos to go live immediately - great for surprise drops or hot trends.
6. Preview Before You Go Live
- Use the built-in Post Preview to check each platform's layout: make sure captions wrap nicely, that your cover isn't cropped, and that any links or tags are correct.
By batching your uploads, caption generation, and scheduling in one unified workflow, you eliminate the need to bounce between apps. You’ll still choose your own best times, craft native-feeling captions, and preview each post - but you’ll save all the back-and-forth and keep your short-form video strategy moving forward in one easy session.
4. Manage Your Scheduled Posts in the Dashboard
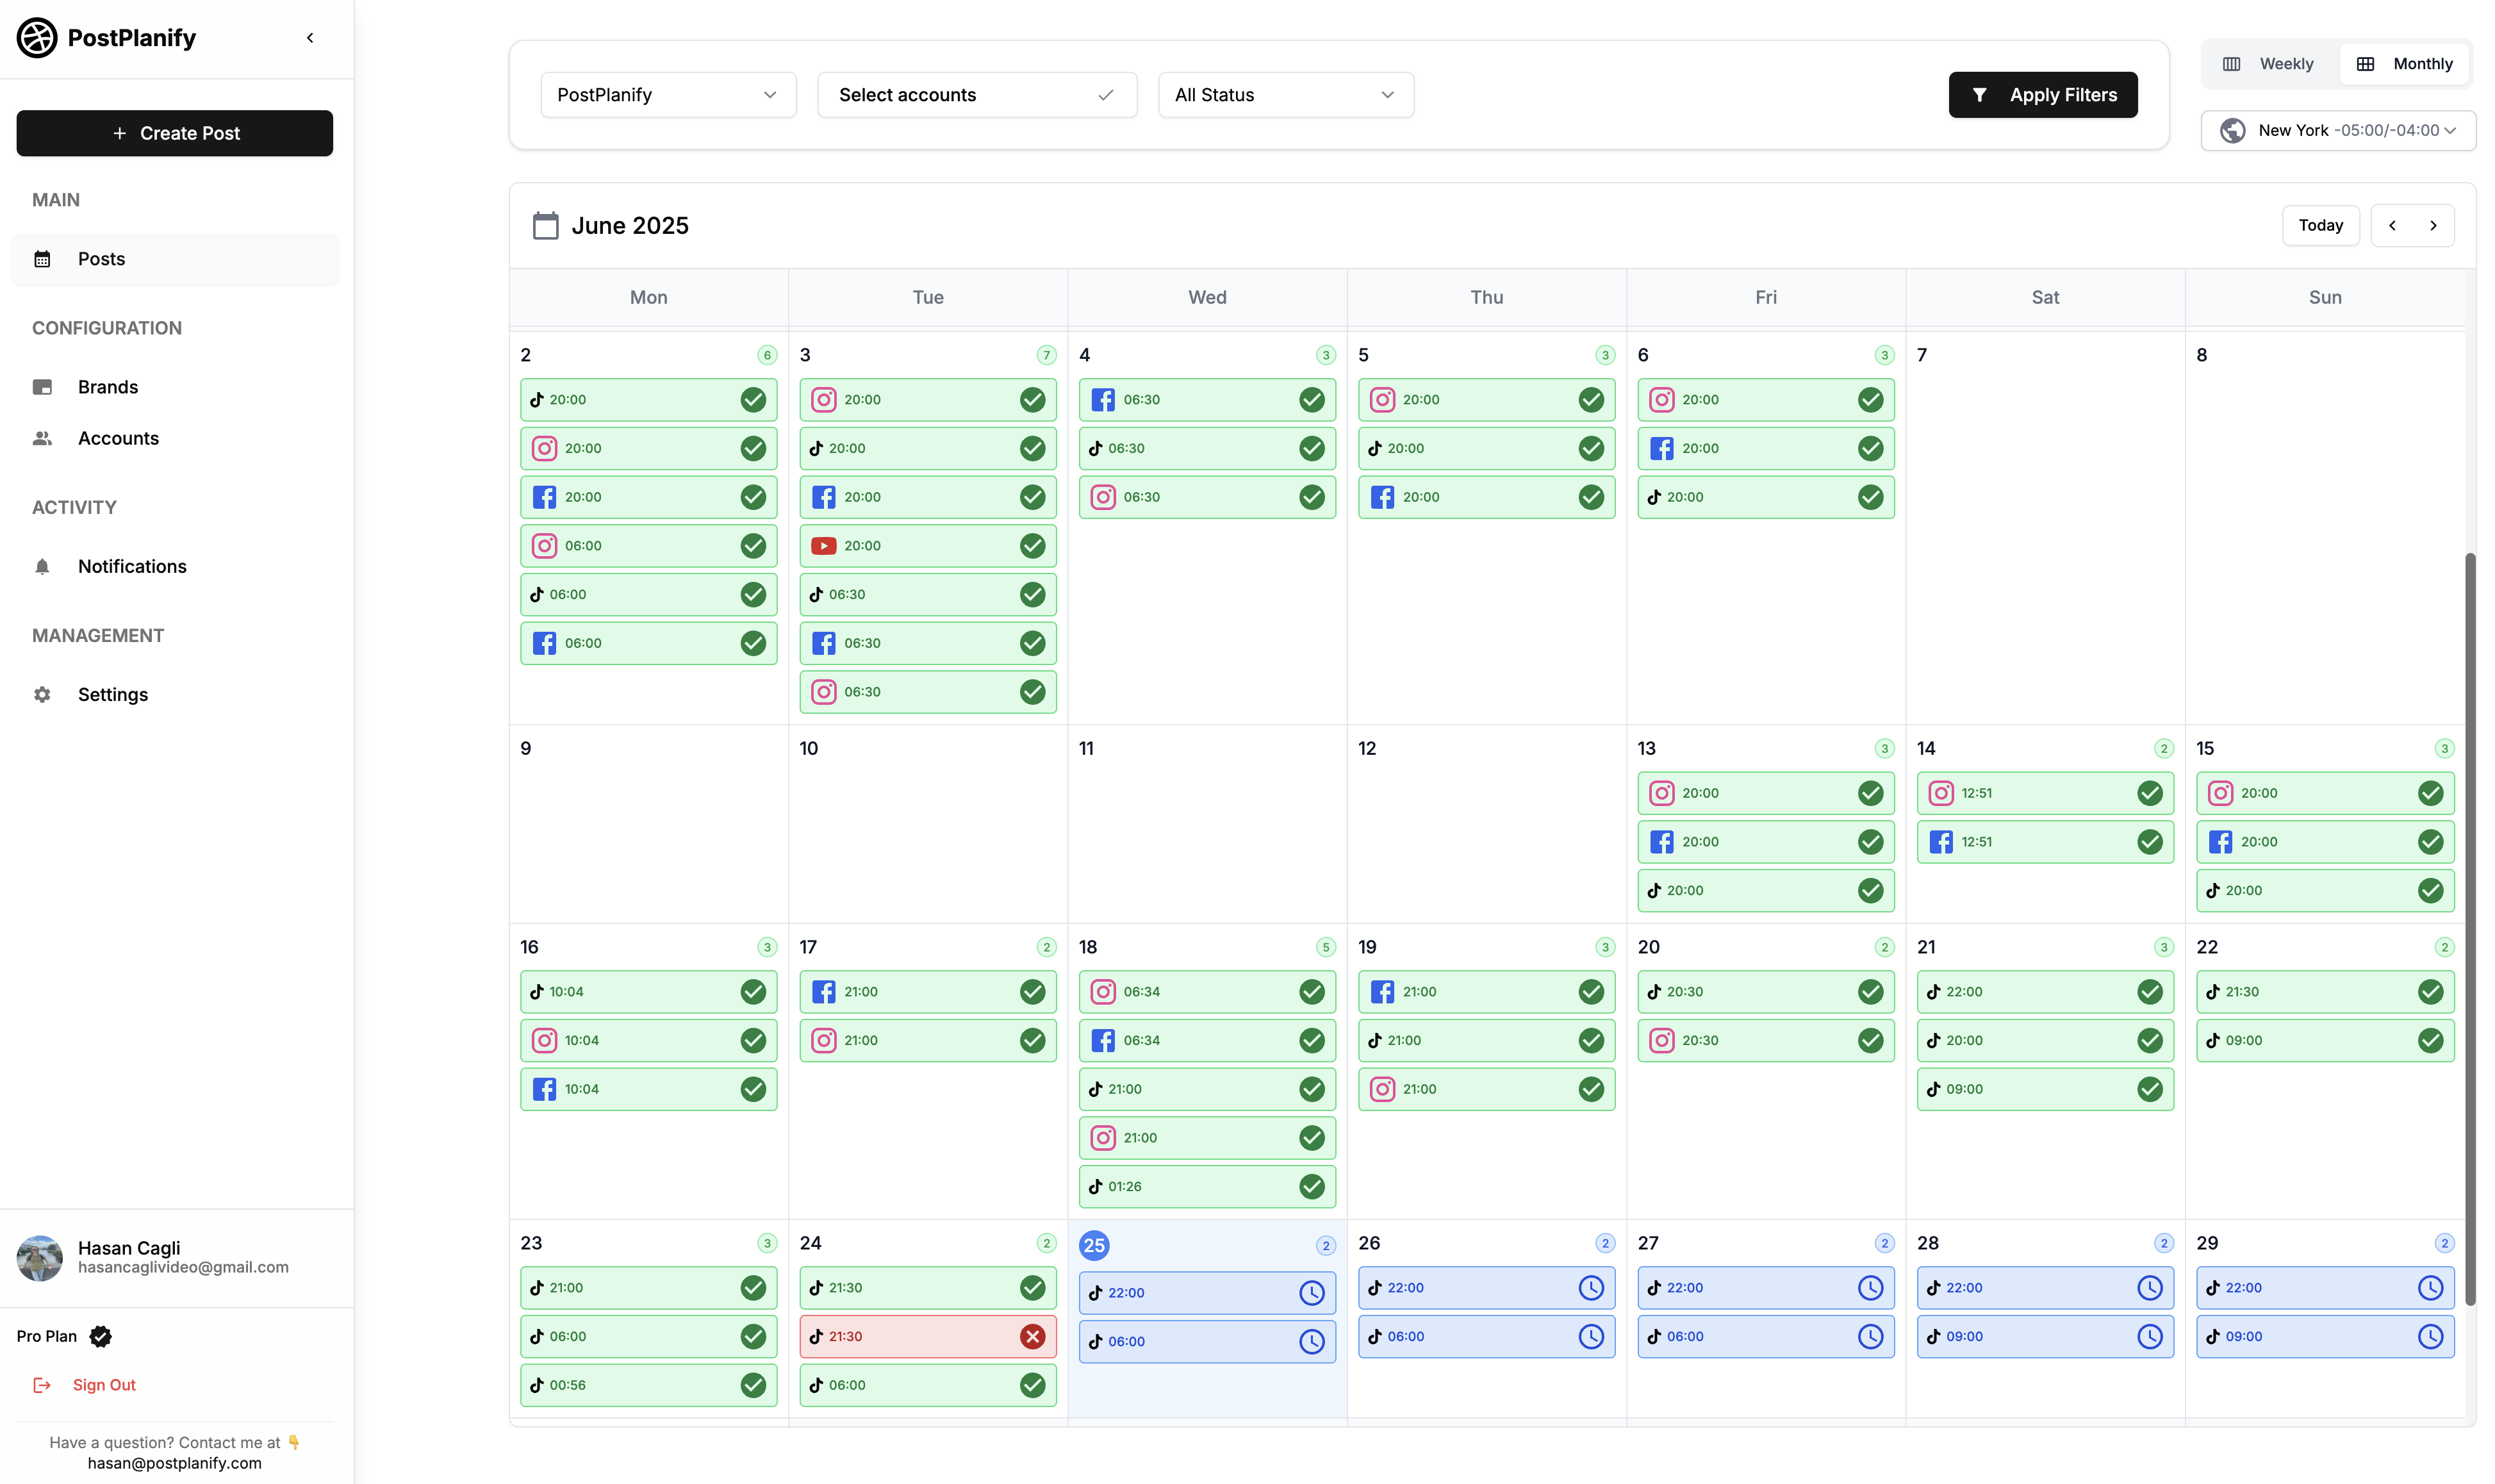
After you schedule Instagram Reels and TikTok videos, it’s just as important to keep an eye on them in PostPlanify’s Dashboard Posts page so nothing slips through the cracks and you always maintain a reliable content pipeline without extra stress. In the weekly calendar view - where the horizontal axis shows the next seven days and the vertical axis shows each hour - you can instantly spot every Reel and TikTok slot you’ve booked, filter by brand or platform to focus on exactly what you need, and see the status of each post (whether it’s scheduled, published, draft, or cancelled) so you know at a glance what’s coming up and what’s already live.
If you ever need to tweak a publish time, update a caption, swap out a clip, or even cancel a scheduled Reel or video because a trend shifted, simply click on that entry in the calendar and hit Edit - make your changes right in the popup, save, and your schedule updates automatically. This means if you discover a hot topic five hours before go-time or want to move a TikTok that underperformed in a test slot to prime time, you can do it in seconds without reuploading media or recreating the entire draft.
Finally, whenever you’ve made edits or cancellations, use the built-in Post Preview one more time to confirm that your updated captions, thumbnails, and scheduled times look correct on both Instagram and TikTok. By treating your Dashboard not just as a static calendar but as an active control center, you’ll maintain the consistency that keeps algorithms happy and your audience engaged, all while making “schedule Instagram Reels” and “schedule TikTok videos” feel effortless and under control.
👉 Learn more about PostPlanify TikTok Scheduler
Import Your Canva Designs Directly into PostPlanify
Even without thumbnail-specific support, PostPlanify’s Canva integration lets you pull in your ready-made graphics or video clips straight from Canva into your scheduled posts - so you spend less time downloading files and more time creating standout content.
1. Connect Your Canva Account
- In Settings, click Connect Canva, authorize access, and your Canva folders and designs will appear inside PostPlanify.
2. Select Canva Media in the Create Post Flow
- When you’re batching Reels or TikTok videos, go to Upload Media and click Import from Canva button.
- Browse your designs - whether it’s a branded intro slide, a custom overlay, or a short video clip - and click Import to add it directly to your post draft.
3. Mix & Match with Your Own Clips
- Combine Canva assets (like branded title cards or animated text) with your raw footage by uploading them together. PostPlanify will handle the file order so your videos play seamlessly in both Reels and TikTok.
4. Schedule or Publish
- Once your Canva designs are in place alongside your clips, click Schedule, pick your days and times for Instagram and TikTok, and let PostPlanify queue everything up.
By importing your polished Canva assets directly, you eliminate extra download/upload steps, ensure consistent branding across platforms, and keep your “schedule Instagram Reels” and “schedule TikTok videos” process fast and friction-free.
👉 Learn more about PostPlanify Instagram Scheduler
FAQ
Can I schedule Instagram Reels with PostPlanify?
Yes. In the Create Post flow you simply upload your Reel video, select your Instagram account, add or generate a caption, set your date and time, and click Schedule. PostPlanify will publish your Reel at the exact moment you choose.
Does PostPlanify support scheduling TikTok videos?
Absolutely. The same workflow you use for Reels applies to TikTok: upload your clip, choose your TikTok profile, tweak the AI-generated caption, pick your publish slot, and hit Schedule. You’ll never have to switch between apps to queue your short-form video content.
How do I import media from Canva into PostPlanify?
First, connect your Canva account under Settings. Then in the Upload Media step, pick the Canva tab, browse your designs, and click Import. Your Canva graphics or short clips flow directly into your post draft alongside any footage you’ve shot.
👉 Instagram Post Scheduler vs Planner: Which Saves You More Time?
Can I edit or cancel a scheduled Reel or TikTok video?
Yes. Go to the Dashboard Posts page, find your scheduled entry in the weekly calendar, click Edit, make your changes to caption, media, or timing, and save - no need to recreate the draft. To cancel, open the same entry and hit Cancel, and PostPlanify removes it from the queue.
Does PostPlanify offer built-in analytics for picking the best posting times?
Yes. PostPlanify includes analytics across all supported platforms and offers best time to post suggestions based on your audience activity. You can use these insights to pick optimal posting slots when scheduling your Reels and TikTok videos.
Can I queue first comments or advanced hashtag presets?
Yes. PostPlanify supports first comment scheduling on Instagram, Facebook, LinkedIn, X, and Threads. You can also save hashtag groups and reuse them across posts with the built-in hashtag manager.
Conclusion
Scheduling Instagram Reels and TikTok videos doesn’t have to be a juggling act. With PostPlanify’s unified Create Post workflow, AI-powered captions, and seamless Canva media import, you can batch your uploads, set precise publish times, and manage everything from the Dashboard Posts page without hopping between platforms.
Start by mapping out your next week’s Reels and TikTok videos, batch-upload your clips and Canva designs, generate native captions, and lock in your optimal slots. Then use the Dashboard to tweak or cancel posts as needed. This streamlined routine turns “schedule Instagram Reels” and “schedule TikTok videos” into a simple, repeatable process - freeing you to focus on storytelling, community engagement, and scaling your brand’s short-form video strategy.
All your social media in one simple dashboard
Schedule posts, track analytics, and reply to comments/DMs — without switching tabs.
Engagement
+18%
Views
52.8k
About the Author

Hasan Cagli
Founder of PostPlanify, a content and social media scheduling platform. He focuses on building systems that help businesses, agencies, and teams plan, publish, and manage content and social media more efficiently across platforms.


