
When you're trying to figure out "how to pin on Instagram Story," you're likely facing one of two specific problems, but the term itself is confusing. Instagram uses "pin" for two entirely different features, which is where most of the frustration begins.
You can either pin a sticker (or text) to a moving object within a video Story, or you can pin an entire Story to your profile as a permanent Highlight.
One is a creative effect to make a video more engaging. The other is a strategic feature to organize your profile content. Knowing which one you need to do is the first step to solving the problem.
Why the Confusion? Two Meanings of "Pin" on Instagram
The core issue is that "pinning" isn't a single action. It refers to two separate functions depending on the context. One is an editing tool used before you publish a Story, and the other is an organizational tool used after a Story is live.
Here’s a clear breakdown to help you identify which solution you're looking for.
| Pinning Method | What It Is | Common Scenarios & Use Cases | Limitations & Edge Cases |
|---|---|---|---|
| Pinning in a Video Story | This feature "sticks" an element like a GIF, poll, or text to a moving object in a video. The element then follows the object as it moves. | Unboxing a product and pinning a "New!" sticker to it. Pinning a question sticker that follows a person's face. Adding a funny GIF that chases a pet. | Only works on video content, not static photos. The tracking can fail if the video is low-quality, the object moves too fast, or something blocks it from view. |
| Pinning as a Highlight | This action saves a published Story to a permanent collection on your profile, located just below your bio. It prevents the Story from disappearing after 24 hours. | Creating permanent folders for FAQs, tutorials, or customer reviews. Showcasing a portfolio of work or a product catalog. Grouping behind-the-scenes content. | You can only add a Story to a Highlight after it has been published. You must have the "Story Archive" feature enabled, or the Story will be permanently deleted after 24 hours. |
One is a dynamic effect; the other is a permanent organizational tool. Once you know which you need, the steps become straightforward.
Scenario 1: Pinning an Element in a Video Story
This is the creative pinning feature. You record a video, add an element like a poll or sticker, and then you can "pin" it to a specific person or object in the video.
For example, if you're demonstrating a new software feature on a laptop, you could pin a "Click Here" sticker to the cursor, and the sticker will move perfectly with the cursor across the screen. This makes your content feel more professional and directs the viewer's attention precisely where you want it.
You need this type of pinning if you are trying to:
- Draw attention to a specific moving item in a busy video.
- Add a dynamic, polished effect to stop users from skipping your Story.
- Create interactive moments, like pinning a poll that follows a person as they walk and talk.
Scenario 2: Pinning a Story as a Profile Highlight
This type of pinning is a strategic move to extend the life of your content. By default, an Instagram Story vanishes after 24 hours. Pinning it as a Highlight saves it to a permanent, clickable folder that lives on your profile page.
These are the small, circular icons you see under a user's bio. They are essential for any business or creator looking to organize important information. You can create different Highlights for categories like "Services," "Reviews," or "About Us," turning your profile into a valuable resource for new followers.
You need this type of pinning if you are trying to:
- Organize evergreen information so followers can easily find answers to common questions.
- Showcase product catalogs, menus, or service offerings for your business.
- Build a portfolio of your work, user-generated content, or press mentions.
Planning your content with Highlights in mind from the start is key to a polished profile. To get ahead, you can learn how to schedule anything on Instagram, ensuring your content pipeline is always ready.
All your social media in one simple dashboard
Schedule posts, track analytics, and reply to comments/DMs — without switching tabs.

Engagement
+18%
Views
52.8k
How to Pin Stickers and Text in a Video Story (Step-by-Step)
If you want to make your video Stories more dynamic, pinning an element—like a sticker, GIF, or text box—is how you lock it onto a moving object. This creates a professional-looking effect that can stop viewers from tapping away. Here’s the practical, step-by-step process.
Step-by-Step Instructions
First, either record a video directly in the Instagram Stories camera or upload a video from your camera roll. Once the video is loaded and trimmed to your liking, add the sticker, GIF, or text you want to pin. You can resize it and place it near where you want the action to start.
Now, follow these steps to pin it:
- Press and hold your finger on the sticker or text element you just added.
- The video will pause, and a slider bar will appear at the bottom of the screen. This is the timeline of your video.
- Use the slider to scrub through the video and find the exact frame where the object you want to pin to is clearly visible.
- Drag the sticker and place it directly on top of that moving object.
- Tap the "Pin" button that appears at the bottom.
Instagram’s algorithm will then process the video to "stick" your element to the object's path of motion.
A quick but important tip: to ensure your pinned elements aren't cut off by Instagram's user interface (like your username at the top or the reply bar at the bottom), it's a good practice to check your design with an Instagram safe zone checker before publishing.
Pro Tip: For the best tracking results, use videos with clear lighting and high contrast between the moving object and its background. This gives Instagram's tracking algorithm a much better chance of locking on accurately and smoothly.
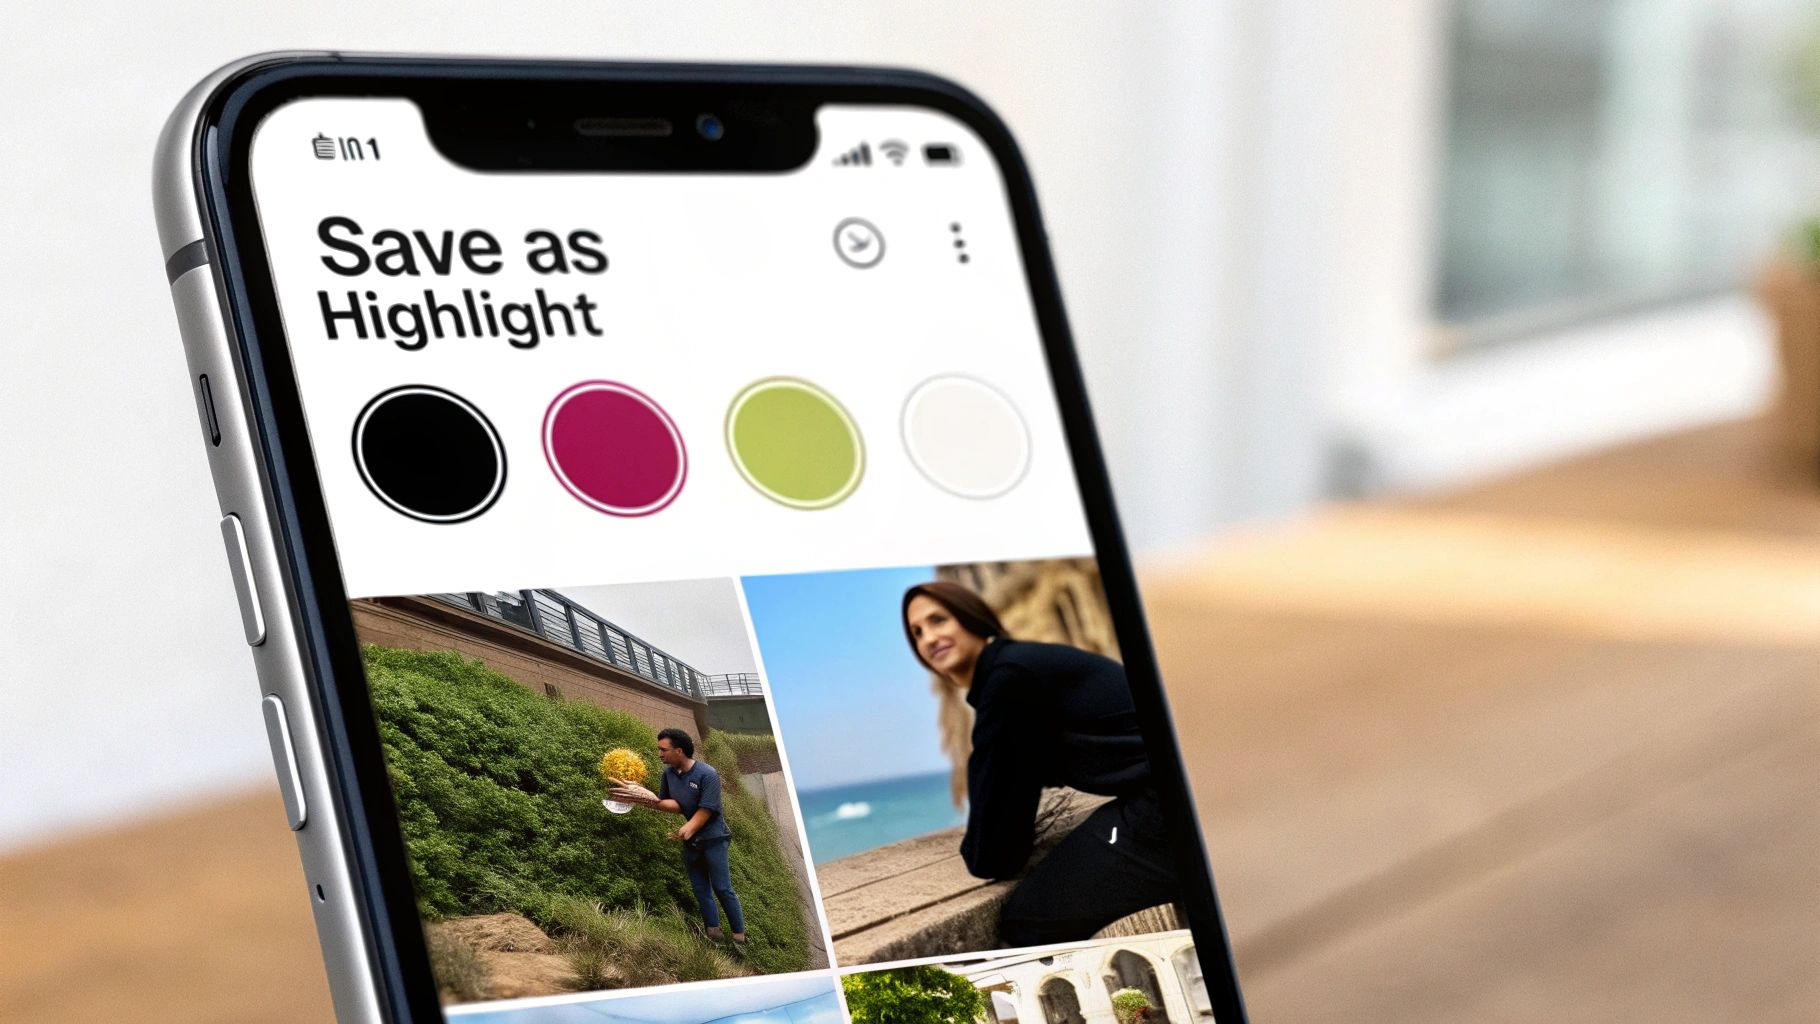
This infographic breaks down the two main ways you can pin on Instagram, showing the flow from the initial idea to the final placement on your profile or in a Story.
As the visual guide shows, pinning within a video is all about adding a creative, in-the-moment effect. Pinning a Story to your profile, on the other hand, is a more strategic move for long-term organization.
Why Pinning an Element in a Story Might Fail
Sometimes, the pinning feature can be buggy or unresponsive. If your sticker isn't tracking correctly, it's usually due to one of these common causes:
- The object is moving too fast or erratically: Quick, unpredictable movements can confuse the tracking algorithm.
- There is low contrast or poor lighting: If the object blends into the background, Instagram's algorithm can't "see" it well enough to follow it.
- The object leaves the frame: The pin will be lost the moment the object it’s attached to disappears from the screen.
- Something obstructs the object: If another person or object passes in front of what you're tracking, the pin can easily become disconnected.
- App bug or outdated version: Sometimes the issue is simply a bug in your current version of the Instagram app.
Starting with a high-quality video is half the battle. If you're creating a lot of video content, exploring top AI video generator tools can help you produce clean, sharp visuals that make features like pinning work more reliably.
How to Pin a Story to Your Profile as a Highlight (Step-by-Step)
Now for the strategic part. Pinning a Story to your profile as a Highlight is one of the most effective ways to organize your Instagram presence. This feature turns temporary 24-hour Stories into evergreen content collections that are immediately visible under your bio, acting as a navigation menu for your profile.
Think of Highlights as curated folders for your most important information. Businesses and creators use them to organize FAQs, customer testimonials, product tutorials, or behind-the-scenes content. This makes your profile instantly more valuable to both new and existing followers.
Step-by-Step Instructions
The process pulls from your Story Archive, so the first critical step is to ensure this feature is enabled. If it isn't, your Stories will be permanently deleted after 24 hours.
To enable your Story Archive: Go to your Profile > Menu (☰) > Settings & Privacy > Archiving and downloading and make sure Save story to archive is toggled on.
Once your archive is active, follow these steps to create a Highlight:
- Navigate to your Instagram profile page.
- Tap the + New circle located directly under your bio.
- Your Story Archive will open. Tap to select all the Stories you want to include in this Highlight.
- Tap Next.
- On the next screen, you can edit the cover image and give your Highlight a short, descriptive name (e.g., "About Us," "FAQs," "Products").
- Tap Add (on iPhone) or Done (on Android), and the Highlight will immediately appear on your profile.
You can add up to 100 Stories to a single Highlight. However, a limitation to be aware of is that if you have more than 100 clips, Instagram will remove the oldest ones as you add new ones. For clarity, it's better to keep Highlights focused on a single topic.
Why is this so important? Over 500 million people watch Instagram Stories daily. Pinning your best content as Highlights allows it to serve your audience long after the initial 24-hour period. According to research from Amra & Elma on top brands' Story habits, the most successful accounts post Stories frequently and strategically save their most valuable content in Highlights for new followers to discover.
How to Design Cohesive Highlight Covers
A polished profile often comes down to small details like custom Highlight covers. They create a strong, branded look and feel.
- Create Custom Covers: Use a free design tool like Canva to create simple icons or graphics that align with your brand's colors and fonts. Keep the designs clean and easily recognizable.
- Add Covers Without Posting to Your Story: You don't need to post a cover image to your live Story. Simply tap and hold an existing Highlight, select Edit Highlight, then Edit Cover. From there, tap the image icon to select any picture from your phone's camera roll.
- Reorder Your Highlights: Your most recently updated Highlight always appears first (on the far left). To change the order, you can add a temporary Story to a Highlight and then immediately remove it. This action "refreshes" the Highlight and bumps it to the first position.
Thinking about your Highlights before you create the Stories makes the whole process smoother. If you want to adopt this strategic workflow, our guide on how to schedule Instagram Stories can help. Planning your content in a tool like PostPlanify lets you visualize your entire content calendar, ensuring your Stories are impactful both on day one and as permanent Highlights.
Troubleshooting Common Instagram Pinning Issues
It's a common point of frustration: you’ve shot the perfect video, picked the right sticker, and you're ready to pin it, but the feature glitches out, or the option is missing entirely.
Most pinning problems are caused by a few common technical issues. Whether a sticker refuses to track a moving object or a Story disappears before you can save it as a Highlight, here's a breakdown of what's happening and how to fix it.
Problem: Pinning a Sticker to a Video Fails
This is the most frequent issue. You try to pin a sticker, but it doesn't track the object correctly, or the "Pin" option is grayed out or unresponsive. This is almost always a technical problem with the app or the video file itself.
Here is a checklist to troubleshoot the issue:
- Update Your Instagram App: This is the most common fix. Instagram is constantly pushing updates and bug fixes. If you're using an older version, features like this can become unstable. Go to the App Store or Google Play Store and check for an update.
- Check Your Video Quality: The tracking algorithm needs a clear, well-lit target. If your video is blurry, the lighting is poor, or the object you’re trying to pin to blends into the background, the pin will fail. High contrast between the object and background is key.
- Analyze the Object's Movement: The algorithm is good, but it has limits. If the object moves too erratically, leaves the frame, or is blocked by another object, the pin will lose its lock. Try to use footage with smoother, more predictable motion.
- Restart the App or Your Phone: If all else fails, a simple restart can clear temporary glitches or cache issues that may be interfering with the feature.
If you’ve tried all of the above, it could be a temporary server-side issue with Instagram. Some of the same troubleshooting steps in our guide for when Instagram scheduled posts are not working can also be helpful here.
Problem: Story Isn't Available to Add to a Highlight
This problem is almost always a settings issue, not a bug. You post a great Story, but when you go to add it to a Highlight a day later, it has vanished from your archive.
The Cause: Your Story Archive feature is likely turned off.
The Fix: Go to your Profile > Menu (☰) > Settings & Privacy > Archiving and downloading and ensure the Save story to archive toggle is enabled. If this setting is off, Instagram permanently deletes your Stories after 24 hours, making them unavailable for future Highlights.
Pinning your best Stories as Highlights is a critical strategy. With brand Stories accounting for a massive 71.9% of their total content, pinning is the only way to get more value out of that effort. The average Story's organic reach is already a small 0.91 users per follower, and with audience attention spans shrinking, exit rates are hitting 12.5% by the 15th slide. These 2025 Instagram Story findings highlight just how important it is to pin your top-performing content where people can find it easily.
Creative Strategies for Using Pinned Stories

Knowing the technical steps is one thing, but using these features creatively is what will make your content stand out. Here are some practical strategies for both types of pinning.
How to Use In-Story Pins Effectively
Pinning stickers in a video is more than a gimmick. Use it to make your content more interactive and clear.
- Product Demos: When unboxing a product or demonstrating a feature, pin a "Quiz" or "Poll" sticker that follows the item as you move it. This is a great way to engage your audience and get instant feedback.
- Storytelling: Pin a location tag or a "Sound On" GIF that follows a person as they walk through a scene. This adds a layer of context and personality that makes your content feel more immersive.
- Tutorials: Pin text labels or arrows to specific items to guide your viewers' attention. For example, in a cooking video, you could pin the name of an ingredient to the bowl as you add it.
These small interactive elements turn passive viewers into active participants.
How to Build a Powerful Highlight Library
Your Story Highlights are your profile's welcome mat and navigation system. Treat them as a curated library, not a random storage folder.
Here are some real-world examples:
- For E-commerce Brands: Create focused Highlights like "New Arrivals," "How to Style," "Customer Reviews," and "FAQs." This makes it easy for potential customers to find the information they need to make a purchase.
- For Service Providers: Build trust with Highlights like "Case Studies," "Client Results," and "Our Process." Use a "Book Now" Highlight to link directly to your booking page.
- For Content Creators: Showcase your personality and build community with Highlights for "Q&A Sessions," "Travel Guides," "My Setup," or "Daily Routines."
Why this works: With 70% of Instagram users watching Stories daily, your Highlights are the most reliable way to overcome the 24-hour limit. Brand Stories have an impressive 88.2% completion rate, making this prime real estate for content that needs to be seen.
Once your content is pinned, the next step is getting people to watch it. You can explore more advanced strategies to get more views on Instagram Story to maximize your impact.
Quick Answers to Common Pinning Questions
Here are some quick, direct answers to the most common questions about pinning on Instagram.
Can I Pin a Sticker on a Static Photo in a Story?
No, this feature is exclusive to video content. The pinning technology relies on analyzing motion between frames to "track" an object. Since a static photo has no motion, there is nothing for the sticker to lock onto.
How Many Stories Can One Highlight Hold?
You can add up to 100 photos or videos to a single Highlight. However, a key limitation is that once you exceed 100, Instagram will start removing the oldest clips as you add new ones. To avoid this, it's best to keep Highlights focused and create new ones for different topics rather than letting one become overly long.
Why Did My Pinned Sticker Stop Tracking Mid-Video?
This is a common tracking error. It usually happens if the object it’s pinned to:
- Moves out of the video frame.
- Is temporarily blocked by another object (like a hand passing in front of it).
- Moves too quickly or erratically for the algorithm to follow.
- Moves into an area with poor lighting or low contrast, causing the algorithm to "lose" it.
To prevent this, use stable video with clear, predictable motion whenever possible.
Planning your content ahead of time can prevent most of these issues. A platform like PostPlanify allows you to schedule your Stories and visualize your feed and profile layout before anything goes live. This helps ensure your pins and Highlights are effective and look professional.
Start your 7-day free trial today.
Bonus: How to Pin a Post to Your Instagram Grid (Profile Pinning)
There's a third type of "pinning" on Instagram that many people confuse with Story pinning: pinning a feed post to the top of your profile grid. This is a completely separate feature from both in-Story sticker pinning and Story Highlights.
What Grid Pinning Does
When you pin a feed post, it stays locked at the top of your profile grid — the first thing visitors see when they land on your page. You can pin up to 3 posts at a time. Pinned posts display a small pin icon in the top-right corner.
This is useful for:
- Showcasing your best-performing or most important content
- Highlighting a current promotion, launch, or announcement
- Ensuring your brand intro post is always visible to new visitors
How to Pin a Post to Your Instagram Grid
- Go to your profile and find the post you want to pin
- Tap the three-dot menu (⋯) in the top-right corner of the post
- Select "Pin to your profile"
- The post moves to the top of your grid with a pin icon
To unpin, tap the three-dot menu on the pinned post and select "Unpin from profile."
Grid Pinning vs Story Highlights vs In-Story Pinning
| Feature | Grid Pinning | Story Highlights | In-Story Pinning |
|---|---|---|---|
| What it pins | A feed post to the top of your grid | A Story to a permanent profile collection | A sticker/text to a moving object in a video |
| Where it appears | Top of your profile grid (first 1-3 spots) | Circular icons below your bio | Inside the Story video itself |
| Maximum | 3 pinned posts | Unlimited Highlights (100 Stories each) | No hard limit per Story |
| Content type | Feed posts only (images, carousels, Reels) | Stories only | Video Stories only |
| Duration | Permanent until you unpin | Permanent until you remove | Lives for 24 hours (or in Highlights) |
| Best for | Showcasing top content to profile visitors | Organizing evergreen content by topic | Making videos more dynamic and interactive |
For tips on making your entire grid look cohesive alongside pinned posts, see our Instagram grid layout guide.
Frequently Asked Questions
Can I pin a post to my Instagram grid?
Yes. You can pin up to 3 feed posts (images, carousels, or Reels) to the top of your profile grid. Tap the three-dot menu on any post and select "Pin to your profile." This is separate from Story pinning — it keeps a feed post permanently visible at the top of your grid. Pinned posts show a small pin icon and remain in position regardless of new uploads.
How many elements can I pin in one Instagram Story?
There's no official limit, but practically, 2-3 pinned elements per video Story works best. More than that can cause tracking conflicts (stickers fighting for lock position) and makes the Story look cluttered. Each pinned element adds processing load, so heavy pinning can also cause the tracking to become less accurate.
Can I unpin a Story from Highlights?
Yes. Tap and hold the Highlight on your profile, select "Edit Highlight," then deselect the Story you want to remove. Alternatively, you can delete the entire Highlight by tapping and holding it and selecting "Delete Highlight." Removing a Story from a Highlight doesn't delete it from your archive — it just removes it from that collection.
Does pinning a sticker work on Instagram Reels too?
Yes — the same sticker pinning feature works in Reels. Record or upload your Reel, add a sticker or text, press and hold it, scrub to the right frame, and tap Pin. The tracking works the same way as Stories. This is great for product demos, tutorials, and labeling moving objects in Reels.
Can I pin someone else's Story as my Highlight?
No. You can only add Stories you've posted yourself to your Highlights. If someone mentions you in their Story, you can reshare it to your own Story first, and then add that reshared version to your Highlights. But you cannot directly pin another user's Story to your profile.
Related: How to Schedule Instagram Stories | Views on Instagram Stories | Changing Background Color of Instagram Story | Instagram Post vs Story vs Reel | Instagram Grid Layout Guide | Instagram Image Size Guide | Instagram Safe Zone Checker | How to Grow Instagram Followers Organically | How to Go Viral on Instagram
All your social media in one simple dashboard
Schedule posts, track analytics, and reply to comments/DMs — without switching tabs.
Engagement
+18%
Views
52.8k
About the Author

Hasan Cagli
Founder of PostPlanify, a content and social media scheduling platform. He focuses on building systems that help businesses, agencies, and teams plan, publish, and manage content and social media more efficiently across platforms.


