
If you're trying to figure out the perfect Instagram image size, here’s the direct answer: always export your images with a width of 1080 pixels. For a classic square post, that means 1080px by 1080px (a 1:1 ratio). To maximize your visibility in the feed, use a portrait post at 1080px by 1350px (a 4:5 ratio). Sticking to these dimensions is the key to ensuring your images look sharp and professional every time, avoiding Instagram's automatic and often destructive compression.
Why Your Instagram Image Size Matters
Getting your Instagram image size right isn't just a technical detail—it directly impacts your content's performance and your brand's perception. When you upload an image that doesn't fit Instagram's ideal dimensions, the platform's algorithm has to either compress or crop it to make it fit.
Why this is a problem:
- Compression: Instagram prioritizes a fast user experience, so it automatically compresses large image files. This process reduces file size but often strips out detail, resulting in blurry, pixelated, or low-quality photos.
- Cropping: If your image's aspect ratio is incorrect (for example, a very wide panoramic photo), Instagram will automatically crop it to fit the feed. This can cut off key subjects, ruin your composition, and make your post look unprofessional.
By optimizing your images before you upload, you take control of the final result. Correctly sized images load quickly, remain crisp on all devices, and ensure that important visual elements aren't accidentally removed. This is especially critical for Stories and Reels, where text overlays and interactive stickers must be placed precisely to avoid being covered by the app's interface.
The Core Instagram Formats
Each of Instagram's primary content types is designed for a specific viewing experience and has its own optimal dimensions. This infographic provides a quick visual reference for the three most common formats you'll work with.
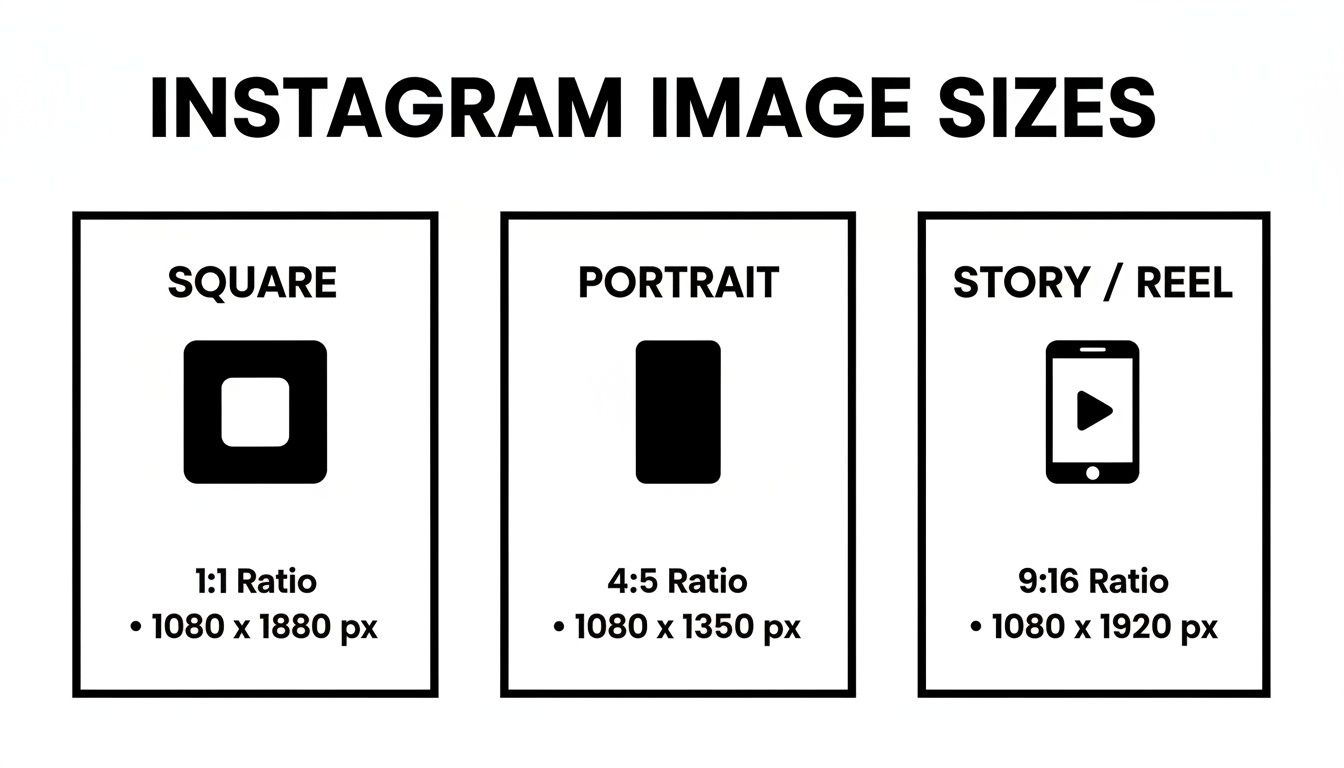
As you can see, portrait and Story formats are taller. This is intentional—they're designed to maximize screen space on mobile devices and hold a user's attention longer as they scroll. However, dimensions are only the first step. You also need to consider the "safe zones" to avoid having your username, captions, or buttons obscure key parts of your image. To learn more, read our complete guide to social media safe zones.
Instagram Image Size Quick Reference
Feeling overwhelmed by the numbers? We've created a simple reference table with all the key Instagram dimensions. Bookmark this page so you can quickly find the exact specs you need.
| Post Type | Recommended Dimensions (Pixels) | Aspect Ratio |
|---|---|---|
| Square Post | 1080 x 1080 | 1:1 |
| Portrait Post | 1080 x 1350 | 4:5 |
| Landscape Post | 1080 x 566 | 1.91:1 |
| Story / Reel | 1080 x 1920 | 9:16 |
| Profile Photo | 320 x 320 | 1:1 |
Keeping this table handy is the easiest way to ensure your content is always optimized for the best possible quality. Not sure which format to use? Our guide on Instagram Post vs Story vs Reel breaks down when each format works best.
All your social media in one simple dashboard
Schedule posts, track analytics, and reply to comments/DMs — without switching tabs.

Engagement
+18%
Views
52.8k
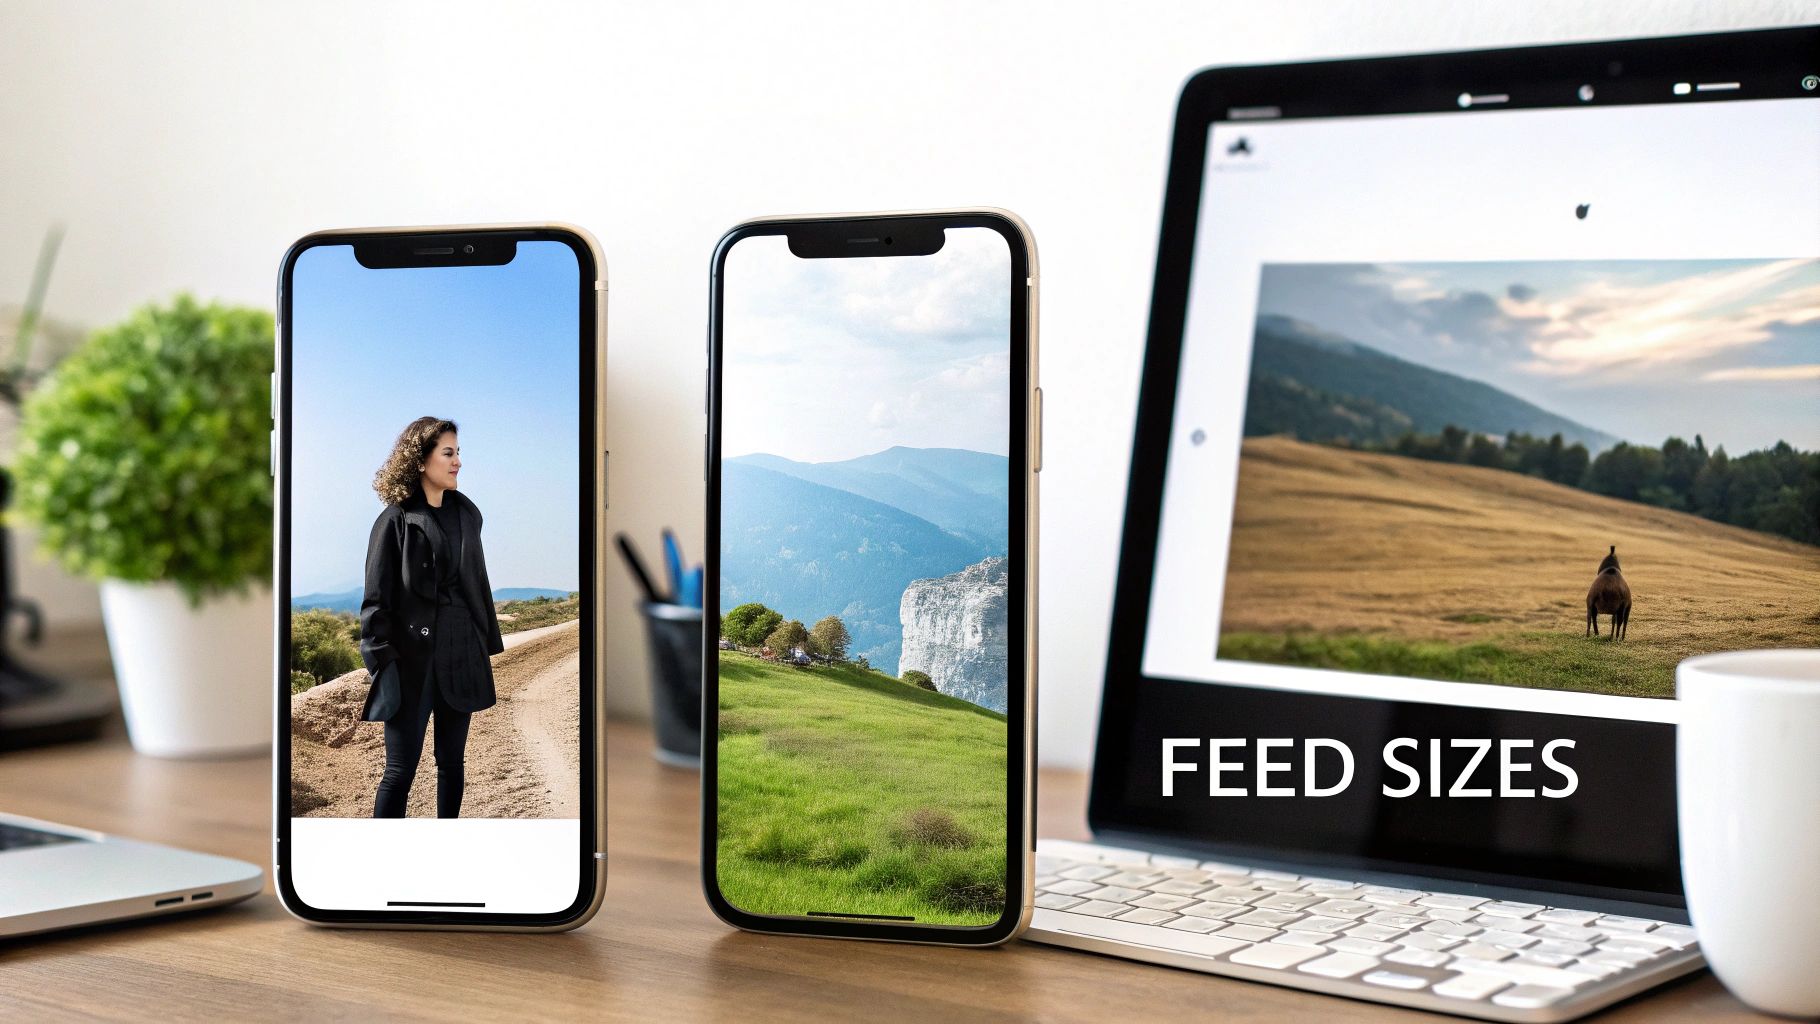
Optimizing Your Feed Post Image Sizes
Your Instagram feed is your digital portfolio. Getting your image sizes right is the foundation for making a strong first impression. While Instagram supports multiple formats, your feed posts will primarily be Square, Portrait, or Landscape. Understanding when to use each is crucial for capturing attention and driving engagement.
If you let Instagram resize or crop your images, you're leaving quality to chance. The platform's compression can make a sharp photo look soft and pixelated. By preparing your visuals to the correct specifications before uploading, you maintain creative control and ensure your work appears exactly as intended on your followers' screens.
The Power of Portrait Posts (4:5)
For maximum impact, the portrait format is the clear winner. It occupies the most vertical space in the mobile feed, pushing other content out of view and holding a user's attention for a crucial extra moment.
- Optimal Dimensions: 1080 x 1350 pixels
- Aspect Ratio: 4:5
Think about the user's scrolling behavior: a taller image takes more time to scroll past. That extra fraction of a second is often all you need to make them stop and engage. For important announcements, detailed product shots, or compelling photography, this is the format you should default to.
The Classic Square Post (1:1)
The square post is the original Instagram format and remains a reliable choice, especially for creating a clean, balanced grid aesthetic. It's versatile enough for almost any type of content, from product shots to text-based graphics.
- Optimal Dimensions: 1080 x 1080 pixels
- Aspect Ratio: 1:1
Interestingly, Instagram has shown foresight with this format. For years, the platform has stored uploaded square images at up to 1080x1080 pixels, even when they were displayed at lower resolutions like 600x600 to improve load times. By saving the higher-quality file, Instagram could later enhance display quality across the app without requiring users to re-upload their entire history of content. You can read more about Instagram's evolving image standards at dustinstout.com.
Pro Tip: Planning your posts to create a consistent visual pattern or color scheme can significantly elevate your profile's appeal. See our Instagram grid layout guide for strategies. Tools like an Instagram grid maker let you preview how your images will look together before you publish.
When to Use Landscape Posts (1.91:1)
The landscape format is the least common for a reason—it takes up the least amount of screen space, making it easy to scroll past. So why use it at all? It's necessary for wide visuals, like panoramic landscape shots or large group photos, that would lose their context or impact if cropped into a square or portrait.
- Optimal Dimensions: 1080 x 566 pixels
- Aspect Ratio: 1.91:1
While it's not the best choice for driving engagement on its own, don't dismiss it entirely. A great strategy for using a landscape image is to place it within a carousel post, surrounded by portrait or square images. This allows you to showcase the full-width photo without sacrificing as much prime real estate in the feed.
Instagram Carousel Image Size
Carousels are one of Instagram's highest-engagement formats — they generate roughly 2x the engagement of single-image posts because each swipe counts as an interaction. Getting the dimensions right across all slides is critical because every slide in a carousel must use the same aspect ratio.
| Carousel Spec | Details |
|---|---|
| Recommended size | 1080 x 1350 px (4:5 portrait) |
| Also supported | 1080 x 1080 px (1:1 square) |
| Maximum slides | 20 per carousel |
| Mixed media | Images and videos can be combined in one carousel |
| Video per slide | Up to 60 seconds per video slide |
| File size | ~30 MB per slide recommended, 4 GB total |
| Aspect ratio rule | All slides must match — you can't mix portrait and square in one carousel |
The most common carousel mistake: designing slide 1 as a square (1:1) and slide 2 as a portrait (4:5). Instagram forces all slides to match the first slide's aspect ratio, so mismatched slides get cropped automatically. Always design every slide at the same dimensions before uploading.
For posting multi-slide content, see our guides on how to post multiple photos on Instagram and how to schedule carousel posts.
Instagram Profile Picture Size
Your profile picture is displayed as a circle on Instagram — but you upload it as a square. Instagram crops the corners.
| Profile Photo Spec | Details |
|---|---|
| Recommended upload size | 320 x 320 px (minimum) |
| Display size | ~110 x 110 px on mobile, ~150 x 150 px on desktop |
| Aspect ratio | 1:1 (square) |
| Format | JPEG or PNG |
| Cropping | Circular — corners are cut off |
Tips for a sharp profile picture:
- Upload at 320x320 px minimum — though 400x400 or 500x500 gives Instagram more to work with and results in a slightly sharper circle
- Keep your subject centered — faces, logos, or text should be in the middle since the circular crop removes corners
- Use a simple, bold design — at 110px display size on mobile, fine details are invisible
- Test on both mobile and desktop — the circle renders differently at different sizes
- Avoid putting text or important details near the edges — they'll be cropped by the circle
Mastering Story and Reel Dimensions
For capturing a user's undivided attention, nothing beats the immersive, full-screen experience of Instagram Stories and Reels. Both formats are designed to be vertical, so getting the dimensions right isn't just a recommendation—it's essential for a professional look.
The correct dimensions are 1080 x 1920 pixels, a 9:16 aspect ratio. Getting these specs right is especially important for Reels, where the Instagram Reels algorithm evaluates watch time and completion rate — poorly sized videos that display black bars or get cropped hurt those signals. Using these exact dimensions ensures your content fills the entire screen, preventing distracting black bars or blurry, stretched visuals. If you upload content that doesn't fit, Instagram will either crop it (potentially cutting off vital information) or shrink it, which looks unprofessional. These specs apply to both short clips and longer videos — if you're planning to share extended video content, our guide on how to post a long video on Instagram covers the full requirements.

Understanding the Safe Zone
Even with perfect dimensions, you have to account for the Instagram interface. Elements like your username, captions, interactive stickers, and buttons are overlaid on top of your content. This is where understanding the "safe zone" becomes critical.
The safe zone is the central portion of your Story or Reel where key elements (text, logos, call-to-action buttons) are guaranteed to be visible and tappable on any device. Placing important content too close to the edges risks it being covered by the app's UI.
- Top Safe Margin: Leave approximately 250 pixels of clear space at the top.
- Bottom Safe Margin: You need a larger buffer at the bottom, around 340 pixels, to avoid interference with the caption and call-to-action buttons.
Key Takeaway: Always position your most important text and visuals within the central area of your 1080x1920 canvas. This is the only way to ensure they are seen by every viewer.
Designing the Perfect Reel Cover Photo
Your Reel's cover photo serves two purposes. It appears in its full 9:16 format in the Reels tab but is cropped to a 1:1 square (1080 x 1080 pixels) on your main profile grid.
To create a cover that works perfectly in both places, design your 1080x1920 image with the primary subject centered within the middle square. This ensures your main grid remains visually consistent and clean while preserving the full-screen impact when users are browsing Reels. When you're ready to post, our guide on how to schedule Instagram Reels can help streamline your workflow.
The standardization of the 9:16 ratio was a key factor in Instagram's explosive growth, enabling the platform to reach 1 billion monthly active users by June 2018. It provided creators with an immersive and predictable format that was easy to master. You can explore more data on Instagram's incredible user growth at analyzify.com.
How to Fix Common Image Cropping and Quality Issues
Have you ever spent time creating the perfect image, only for Instagram to upload it as a blurry, pixelated, or poorly cropped version? This is a common and frustrating problem for many creators.
The issue almost always stems from two main causes: Instagram’s automatic compression and incorrect aspect ratios.
When you upload an image that doesn't meet its specific requirements, Instagram's algorithm intervenes. It will aggressively compress oversized files to save storage space and reduce loading times, and it will stretch smaller images, causing pixelation. If the aspect ratio is wrong, it simply crops the photo for you, often removing the most important parts. The only solution is to take control of the export process and provide Instagram with a perfectly optimized file.
Why Your Images Look Blurry
Blurriness is a direct consequence of Instagram's compression algorithm. The platform is optimized for speed, so it reduces the file size of every photo you upload. If your original image is already low-resolution or has a very large file size, the effects of this compression will be much more noticeable.
A common mistake is uploading a photo wider than 1080 pixels. Instagram automatically downsizes it, and this resizing process can soften details and reduce sharpness. The key is to resize the image yourself before uploading.
A Step-by-Step Fix for Quality Loss
To prevent Instagram from degrading your image quality, follow this pre-upload checklist. By doing so, you provide the algorithm with an optimized file that requires minimal processing on its end.
- Crop to the Correct Aspect Ratio: Before doing anything else, crop your image to the desired aspect ratio (e.g., 4:5 for a portrait post or 1:1 for a square).
- Resize to the Correct Width: After cropping, resize the image so its width is exactly 1080 pixels. For a 4:5 portrait post, your final dimensions will be 1080px by 1350px.
- Export in the Right Format: Save your image as a high-quality JPEG. While PNG files are useful for graphics with transparency, JPEGs provide the best balance of quality and file size for photographs on Instagram.
- Use the sRGB Color Profile: Ensure your image is saved in the sRGB color space. Other profiles, like Adobe RGB, may look vibrant in editing software but can appear dull or discolored on the web.
- Check Your Safe Zones: For Stories and Reels, double-check that critical text and graphics are within the viewable area. You can use a free tool like this Instagram safe zone checker to preview your layout and ensure nothing important is obscured by the user interface.
Following these steps puts you in control of the final quality. Of course, technical optimization is only part of the equation; for more tips on creating compelling visuals, check out these 6 ways to post high quality content on Instagram.
Using a scheduling tool like PostPlanify can also help preserve quality. By integrating directly with design tools, it allows you to schedule perfectly sized images without the extra download/re-upload steps that can introduce compression issues.
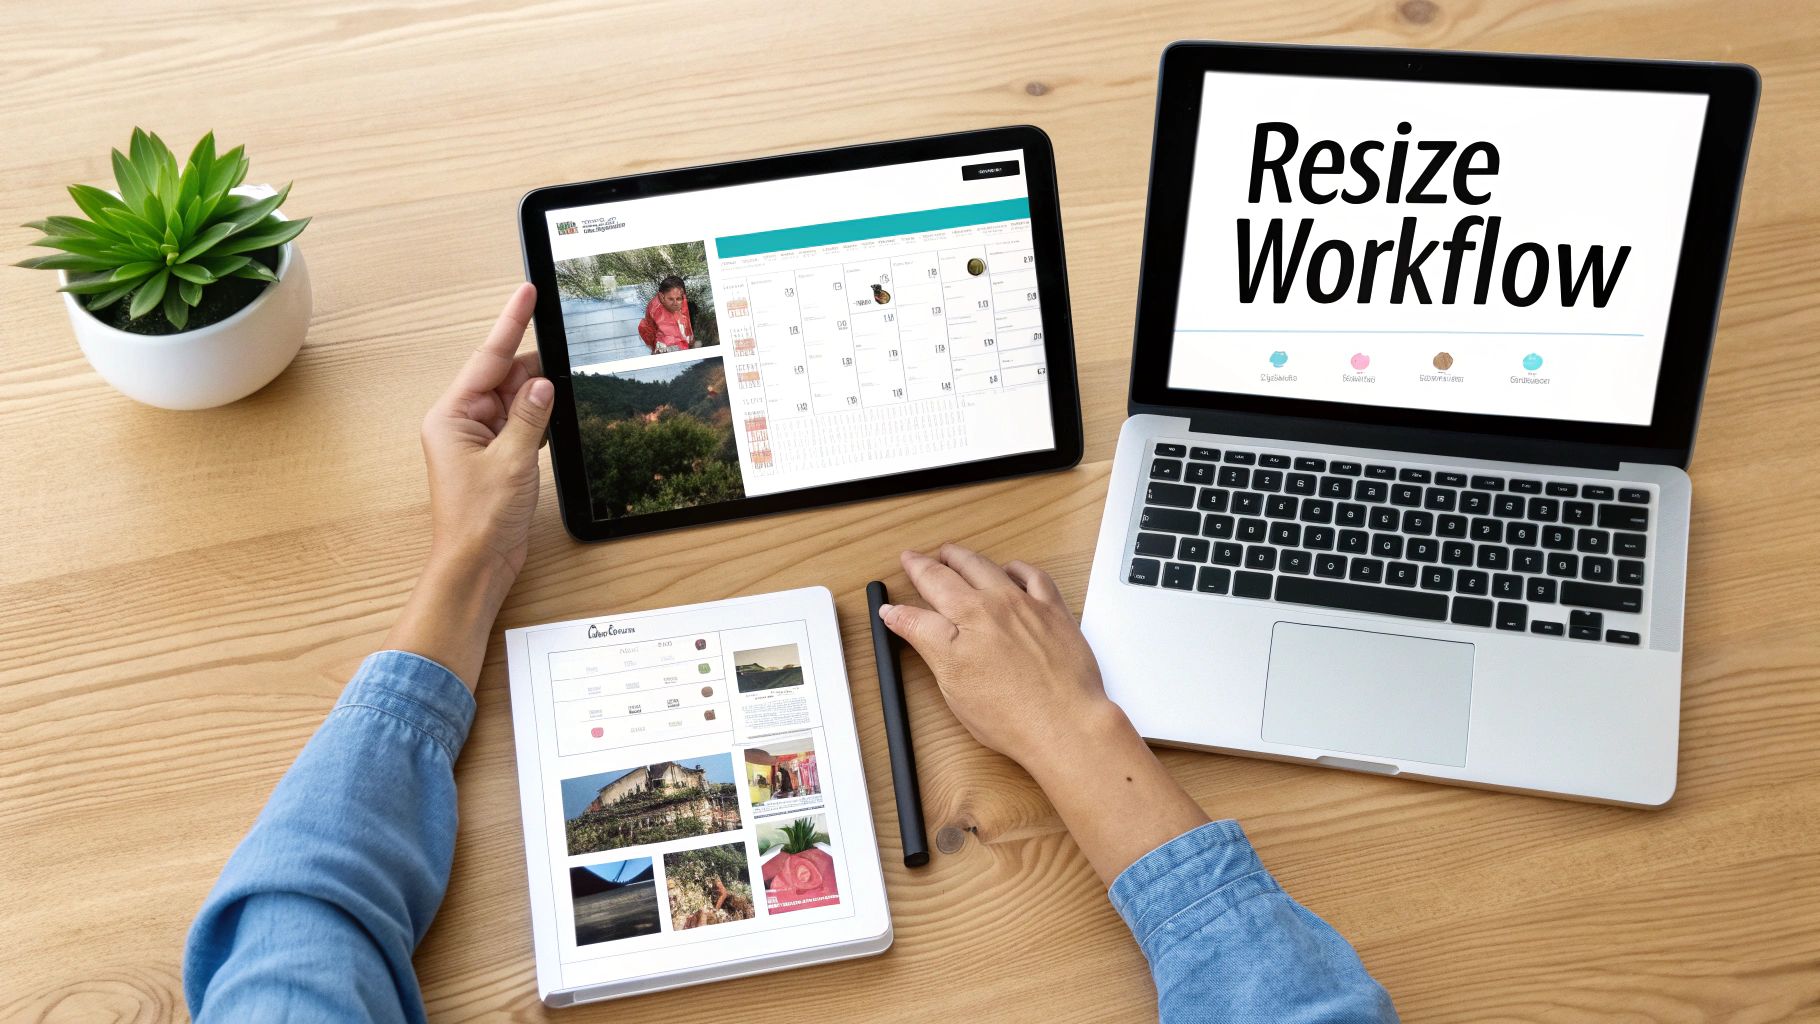
A Simple Workflow for Resizing Your Images
Consistently sizing your Instagram images correctly doesn't have to be a complicated process. The key is to establish a simple, repeatable workflow using the right tools. This ensures every post, from feed to Stories, looks sharp and professional without requiring you to start from scratch each time.
A great starting point is a free design tool like Canva. You can easily create custom-sized templates for each Instagram format: one for square posts (1080x1080), another for portrait (1080x1350), and a third for Stories (1080x1920). Once these templates are saved, you can simply drop new photos or graphics into the appropriate one, export, and you're ready to post.
Using Canva for Quick Resizing
Canva is an invaluable tool for creators who need to work efficiently while maintaining brand consistency. Here’s a quick guide:
- Create a Design: On the Canva homepage, click “Create a design” and select “Custom size.”
- Enter Dimensions: Input the exact pixel dimensions required, such as 1080 for the width and 1350 for the height for a portrait post.
- Design and Save: Add your images, text, and graphics. Once you're finished, save the design as a reusable template (e.g., “Instagram Portrait Template”).
For more complex adjustments like advanced cropping, color correction, or quality enhancement, a powerful AI image editor can automate much of the work and significantly speed up your workflow.
Integrating with Your Scheduler
The most efficient workflows eliminate redundant steps. Instead of downloading a completed design from Canva just to re-upload it to your scheduling tool, you can connect them directly.
PostPlanify’s Canva integration is designed for this purpose. It allows you to create your perfectly sized visuals in Canva and send them directly to your content calendar in a single click. This removes the download-upload cycle, saving time and preventing potential quality degradation.
For carousel posts, you can design a single long image in Canva and then use a dedicated tool to slice it into perfect squares for posting. Learn how with our free Instagram carousel splitter. For the full carousel strategy — including how many slides to use and what content works best — see our Instagram carousel guide.
Frequently Asked Questions About Instagram Image Sizes
We understand there's a lot to remember. Here are clear, direct answers to the most common questions about Instagram image sizes.
What Is the Single Best Image Size for Instagram?
If you have to choose just one size for feed posts, use the 4:5 portrait format at 1080 x 1350 pixels. It is the most effective format for capturing attention. By taking up more vertical space on a mobile screen, it makes it harder for users to quickly scroll past your content.
The classic 1:1 square post (1080 x 1080 pixels) remains a solid and reliable option, particularly for maintaining a clean, uniform grid. However, from a strategic perspective focused on maximizing engagement, the 4:5 ratio gives you a distinct advantage.
How Does Instagram's Compression Work?
Instagram's primary goal is a fast, seamless user experience. To achieve this, it automatically compresses every image uploaded to its platform to reduce file size and decrease load times. If your image is wider than 1080 pixels, Instagram's algorithm will resize it for you, which often leads to a loss of quality.
Pro Tip: To avoid unwanted pixelation, resize your image to a width of exactly 1080 pixels before you upload. This gives you control over the resizing process, resulting in a sharper final image than if you let Instagram's algorithm handle it.
Should I Use JPEG or PNG for Instagram?
For virtually all photographs, JPEG is the best choice. It offers an excellent balance between high image quality and small file size, which is ideal for a fast-paced platform like Instagram. Since Instagram converts most uploaded files to JPEG anyway, starting with a JPEG gives you more control over the final appearance.
The only time you should use PNG is when your image requires a transparent background, such as for logos, icons, or certain graphic overlays. For all other photographic content, a high-quality JPEG will produce the sharpest results.
What size should Instagram Reels be?
Instagram Reels should be 1080 x 1920 pixels with a 9:16 aspect ratio. This is the full-screen vertical format that fills the entire phone screen. Uploading at any other aspect ratio will result in black bars or cropping. For video codec, use MP4 with H.264 at 30fps. Keep file sizes under 4GB. The same dimensions apply whether your Reel is 15 seconds or 20 minutes long — see our guide on how to post a long video on Instagram for length-specific details.
What is the best Instagram profile picture size?
Upload your profile picture at a minimum of 320 x 320 pixels (1:1 square). Instagram displays it as a circle — approximately 110px on mobile and 150px on desktop — so keep important elements centered and avoid fine details near the edges. For the sharpest result, upload at 400x400 or 500x500 so Instagram has more data to work with when rendering the circle.
Can I upload 4K photos to Instagram?
You can, but Instagram will downscale them to a maximum width of 1080 pixels. This resizing adds an extra compression step that can reduce quality. For the sharpest results, resize your photos to exactly 1080px wide before uploading — this gives you control over the downscaling process rather than letting Instagram's algorithm handle it.
What aspect ratio is best for Instagram feed posts?
4:5 portrait (1080 x 1350 px) is the best aspect ratio for feed posts. It takes up the most vertical space in the mobile feed, making it harder for users to scroll past. Square (1:1) at 1080x1080 is the second-best option and creates a cleaner grid. Landscape (1.91:1) takes up the least space and should only be used for wide panoramic shots or when cross-posting from platforms that favor horizontal formats.
Why does Instagram crop my photos?
Instagram crops photos that don't fit its supported aspect ratios. Feed posts must be between 1.91:1 (landscape) and 4:5 (portrait). If you upload a taller image — like a full 9:16 screenshot — Instagram will force-crop it to 4:5. The fix is to crop your image to the correct aspect ratio before uploading, so you control what gets cut rather than letting Instagram decide.
What is the Instagram carousel image size?
Each slide in an Instagram carousel should be 1080 x 1350 px (4:5 portrait) for maximum screen space, or 1080 x 1080 px (1:1 square) for a clean look. All slides must use the same aspect ratio — you can't mix portrait and square in one carousel. Carousels support up to 20 slides, and each video slide can be up to 60 seconds. See our Instagram carousel guide for the full strategy.
Your Instagram Image Size Checklist
Before you publish any post, run through this quick checklist to ensure your visuals are perfectly optimized. This final review is the difference between a professional feed and one filled with blurry or poorly cropped images.
- Feed Posts Width: Always export images at 1080px wide.
- Best Feed Ratio: Default to a 4:5 aspect ratio (1080x1350px) to maximize screen real estate.
- Stories and Reels: Use a 9:16 ratio (1080x1920px) for an immersive, full-screen experience.
- Check Safe Zones: For Stories and Reels, keep critical text and graphics centered, away from the top and bottom edges where the app interface appears.
- File Format: Use JPEG for photos and PNG for graphics with transparency.
- Color Space: Always export in sRGB to ensure consistent color representation.
Related: Instagram Post vs Story vs Reel | Instagram Carousel Guide | Instagram Grid Layout Guide | Social Media Safe Zones Guide | Instagram Reels Algorithm | How to Post a Long Video on Instagram | How to Schedule Instagram Reels | How to Grow Instagram Followers Organically | Best Time to Post on Instagram
All your social media in one simple dashboard
Schedule posts, track analytics, and reply to comments/DMs — without switching tabs.
Engagement
+18%
Views
52.8k
About the Author

Hasan Cagli
Founder of PostPlanify, a content and social media scheduling platform. He focuses on building systems that help businesses, agencies, and teams plan, publish, and manage content and social media more efficiently across platforms.


