


You finished the edit. The file looks sharp on your phone. Then Instagram softens the image, crops the cover wrong, rejects the video, or stalls on processing. That's the primary issue with uploading to Instagram. The click itself is easy. The reliability isn't.
Most upload issues come from three places: the file wasn't prepared for Instagram's pipeline, the wrong publishing method was used for the job, or the workflow depends too much on manual steps. If you want posts to publish cleanly and keep their quality, you need a system that starts before you tap Publish.
Quick Answer: How to Upload to Instagram
To upload to Instagram in 2026, follow these steps:
- Export the file correctly — 1080px wide JPG/PNG for photos, 9:16 MP4 under 100MB for Reels, matching ratios for carousels.
- Enable highest-quality uploads — Instagram Settings → Account → Data usage → Media quality → toggle on "Upload at highest quality."
- Tap Create (+) in the Instagram app, choose Post, Reel, or Story, and confirm the crop manually.
- Add caption, alt text, tags, and location before publishing.
- Publish now or schedule — Instagram's native scheduler covers up to 75 days; tools like PostPlanify handle multi-platform queues, approvals, and bulk uploads.
If your upload is failing, jump to the diagnosis table below to match your symptom to the fix.
Quick Diagnosis: Why Your Instagram Upload Failed
Not sure where it's breaking? Match the symptom to the most likely cause and jump to the fix.
| Symptom | Most Likely Cause | Fix |
|---|---|---|
| Photo looks blurry after upload | Oversized export or repeated re-saves | Why Instagram softens your images |
| Reel won't post or gets rejected | Wrong aspect ratio (not 9:16) or file over 100MB | Reel won't publish |
| Carousel slides crop unevenly | Mixed aspect ratios across slides | Carousel crops inconsistently |
| "Couldn't post — try again" error | Network drop or temporary API issue | Post or Reel won't publish |
| Story text covered by stickers/UI | Layout placed in unsafe zones | Story text gets covered |
| Music option missing on Reel | Business account or regional music library limit | Music or audio is unavailable |
| Desktop upload works for one account, not another | Permissions or linked-account mismatch | Desktop upload works for one account but not another |
| HEIC photo won't upload | Unsupported format on web/some Android devices | Pre-upload checklist |
| Video upload stuck at "Processing" | Codec mismatch or oversized file | Reel won't publish |
| Posting on the wrong account | Account switcher in the create flow set to default | When mobile is the wrong tool |
What Changed With Instagram Uploads in 2026
If you've been uploading to Instagram for years, a few 2026 updates are worth knowing:
| Update | Impact |
|---|---|
| Carousels now support up to 20 slides | More room for storytelling, but the all-same-aspect-ratio rule still applies |
| Native scheduling expanded to all public accounts (March 2026) | You no longer need Professional Mode just to schedule a post |
| In-app "Upload at highest quality" toggle is more aggressive about preserving fidelity | Worth enabling once, especially for design-heavy posts |
| Reel cover editing is more flexible — you can adjust the cover frame and overlay text after recording | Stop picking covers as an afterthought |
| Stories still cannot be scheduled natively in the app | Use Meta Business Suite or a third-party tool for Story scheduling |
For the full breakdown of the March 2026 scheduling expansion, see my guide on how to see scheduled posts on Instagram.
Your Complete Guide to Uploading to Instagram
Instagram is too important to treat as an afterthought. Statista reports Instagram had about 2 billion monthly active users worldwide in early 2024, and 80% of global marketers used the platform for advertising in 2023 (Instagram audience and marketing usage on Statista). A clean upload puts your content into one of the biggest commercial distribution systems on the internet.
That matters whether you're publishing one product photo, a carousel, a Reel, or a Story series. A sloppy upload workflow costs reach in quiet ways. Blurry covers reduce taps. Incorrect aspect ratios create awkward crops. Failed uploads waste timing windows. Teams end up re-exporting the same asset three times because nobody caught the issue before posting.
Practical rule: Instagram isn't just a place where files land. It's a processing system. Prepare for the system, not just for your camera roll.
Uploading to Instagram reliably comes down to a few decisions:
- Choose the right format first: A single image, carousel, Reel, and Story don't behave the same way after upload.
- Prep the file for Instagram's resizing: If the platform has to do too much work, quality usually drops.
- Match the upload method to the task: Phone posting is fastest for reactive content. Desktop workflows are better for review, coordination, and asset control.
- Reduce manual risk: Saved hashtag groups, caption templates, scheduled publishing, and approval steps prevent the avoidable mistakes.
A lot of users start by asking how to upload to Instagram, but the better question is how to make the upload survive Instagram's processing without losing what made the content good in the first place.
If you're still deciding whether the content belongs in the feed, Stories, or Reels, this breakdown of Instagram post vs Story vs Reel helps clarify the trade-offs before you publish.
Preparing Your Content for Flawless Uploads
Good uploads start outside Instagram. If the file is wrong before it hits the app, filters, captions, and hashtags won't fix it.
The most common mistake is exporting media larger than Instagram needs and assuming "bigger" means "better." In practice, that often makes quality worse after upload because Instagram compresses the file again.
Why Instagram softens your images
Instagram often resizes images to 1080 pixels wide, and uploading files much larger can trigger extra compression, which is why a "high-res" image can still look soft after posting. Enabling "Upload at highest quality" in the app settings is also recommended to preserve fidelity during upload (image quality guidance on Lemon8).
That gives you a practical workflow:
- Export at the size Instagram is likely to use, not far above it.
- Keep your aspect ratio consistent with the post type.
- Turn on highest-quality uploads before posting important content.
- Avoid repeated save-export-upload cycles across different apps, because each pass can degrade the file.
Upload once from a final master export. Don't export from your editor, save to a chat app, re-save to your phone, then upload that copy.
Instagram content specs for 2026
| Content Type | Aspect Ratio | Recommended Resolution (Width) | Max File Size / Length |
|---|---|---|---|
| Feed square photo | 1:1 | 1080 px | 30 MB recommended |
| Feed portrait photo | 4:5 | 1080 px | 30 MB recommended |
| Feed landscape photo | 1.91:1 | 1080 px | 30 MB recommended |
| Carousel (up to 20 slides) | Keep all slides the same ratio | 1080 px | 30 MB per image, 100 MB per video |
| Reel | 9:16 | 1080 px | 100 MB recommended, 15 min max length |
| Story image | 9:16 | 1080 px | 30 MB |
| Story video | 9:16 | 1080 px | 60-sec segments, auto-split if longer |
The table reflects a safe publishing approach, not a promise that Instagram won't process the file further. It usually will.
File prep that prevents common failures
When I review broken Instagram uploads, the causes tend to repeat:
- Mixed aspect ratios in a carousel: Instagram will often crop unpredictably based on the first asset selected.
- Text too close to the edges: Covers, Stories, and vertical posts can lose readability when UI elements sit on top.
- Oversharpened exports: Compression exaggerates halos and edge artifacts.
- Tiny caption-safe margins: A design can look fine in preview and still feel cramped once posted.
- HEIC files from iPhone: Web uploads and some Android devices reject HEIC — convert to JPG before posting.
- Variable frame rates on video: Phone-captured VFR clips can confuse Instagram's encoder. Re-export at a constant 30 or 60 fps.
If you draw covers, annotation overlays, or hand-lettered designs on a tablet, a precise stylus for iPad can help you build cleaner text placement and safe margins before export. That's especially useful for Reels covers and Story slides where alignment errors become obvious after upload.
Pre-upload checklist
Use this before every important post:
- Confirm the crop first: Export for the target format instead of letting Instagram crop on the fly.
- Keep width aligned to Instagram's pipeline: 1080 pixels wide is the practical baseline for image uploads.
- Enable highest-quality uploads: Check this inside the Instagram app before publishing.
- Standardize carousel dimensions: Every slide should match.
- Review on mobile before posting: Desktop previews miss edge crowding and text cutoff.
- Store approved export presets: Teams should not guess dimensions every week.
- Convert HEIC to JPG: Especially if you're uploading from web or sharing files across devices.
If you need a deeper sizing reference for feed posts, Reels, and Stories, this guide to Instagram image size is worth keeping handy.
Instagram App vs Meta Business Suite vs Third-Party Tools
There's no single "best" way to upload to Instagram — it depends on whether you're posting reactively from a phone, planning weeks ahead, or coordinating across a team. Here's how the three main options compare in 2026.
| Capability | Instagram App | Meta Business Suite | PostPlanify |
|---|---|---|---|
| Cost | Free | Free | Starts at $99/mo |
| Feed posts | Yes | Yes | Yes |
| Reels | Yes | Yes (delivery bug reported) | Yes |
| Stories | Yes (no native scheduling) | Yes (no interactive stickers) | Yes |
| Carousels (up to 20) | Yes | Yes | Yes |
| Max upload size (video) | 100 MB recommended | 100 MB | 100 MB |
| Scheduling window | 75 days | 75 days | Unlimited |
| Bulk upload | No | No | Yes (CSV + batch) |
| First comment | No | No | Yes |
| Visual grid preview | No | No | Yes |
| Multi-platform | Instagram only | Facebook + Instagram | 10 platforms (IG, X, FB, TikTok, YouTube, LinkedIn, Threads, Pinterest, Bluesky, Google Business) |
| Approval workflows | No | Basic | Full multi-step |
| Best for | Reactive solo posting | Small businesses already in Meta | Teams, agencies, multi-platform creators |
If you're managing more than Instagram, the time you lose switching between platforms usually outweighs the cost of a unified tool. The PostPlanify Instagram scheduler consolidates feed, Reels, Stories, and carousels in one calendar.
 PostPlanify
All your social media in one simple dashboard
Schedule posts, track analytics, and reply to comments/DMs without switching tabs.

Engagement
+18%
Views
52.8k
How to Upload from Your Phone (All Formats)
The phone workflow is still the default for most creators and social teams. It's fast, direct, and best for anything that needs native features like Story stickers, quick edits, in-app audio, or location-based posting.
The key is choosing the format before you start. Data compiled by Sprout Social and cited by InVideo says carousels and Reels often see slightly higher engagement rates, at 0.55% and 0.52%, than single image posts (Instagram engagement format breakdown via InVideo). That doesn't mean every idea should become a Reel. It means format choice affects outcome.
Uploading a feed post
Feed uploads are best when you want a durable post on the grid, a clean visual presentation, and a caption that carries context.
Use this workflow:
- Open Instagram and tap the create button.
- Choose Post.
- Select one image or video from your camera roll.
- If you want a carousel, tap the multiple-select option and choose the assets in order.
- Adjust the crop. Don't rush this. Instagram's default framing can cut important detail.
- Apply edits only if needed. If the file is already professionally edited, skip heavy in-app filters.
- Write the caption.
- Add location, tags, collaborator settings, or product tags if relevant.
- Review the thumbnail and crop one more time.
- Publish.
A few things usually go wrong here. Users mix portrait and horizontally oriented assets in one carousel. They also rely on Instagram's crop instead of checking each frame manually. If the first card sets the visual frame poorly, the whole carousel suffers.
For a complete walkthrough of carousel-specific quirks, see my guide on how to schedule carousel posts on Instagram.
Uploading a Reel
Reels work best when movement, pacing, or demonstration matters. They also carry more formatting risk because the cover, vertical frame, and audio all need to survive upload intact.
Phone steps are straightforward:
- Tap the create button.
- Choose Reel.
- Record inside the app or import a pre-edited clip.
- Trim the clip and reorder if you're adding multiple segments.
- Add music, voiceover, captions, or effects if needed.
- Choose a cover carefully. This affects both the Reel tab and how the post looks on your profile grid.
- Add your caption, tags, and location.
- Publish.
Don't choose the Reel cover as an afterthought. A strong video with a weak cover often underperforms before anyone even watches it.
For brands, I usually recommend designing the cover before the upload starts. If you wait until the last screen, you'll pick a random frame and live with it. For longer videos, my how to post a long video on Instagram guide breaks down current length limits by format.
Uploading a Story
Stories are the most forgiving format for casual content and the least forgiving for cluttered design. If text sits too high, too low, or too close to the edges, stickers and interface elements can cover it.
To post a Story:
- Swipe right from the home screen or tap your profile image with the plus icon.
- Capture a photo or video, or pull media from your camera roll.
- Add text, stickers, GIFs, links, polls, mentions, or music.
- Check spacing near the top and bottom of the frame.
- Choose Your Story, Close Friends, or send it to selected users.
Stories are also where native posting matters most. Features often appear in the mobile app before they're fully supported elsewhere. If your workflow depends on stickers, interactive elements, or fast reactive posting, keep the final Story step on mobile.
For reposting and sharing behavior inside Stories, this guide on how to share a story on Instagram covers the usual account and visibility edge cases.
When mobile is the wrong tool
Phone uploads are convenient, but they aren't always reliable for team workflows.
Use desktop or scheduled publishing instead when:
- Assets need approval: Manual phone posting creates version confusion.
- You manage multiple brands: It's too easy to publish from the wrong account.
- Captions are long or technical: Desktop editing is easier and safer.
- You need repeatable publishing windows: Manual posting leads to drift.
If you're solo and posting live from an event, mobile is perfect. If you're running a content calendar across clients or departments, mobile should usually be the last mile, not the whole system.
Uploading to Instagram from a Desktop PC or Mac
Desktop uploading is better when your assets live on a computer, your team reviews content before posting, or you need cleaner control over captions and file organization. It's common for photographers, ecommerce teams, agencies, and anyone editing in Canva, Photoshop, Premiere, or CapCut desktop.

Option one with Instagram.com
Instagram's native web uploader is the simplest desktop route. You log in, click create, choose your media, crop it, write your caption, and publish.
That works well for:
- One-off feed posts
- Quick uploads from a laptop
- Captions that are easier to write with a keyboard
- Teams that don't need approvals or scheduling
Its limitations show up fast. Web posting is lighter than a full publishing workflow. Some mobile-native features don't translate cleanly. Story creation and format-specific controls can also feel more limited than the app.
Option two with Meta Business Suite
Meta Business Suite is usually the better free option for business use. It gives you more control over planning, scheduled publishing, and account-level management than basic browser posting.
Use it when you need:
- Drafts and scheduled posts
- Shared access across teammates
- A clearer content calendar
- Business or creator account management
- Less dependence on one person's phone
The trade-off is that setup and permissions matter more. If the wrong Instagram account is connected, if someone loses page access, or if the Instagram profile isn't linked correctly inside Meta, publishing can stall even when the file itself is fine.
Browser upload is a posting tool. Business Suite is a workflow tool. Pick based on the process, not just convenience.
Which desktop path makes more sense
A simple way to choose:
| Need | Better option |
|---|---|
| Fast manual post from a laptop | Instagram.com |
| Team review and scheduling | Meta Business Suite |
| Keyboard-based caption writing | Either |
| Business account management | Meta Business Suite |
| Multi-platform publishing | Third-party tool |
| Minimal setup | Instagram.com |
Desktop uploading also reduces one common quality issue. You're less likely to move files through messaging apps or cloud shares that create extra compressed copies before posting.
If your team still isn't sure what desktop Instagram can and can't handle, this breakdown of posting on Instagram from desktop maps the current options more clearly.
PostPlanifyAll your social media in one simple dashboard
Schedule posts, track analytics, and reply to comments/DMs without switching tabs.
Engagement
+18%
Views
52.8k
Optimizing Your Uploads for Reach and Engagement
A technically correct upload can still flop. Once the file is ready, three fields matter most: the caption, the hashtag set, and the accessibility layer.

Build captions that do a job
Most weak captions fail in the first line. They open with filler, repeat what the image already shows, or never tell the reader what to do next.
A simple structure works:
-
Hook
Give the reader a reason to stop. Lead with a problem, outcome, opinion, or unexpected detail. -
Body
Add context, instruction, or the story behind the post. Keep it readable. Dense caption blocks get skipped. -
Call to action
Ask for one specific next step. Comment, save, message, click, or share.
Business.com guidance summarized in the verified data recommends a strong caption hook and clear call to action. That advice pairs well with workflow-based caption drafting because it stops teams from posting vague text that doesn't move the audience anywhere.
PostPlanify's AI assistant can draft hook-led captions from your image or video — it's vision-powered, so it reads the actual asset instead of guessing from a prompt. Useful when you're batching 20+ posts in one session.
Use hashtags as a saved system
Instagram allows up to 30 hashtags per post, and expert guidance recommends creating saved hashtag groups by topic so you're not rebuilding them from scratch every time (Peg Fitzpatrick's Instagram strategy guidance).
That approach works because it cuts friction. Instead of typing random tags at publish time, you prepare sets like:
- Brand tags: Your business name, campaign tags, product line tags
- Topic tags: Niche descriptors tied to the subject of the post
- Audience tags: Terms your ideal viewer follows or searches
- Format tags: Occasionally useful when tied to a recurring series or challenge
Saved groups don't mean copy-paste blindly. Review them before publishing. A Reel, educational carousel, product shot, and Story promotion often need different supporting tags.
If you run ecommerce or print-on-demand accounts and want more practical ideas on content patterns that help grow your POD sales on Instagram, that guide is useful because it focuses on engagement mechanics rather than generic posting advice.
Don't skip alt text
Alt text is one of the easiest wins in Instagram publishing and one of the most ignored. It improves accessibility for users who rely on screen readers, and it also forces you to describe the content clearly.
Write alt text like a human description, not a keyword dump.
Bad alt text:
- "marketing social media branding instagram growth business"
Better alt text:
- "A flat lay of packaged skincare products on a white background with ingredient labels facing up."
That kind of description helps users and sharpens your own content discipline.
For discovery-oriented formats, this breakdown of the Instagram Reels algorithm helps connect creative choices with how content gets surfaced after publishing. For timing, my best time to post on Instagram guide breaks down peak windows by day and industry.
How to Schedule Instagram Posts for a Consistent Workflow
Manual posting works until volume rises. Then it starts breaking in ordinary ways. Captions are still in drafts when the publish window hits. The approved asset is sitting in someone else's drive. A teammate posts the wrong version from the right account, or the right version from the wrong account.

Scheduling fixes that because it turns posting from a live task into a controlled workflow. A practical benchmark for growth on Instagram is posting 3 to 5 times per week during the "most active times" identified in your Business Account insights (Sprout Social's Instagram posting guidance). Hitting those windows consistently is much easier when the content is already loaded, reviewed, and queued.
What scheduling actually improves
The obvious benefit is consistency. The less obvious benefit is error reduction.
A reliable scheduling workflow helps with:
- Timing discipline: Posts go out when the audience is active, not when someone remembers.
- Batch production: Teams can write captions, prep assets, and review campaigns in one focused block.
- Version control: Approved media and final captions live in one place.
- Cross-account safety: Fewer mistakes when multiple brands are involved.
- Mental load: Nobody has to rebuild the post at the last minute on a phone.
The goal isn't just to publish later. It's to remove live publishing risk.
Where native scheduling helps and where it doesn't
Instagram and Meta tools are fine for many basic scheduling needs. If you're a solo operator or a small business with a straightforward posting rhythm, they can be enough.
The friction shows up when the process includes approvals, asset libraries, multiple contributors, client reviews, or a mix of platforms beyond Instagram. Native tools also tend to be less comfortable for teams that need a true calendar view, repeatable queues, and a clearer separation between drafting and approval.
That's where a platform like PostPlanify fits naturally. It gives you a shared content calendar, team collaboration with approval workflows, a media library, analytics across 10 platforms with best-time-to-post suggestions, a social inbox covering 7 platforms, and white-label PDF reports for client-facing teams. It also reduces the "who has the final file?" problem that causes so many broken upload handoffs.
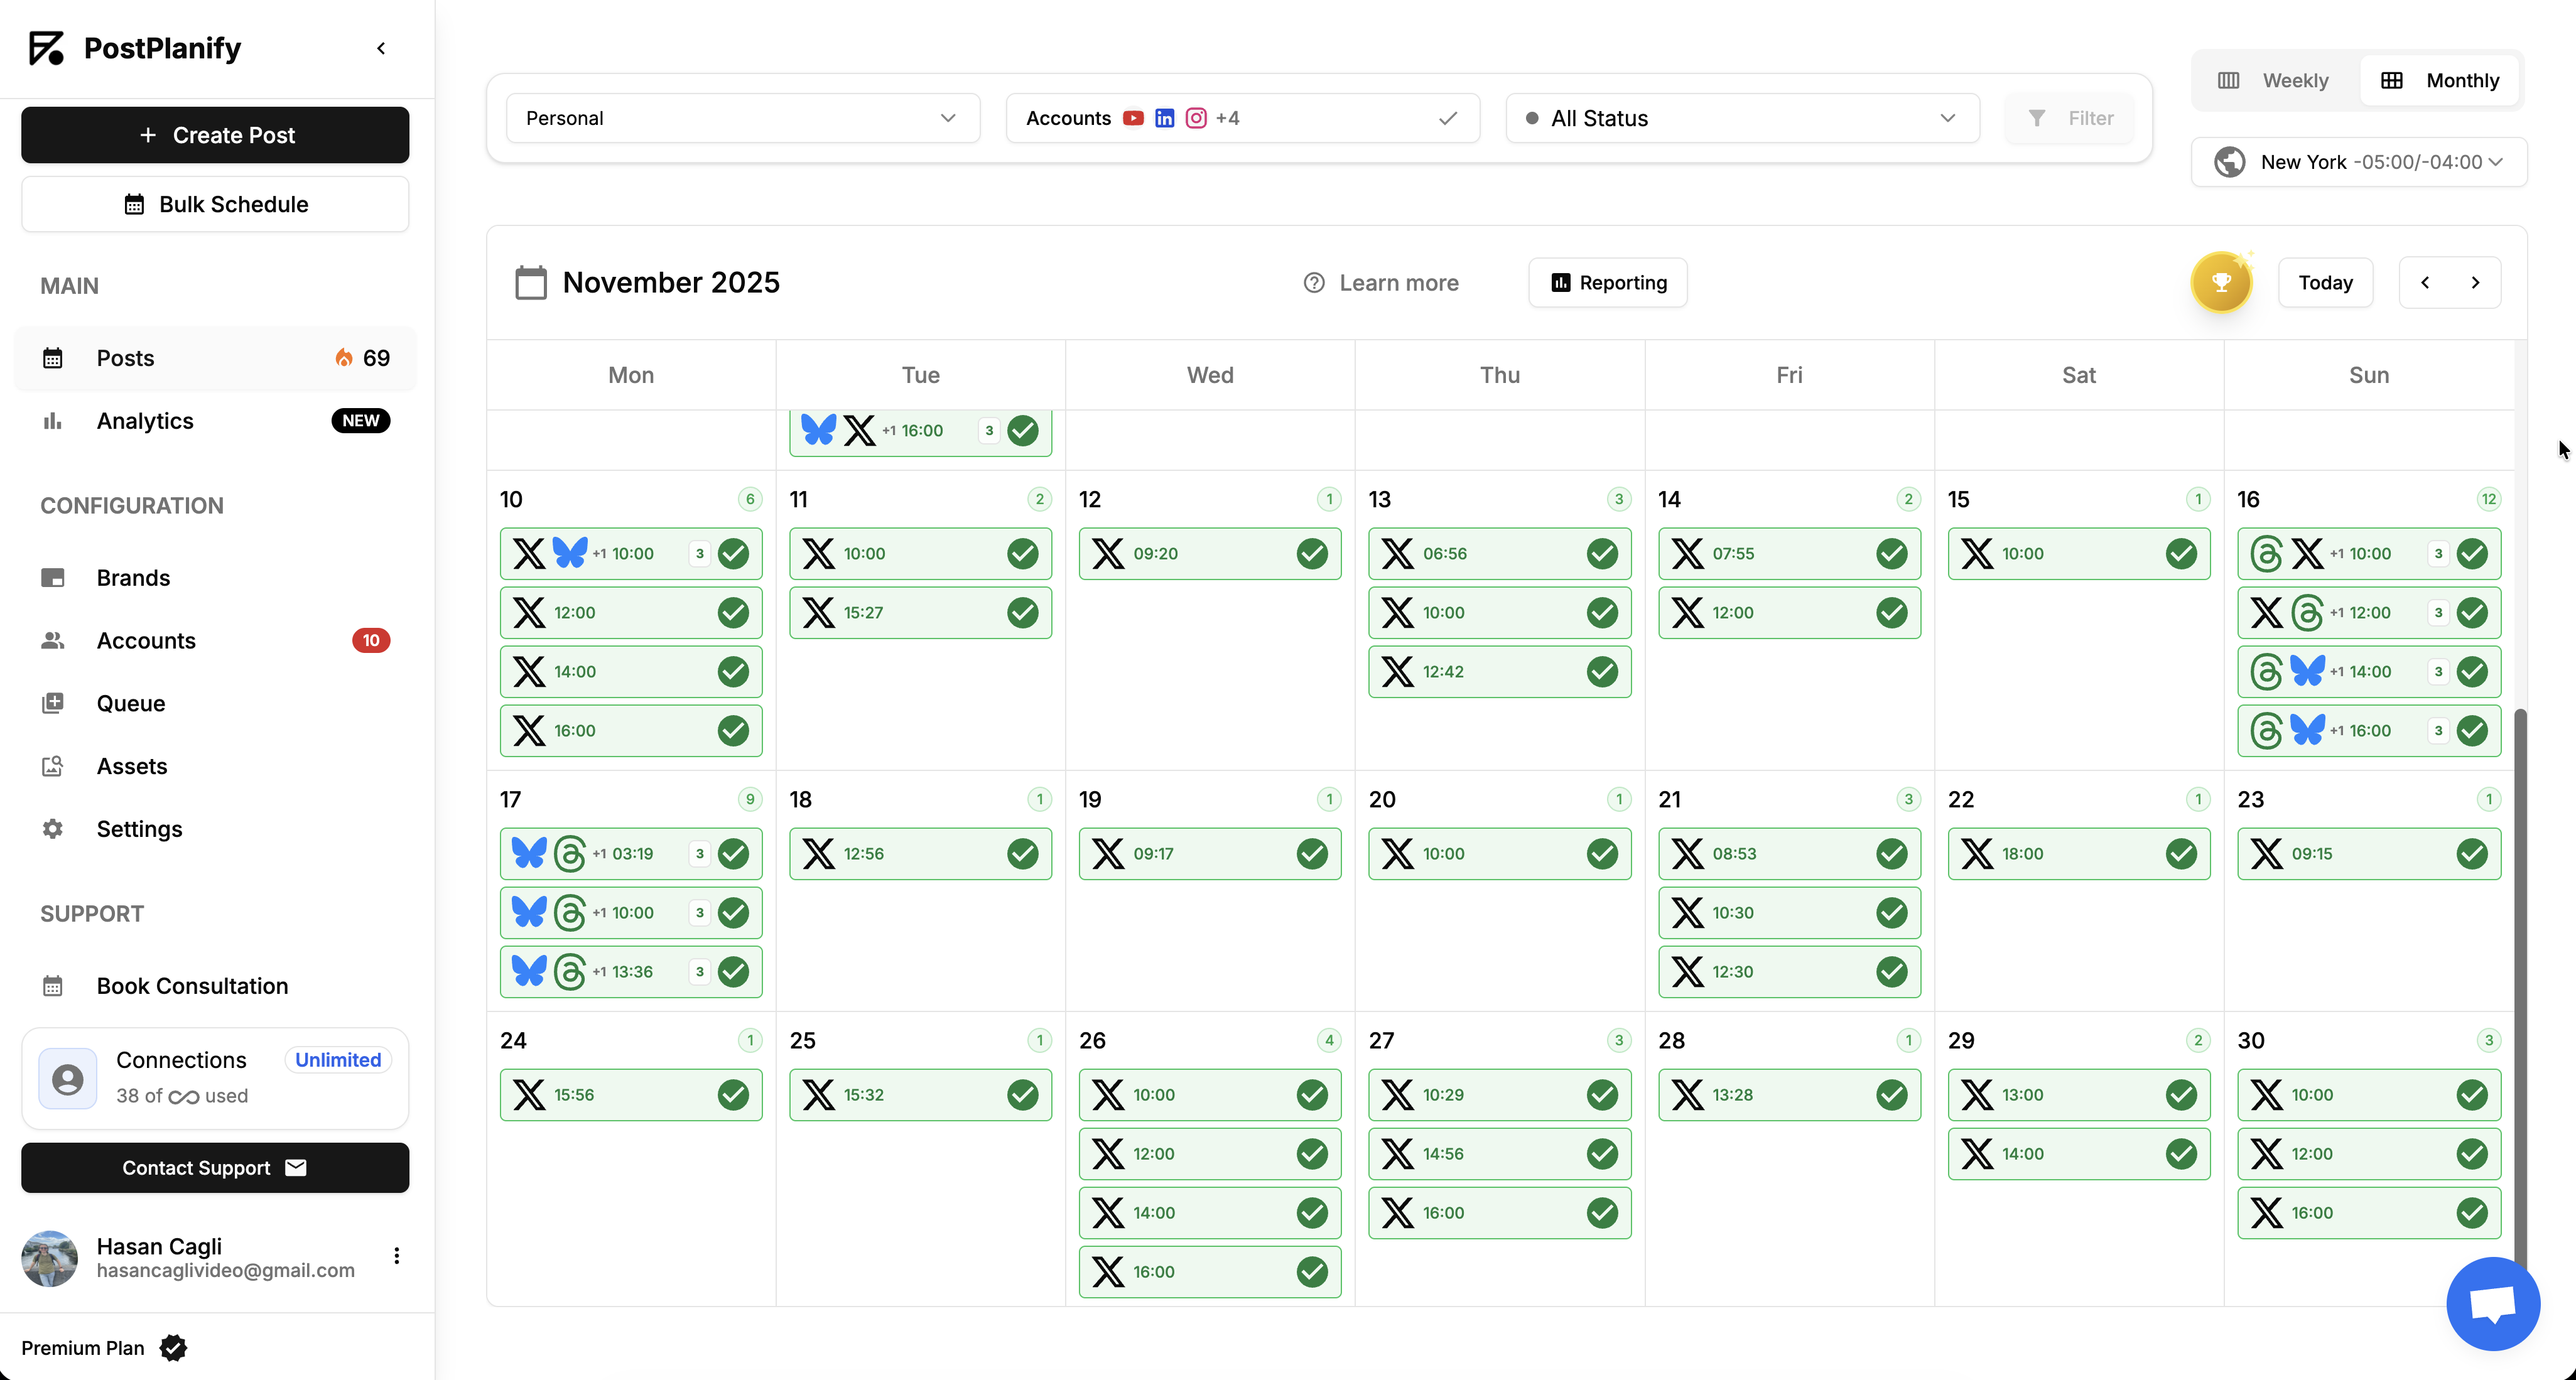
A scheduling workflow that holds up
Use this process if you want uploads to stay clean and predictable:
-
Batch the assets
Export all approved files into a single campaign folder with clear names. -
Write captions in one session
Keep the hook, body, CTA, mentions, and hashtag groups together. -
Assign review before scheduling
Don't schedule first and approve later. That invites rushed edits. -
Load content into the calendar
Match each post to the right account, format, and publishing date. -
Check mobile presentation
Covers, crops, and Story-safe spacing still need a final visual review. -
Watch the first scheduled runs
When using any tool for a new account or format, verify that the published result matches the preview.
A quick walkthrough helps if you're building this process into your team's week:
When not to schedule
Not every Instagram upload should be automated.
Keep some posts manual when:
- The content depends on a live trend or breaking moment
- You need native Story features that are easiest to add in-app
- The post includes last-minute location context
- The creative might change based on same-day events
The right setup is usually hybrid. Schedule the planned content. Post reactive content manually. That gives you consistency without losing flexibility. For step-by-step scheduling, see my how to schedule Instagram posts guide.
Troubleshooting Instagram Upload Errors
When an upload fails, don't start by rewriting the caption or reinstalling the app. Diagnose the likely cause first.
Common Instagram upload error messages and what they mean
| Error Message | What It Means | Likely Fix |
|---|---|---|
| "Couldn't post — try again" | Generic failure — network, server, or file issue | Post or Reel won't publish |
| "Action blocked" | Instagram flagged the account for spam-like behavior | Wait 24–48 hours, reduce posting frequency. See why can't I post on Instagram |
| "Upload failed" | Media format or size rejected | Check specs table above; verify MP4/JPG and 1080px width |
| "Couldn't refresh feed" | Cached account state out of sync | Force-close app, switch networks, retry |
| "This video can't be uploaded" | Codec, frame rate, or duration mismatch | Re-export at constant 30 fps, H.264, MP4 |
| "Try again later" | Temporary Instagram API outage | Check Downdetector, wait 30–60 minutes |
| "You can't use this feature right now" | Account restriction or new account limit | Verify account standing in Settings → Help → Support Requests |
| "Photo couldn't be uploaded" | HEIC format, oversized image, or corrupted file | Convert to JPG, re-export under 30 MB |
| No error, just stuck on Processing | Variable frame rate or oversized video | Re-export at constant FPS, under 100 MB |
| "Sorry, something went wrong" | Token/session expired or app cache corrupted | Log out, clear cache (Android) or reinstall (iOS), log back in |
If you're seeing repeated failures specifically on scheduled posts, my Instagram scheduled posts not working guide covers a deeper troubleshooting tree.
Post or Reel won't publish
This usually comes from a connection issue, account glitch, or file problem.
Try this:
- Save the draft if possible.
- Close and reopen Instagram.
- Switch networks if the connection is unstable.
- Re-export the file from the original editor.
- Check whether you're posting from the intended account.
- Try publishing a different asset to isolate whether the issue is account-related or file-specific.
If one file keeps failing while others publish, the asset is usually the problem.
Image looks blurry after posting
The most common cause is aggressive platform processing after an oversized or repeatedly compressed export.
Fix it by:
- Exporting closer to Instagram's expected display size
- Avoiding resaved copies from chat apps or cloud previews
- Turning on highest-quality uploads in the app
- Uploading the final master export only once
Carousel crops inconsistently
This usually happens when the selected files don't share the same dimensions.
Use one aspect ratio across every carousel card. If needed, rebuild the set on a common canvas before export. Don't mix horizontal, portrait, and square assets and expect Instagram to sort it out cleanly.
If the carousel looks wrong in the selector screen, it won't improve after publishing. Stop there and fix the files.
Story text gets covered by stickers or UI
That's a layout problem, not an upload bug. Keep important text and logos away from the top and bottom edges. Test Story slides on an actual phone before posting a full sequence.
Reel won't publish
Reels add a couple of extra failure modes on top of standard upload errors:
- Aspect ratio not 9:16 — re-export as full vertical
- Video over 100 MB — compress or re-export at a lower bitrate
- Variable frame rate — re-encode at constant 30 or 60 fps
- Copyrighted music added outside Instagram — strip the audio and add music inside the Instagram app instead
- Codec other than H.264 — re-export as H.264 MP4
If Reels keep failing while feed posts work, the issue is almost always the file, not the account.
Desktop upload works for one account but not another
This often points to permissions, account connections, or a platform-side inconsistency between web and mobile publishing methods. Confirm the Instagram profile is linked correctly, that the right teammate still has access, and that you're using the intended publishing tool for that account.
Music or audio is unavailable
This can happen because of account type, region, content rights, or the upload method used. Business accounts sometimes see a different music library than personal accounts. If the track matters, test inside the final publishing environment before approving the post.
PostPlanifyAll your social media in one simple dashboard
Schedule posts, track analytics, and reply to comments/DMs without switching tabs.
Engagement
+18%
Views
52.8k
Instagram Upload FAQ
Why won't Instagram let me upload my photo?
The most common reasons are: the file is HEIC (convert to JPG), the image is over 30 MB, the aspect ratio is outside Instagram's accepted range (between 4:5 and 1.91:1 for feed), or your account has a temporary action block from spam-like behavior. Try uploading a known-good JPG to isolate whether it's the file or the account.
What's the max file size for uploading to Instagram?
For images, stay under 30 MB. For feed videos and Reels, the practical recommendation is under 100 MB (Instagram accepts larger but compresses heavily). Stories accept up to 30 MB for images and 60-second video segments that auto-split for longer clips.
Can I upload to Instagram from my computer?
Yes. You can upload feed posts, carousels, and Reels through instagram.com on a desktop browser, or through Meta Business Suite for scheduling and team workflows. Stories cannot be uploaded directly from instagram.com — you need the mobile app or a third-party tool. See posting on Instagram from desktop for the full breakdown.
Why does Instagram blur my photos after uploading?
Instagram compresses every image it receives, and oversized uploads trigger more aggressive compression. To prevent blur: export at 1080 pixels wide, use JPG or PNG (not HEIC), avoid resaving the file through chat apps before uploading, and enable "Upload at highest quality" in Instagram's Data usage settings.
Why won't my Instagram video upload?
Video upload failures usually come from one of: wrong aspect ratio (Reels need 9:16), file over 100 MB, a codec other than H.264, variable frame rate from phone capture, or a duration over 15 minutes for Reels. Re-export as constant-FPS H.264 MP4 at the correct ratio and try again.
How do I upload multiple photos as a carousel?
In the Instagram app, tap Create → Post, then tap the multi-select icon in the top-right of the media picker. Choose up to 20 images or videos (as of 2026). Make sure every slide shares the same aspect ratio — mixed ratios cause uneven crops across slides. Reorder by dragging before publishing. For the full walkthrough, see how to schedule carousel posts on Instagram.
Can I upload HEIC photos to Instagram?
In the mobile app, yes — iOS converts HEIC during upload. From the web (instagram.com), HEIC often fails. Some Android devices also reject it. The safest move is to convert HEIC to JPG before uploading, which also avoids unexpected color shifts during conversion.
Why does Instagram crop my photo when I upload it?
Instagram crops images that fall outside its accepted feed ratios (between 4:5 portrait and 1.91:1 landscape). If your photo is taller or wider than that, Instagram will auto-crop to fit. Export at one of the accepted ratios before uploading so you control the framing, not Instagram's algorithm.
How do I upload a long video to Instagram?
Videos longer than 60 seconds should be uploaded as Reels, which support up to 15 minutes. The video must be 9:16 aspect ratio, MP4 with H.264 codec, and under 100 MB recommended. For longer or higher-quality videos, see my how to post a long video on Instagram guide.
Why does my Reel lose quality after uploading?
Reels lose quality for the same reasons photos do — Instagram re-encodes every video on upload. Mitigate it by: exporting at exactly 1080×1920, using H.264 codec at a high bitrate (8–12 Mbps), keeping the file under 100 MB, enabling "Upload at highest quality" in app settings, and avoiding re-saves through messaging apps before upload.
Can I upload to Instagram from PC or Mac without a phone?
Yes. Instagram's web interface at instagram.com supports feed posts, carousels, and Reels directly from desktop. Meta Business Suite adds scheduling and team management. Third-party tools like PostPlanify add bulk upload, approval workflows, and multi-platform posting. None of these require the mobile app.
How many photos can I upload to Instagram at once?
A single carousel post can contain up to 20 images or videos (as of 2026). You can also schedule up to 25 posts per day through Instagram's native scheduler. For bulk uploads beyond that, third-party tools support CSV imports and batch scheduling.
Why does my Instagram upload say "Posting" forever?
A stuck "Posting" status usually means: a network drop mid-upload, an oversized video that exceeded a silent timeout, or a corrupted file. Force-close Instagram, reopen it, check Settings → Drafts to see if the post saved, and retry. If it fails again, re-export the file at a smaller size.
Can I upload to Instagram and Facebook at the same time?
Yes. In the Instagram app, before tapping Share, toggle "Also share to Facebook" under your linked accounts (requires a connected Facebook Page). Meta Business Suite and most third-party tools also support simultaneous publishing to both platforms from one upload.
How do I fix "Action blocked" when uploading to Instagram?
"Action blocked" means Instagram flagged the account for spam-like behavior — usually too many posts, follows, likes, or comments in a short window. Wait 24–48 hours before trying again, then resume at a slower pace. If the block persists, request a review through Settings → Help → Report a Problem. See why can't I post on Instagram for the full troubleshooting checklist.
Key Takeaways
- Prep the file before you tap Create — 1080px wide, correct aspect ratio, JPG/PNG for photos, 9:16 MP4 for Reels under 100 MB
- Enable "Upload at highest quality" in Instagram Settings → Account → Data usage → Media quality
- Carousels need matching aspect ratios across every slide — mixed ratios cause unpredictable cropping
- HEIC photos often fail on web uploads — convert to JPG before posting
- Reels with copyrighted external music will fail — add music inside the Instagram app instead
- Desktop uploads are better for team workflows — Instagram.com for one-offs, Meta Business Suite for scheduling, third-party tools for multi-platform and approvals
- Stories still can't be scheduled natively in the Instagram app — use Meta Business Suite or a third-party tool
- Carousel slide limit expanded to 20 in 2026 — more storytelling room without sacrificing the aspect-ratio rule
- If uploads keep failing, isolate the cause: try a different file (file issue) or a different account (account issue) before reinstalling anything
Pre-Upload Checklist
Run through this before every important post:
- ✅ Exported at 1080 pixels wide (or 1080×1920 for Reels/Stories)
- ✅ File format is JPG or PNG (images) or MP4 H.264 (video)
- ✅ Image file under 30 MB, video under 100 MB
- ✅ Aspect ratio matches the target format (4:5 to 1.91:1 for feed, 9:16 for Reels/Stories, consistent across carousel slides)
- ✅ "Upload at highest quality" toggle is on in Instagram settings
- ✅ Caption has a hook, body, and one CTA
- ✅ Alt text written in plain language (not keyword-stuffed)
- ✅ Tags, location, and collaborator settings added if relevant
- ✅ Reel cover chosen deliberately (not the auto-picked frame)
- ✅ Posting from the correct account (especially for multi-brand teams)
- ✅ Tested on mobile preview if designed on desktop
Ready to consolidate your Instagram, TikTok, X, LinkedIn, and YouTube uploads into one calendar with approval workflows, analytics, and bulk scheduling? Try PostPlanify free for 7 days.
If uploading to Instagram keeps breaking because too many steps live in different apps, PostPlanify can help centralize the process. It's useful when you need one place for drafts, approvals, scheduling, asset management, and final publishing without relying on manual handoffs between teammates.
Related Reading
- How to See Scheduled Posts on Instagram
- Instagram Scheduled Posts Not Working? 10 Quick Fixes
- How to Schedule Instagram Posts: Full Guide
- How to Schedule Instagram Reels
- How to Schedule Instagram Stories
- How to Schedule Carousel Posts on Instagram & Facebook
- Instagram Image Size Guide
- Best Time to Post on Instagram
- How to Post a Long Video on Instagram
- Why Can't I Post on Instagram? 15 Fixes
- Can You Post on Instagram From Desktop?
- Instagram Reels Algorithm Explained
- Instagram Carousel Guide
- Instagram Post vs Story vs Reel
- Best Instagram Post Scheduler Tools
- Automating Instagram Posts Safely
PostPlanifyAll your social media in one simple dashboard
Schedule posts, track analytics, and reply to comments/DMs without switching tabs.
Engagement
+18%
Views
52.8k
About the Author

Hasan Cagli
Founder of PostPlanify, a content and social media scheduling platform. He focuses on building systems that help businesses, agencies, and teams plan, publish, and manage content and social media more efficiently across platforms.


